Kitchen Compost and Worm Bin Setup
It usually starts the same way: you’re standing at the kitchen counter with a cutting board full of onion skins, coffee grounds, and limp greens, and the trash can is already too full. Outside, your garden bed (or balcony containers) could use a boost, but the “scraps situation” is turning into a smell-and-fruit-fly problem. The design move here isn’t just buying a bin—it’s giving food scraps a planned route through your home, like any other system you’d lay out: storage, processing, and a clean handoff back to plants.
What follows is a layout-first approach to a kitchen compost collector plus a worm bin (vermicompost) setup that fits real homes: rentals, tight kitchens, apartments, and family houses. Think like a landscape designer: we’ll place each element where it naturally wants to live, control moisture and airflow, and connect the output—castings and compost tea—to specific plants you’re growing.
Start with the “scrap path”: a micro-layout that prevents mess
Before you buy anything, map the scrap path in three steps: prep surface → collection → processing. If any step is inconvenient, scraps will drift back into the trash. Good design makes the “right behavior” the easiest behavior.
Principle 1: Keep the kitchen collector within 3 steps of the cutting board
Measure your most-used prep spot and count your steps. Your countertop caddy or under-sink container should live within 3 steps (about 6–8 feet) of that spot. If you have to cross the kitchen, you’ll skip it on busy nights.
- Countertop caddy: Aim for 1–1.5 gallons so it fills in 2–4 days—small volume means fewer odors.
- Under-sink pail: 2–5 gallons if you cook heavily or have a larger household.
Principle 2: Separate “smelly wet” from “dry browns” at the source
Odor is a layout problem as much as a biology problem. Put a small container of carbon-rich bedding near your processing area—shredded cardboard, torn egg cartons, or dry leaves. If your worm bin is nearby, keep a paper grocery bag of shredded brown material next to it, not in a garage you won’t visit.
Real data helps: composting best practices typically emphasize balancing nitrogen-rich “greens” with carbon-rich “browns” to reduce odor and improve decomposition. The U.S. EPA notes the importance of managing moisture and aeration in compost systems (U.S. Environmental Protection Agency, 2023).
Principle 3: Place the worm bin where temperatures stay stable
Worms don’t want drama. The sweet spot for red wigglers (Eisenia fetida) is generally comfortable indoor room temperature; avoid direct sun, heaters, and freezing garages. A good target zone is 55–77°F. The University of California Agriculture and Natural Resources emphasizes temperature and moisture management for worm composting success (UC ANR, 2019).
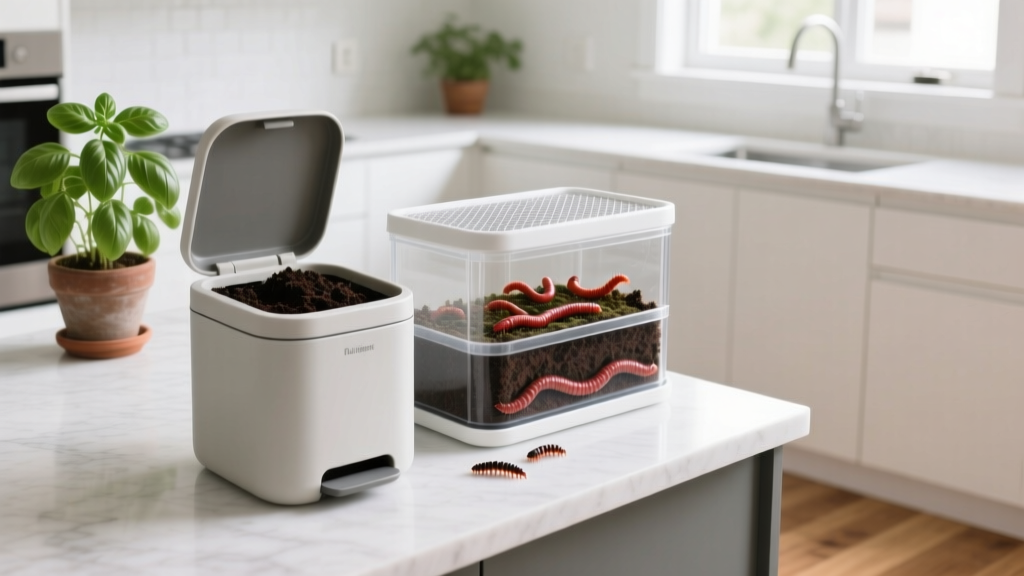
Choosing your system: compost collector + worm bin combo that fits your space
Most homes do best with a two-part system:
(1) A small kitchen collector for daily scraps, and (2) a worm bin as the main processor. Traditional outdoor compost piles are great, but many renters and small-space gardeners need an indoor option that stays tidy.
| Setup option | Best for | Typical footprint | Upfront cost | Odor risk | Output speed |
|---|---|---|---|---|---|
| Countertop caddy + 10–20 gal worm bin | Apartments, rentals, year-round composting | Bin: ~24" x 16" | $60–$180 | Low if managed | Fast (weeks) |
| Countertop caddy + outdoor tumbler | Homes with patios, higher volume | Tumbler: ~30" x 24" | $120–$250 | Low outdoors | Moderate (months) |
| Under-sink bucket + Bokashi bucket + soil bury | No space for worms, fast kitchen fermentation | Bucket: ~12" x 12" | $80–$160 | Very low (sealed) | Fast (2–4 weeks + soil time) |
Designing the worm bin zone: airflow, access, and a clean workflow
The worm bin is not just a container; it’s a workstation. Give it a clear “service area,” like you would a potting bench.
Footprint and clearances
A common, reliable size for beginners is a 14–18 gallon tote (often around 24" L x 16" W x 12" H). Plan for:
- 2 feet of clearance in front so you can lift the lid and work comfortably.
- A washable tray underneath (an old boot tray or cafeteria tray) to catch drips.
- A nearby “browns” stash: a 10–15 gallon paper bag or small lidded bin.
Light and location
Worms prefer dark, but you prefer not to trip over the bin. Place it where you have ambient light and easy access, but not direct sun. A laundry room corner, pantry floor, mudroom, or a shaded kitchen nook works well. If you’re using a balcony, keep the bin shaded and insulated; temperature swings are the biggest challenge outdoors.
“Good compost systems are designed like kitchens: materials should flow in one direction, from collection to processing to storage, with minimal backtracking and easy cleanup.” — A principle echoed in small-site workflow planning used in residential landscape practice
Step-by-step setup: a clean, renter-friendly worm bin build
This setup favors stability and low odor. You can build it in an afternoon.
Materials checklist (with realistic costs)
- Opaque plastic tote, 14–18 gallons: $10–$25
- Second tote or tray for a catch pan: $8–$20
- Coconut coir brick (8–10 qt expanded): $6–$12
- Shredded cardboard/paper (free)
- Red wigglers, 1 lb: $30–$55
- Hand drill + 1/8" bit (or nail/awl): varies
- Optional: spigot bin or harvesting screen: $15–$40
Build and start (numbered steps)
- Drill airflow holes: Add 20–30 holes (1/8") around the upper sides and lid for ventilation. If you’re nervous about pests, fewer holes + good moisture control works fine indoors.
- Create a drip strategy: Either (a) drill 6–10 small holes in the bottom and nest the bin into a catch tray, or (b) keep the bottom intact and manage moisture carefully. Indoors, many people prefer no bottom holes to reduce mess—just avoid overwatering.
- Make bedding: Hydrate coconut coir, then mix with shredded cardboard until it feels like a wrung-out sponge. Aim for 6–8 inches of fluffy bedding depth.
- Add grit: Mix in 1/2 cup of crushed eggshells (rinsed and dried) or a sprinkle of garden soil. Worms use grit to help digest food.
- Introduce worms: Place 1 lb of red wigglers on top; they’ll disappear into the bedding quickly.
- Feed lightly at first: Start with 1–2 cups of chopped scraps buried in one corner. Cover with bedding. Increase feeding only when previous food is mostly gone.
- Label a “feed map”: Rotate feeding spots like a clock (12 o’clock, 3 o’clock, 6 o’clock, 9 o’clock). This keeps odors down and makes harvesting easier.
Food safety note: Many worm keepers avoid meat, dairy, and oily foods to prevent odor and pests. Stick to fruit/veg scraps, coffee grounds (in moderation), tea leaves, and crushed eggshells.
Three layout scenarios that actually happen (and how to design for each)
Scenario 1: The small apartment kitchen (no balcony, limited storage)
Design goal: invisible, odor-free composting that doesn’t steal precious floor space.
Layout strategy: Use a 1-gallon countertop caddy lined with paper or a compostable bag, emptied every 2–3 days into a slim worm bin tucked in a pantry or under a small console. A 24" x 16" tote can slide under many shelving units if you maintain 13–14" of vertical clearance for lid removal.
Pro move: Freeze “wet” scraps (like melon rinds) in a container and feed them as needed. Freezing also breaks down cell walls, helping worms process faster.
Scenario 2: The rental with a balcony herb garden
Design goal: connect kitchen scraps to container soil fertility without attracting balcony pests.
Layout strategy: Keep the worm bin indoors (temperature stability), and create a small “castings station” near your balcony door: a lidded 2-gallon bucket for finished castings and a scoop. Apply castings as a top-dress 1/2 inch thick on containers every 6–8 weeks during the growing season.
Sunlight note: Most culinary herbs want 6+ hours of sun. If your balcony gets only 3–4 hours, favor leafy herbs (mint, chives, parsley) and use worm castings to keep growth steady despite lower light.
Scenario 3: The family home with a garage and a raised bed garden
Design goal: handle higher scrap volume and produce enough compost to matter in beds.
Layout strategy: Place the worm bin in the garage on an insulated shelf (not on cold concrete). Add a second processor outdoors: a simple compost pile or tumbler for bulk yard waste. Worms handle kitchen scraps; outdoor compost handles leaves and stems.
Volume planning: A 1 lb worm population often processes around 1/2 lb of scraps per day under good conditions. If your household produces more, either (a) scale to 2 lbs of worms in a larger bin, or (b) split scraps between worms and an outdoor system.
Planting with worm castings: specific varieties and why they work
Worm castings shine in intensive plantings—containers, raised beds, and high-turnover edible gardens—because they support steady nutrient release and soil structure. You don’t need much; think “seasoning,” not “main ingredient.”
Container herbs and greens (small-space all-stars)
- Basil ‘Genovese’: Loves consistent moisture and fertility. A light top-dress of castings helps prevent the midseason stall common in pots.
- Parsley ‘Giant of Italy’: Slow starter; benefits from improved soil biology and gentle nutrition.
- Chives: Reliable perennial in containers; castings keep clumps productive without heavy synthetic fertilizer.
- Lettuce ‘Buttercrunch’: Fast, forgiving, and responds quickly to a castings-amended potting mix. Space plants 6–8 inches apart in boxes for full heads.
- Kale ‘Lacinato’ (Dinosaur kale): Strong container performer with regular feeding. Give 12 inches spacing in large pots for airflow.
Patio tomatoes and peppers (where castings pay off)
- Tomato ‘Sungold’ (cherry): Heavy producer; in a 15–20 gallon container with full sun (8+ hours), a monthly castings top-dress supports steady fruiting.
- Tomato ‘Celebrity’: More forgiving than many slicers, good disease tolerance for home gardens.
- Pepper ‘California Wonder’: Appreciates consistent nutrition; castings help without pushing overly soft growth.
Raised beds and cut-and-come-again crops
- Swiss chard ‘Bright Lights’: Long season, repeated harvest—ideal for gentle fertility inputs.
- Scallion ‘Evergreen Hardy White’: Great for edging beds; a thin band of castings in the planting line improves establishment.
How to apply: For containers, mix castings at 10–20% by volume when refreshing potting soil, or top-dress 1/4–1/2 inch. For raised beds, spread 1/2 inch over the surface and lightly rake in at the start of the season.
Budget-smart choices and DIY alternatives
You can spend a lot on sleek bins, but you don’t have to. The design goal is function: airflow, access, and cleanliness.
Low-budget build (often under $60)
- Repurpose a tote you already own (free)
- Use shredded cardboard bedding (free)
- Buy 1 lb worms ($30–$55)
- Skip spigots and fancy stacking trays at first
Mid-range upgrade (around $120–$180)
- Stacking worm tower system for easier harvesting
- Charcoal filter countertop caddy to reduce odor
- Dedicated castings bucket and scoop for neat balcony/garden use
DIY polish that makes the system feel intentional
- Create a “compost drawer”: A small bin of browns, gloves, a hand brush, and a note card with what-to-feed.
- Add a washable mat under the worm bin zone.
- Use a lidded tin for crushed eggshells so grit is always ready.
Maintenance: what it really takes week to week
Plan for 10–15 minutes per week once the bin is established. Most issues come from feeding too much, too wet, or not enough bedding.
Weekly rhythm (simple and realistic)
- 2–3 minutes: Add scraps (bury them), cover with browns.
- 5 minutes: Quick moisture check—bedding should feel like a wrung-out sponge. If it’s wet, add shredded cardboard. If it’s dry, mist lightly.
- 5 minutes: Fluff the top layer gently if it’s compacted (don’t “turn” like compost; just aerate).
Seasonal tasks
- Every 3–4 months: Harvest castings. The bin will slow down if castings build up without removal.
- Summer: Watch fruit flies—freeze scraps or bury deeper, and keep a thicker bedding cap (2–3 inches).
- Winter: Protect from drafts and cold floors. If the bin is in a garage, add insulation and keep it off concrete.
Odor is your early warning system. A healthy worm bin smells earthy. Sour smells mean too wet or too much food; add browns, pause feeding for a few days, and improve airflow.
Connecting the system back to your garden layout
The most satisfying compost setup is the one that feeds a specific planting plan. If you’re designing a small edible landscape, treat worm castings like a premium soil amendment reserved for high-value zones:
- Seed-starting and transplants: Mix a small amount into potting mix for stronger starts.
- Container “workhorses”: Tomatoes, basil, peppers—plants that pay you back weekly.
- Cut-and-come-again beds: Lettuce, chard, kale—steady harvest needs steady soil.
And keep the workflow elegant: store finished castings in a lidded bucket near where you’ll actually use them. If your garden is on a balcony, that bucket lives by the door. If your garden is in a backyard, it lives with your hand tools—because carrying castings across the house is how good intentions die.
One last design note: don’t aim for perfection in week one. Aim for a system that’s easy to use when you’re tired. Place the caddy where your hands already are, keep browns within arm’s reach, and let the worm bin become part of the home’s quiet infrastructure—turning daily scraps into the dark, crumbly amendment your basil and tomatoes will recognize immediately.
Sources: U.S. Environmental Protection Agency (EPA), “Composting at Home” (2023); University of California Agriculture and Natural Resources (UC ANR), vermicomposting guidance and resources (2019).