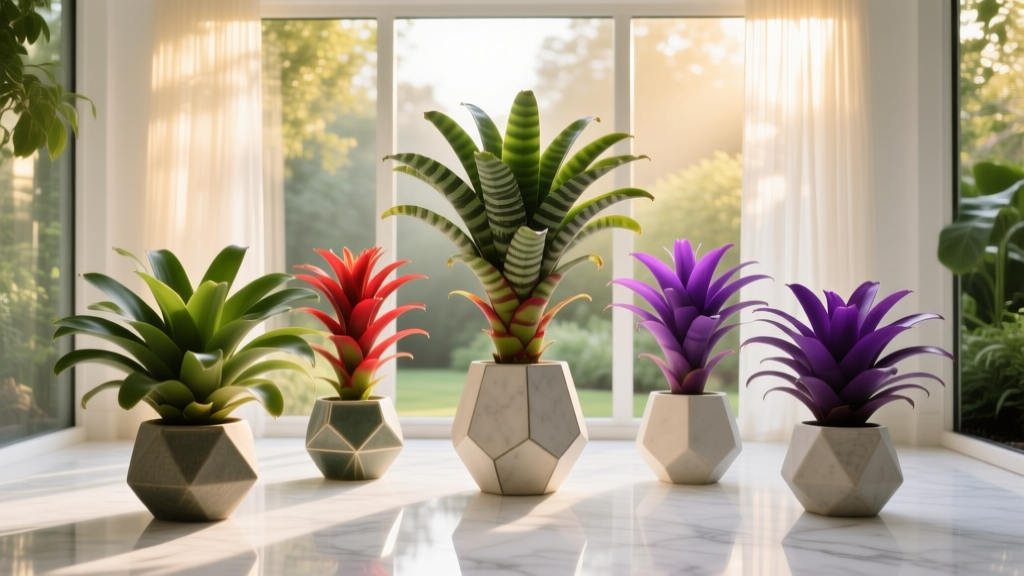
Sunroom Bromeliad Collection Display
The sunroom looks perfect on paper: bright windows, a cozy chair, maybe a reading lamp. In real life, it often turns into a plant purgatory—pots clustered on the floor, saucers staining the tile, leaves reaching awkwardly toward the glass. Bromeliads are especially prone to this “beautiful mess” because you buy one in bloom, then another, then a pup appears, and soon your sunroom has a colorful but chaotic crowd.
Let’s turn that crowd into a collection: a display that looks intentional from the doorway, keeps plants healthy, and makes watering a two-minute habit instead of a Sunday project. I’ll walk you through layout strategies, exact spacing and sizing, and the bromeliad varieties that behave best indoors—plus real-world scenarios for renters, small sunrooms, and homes with pets.
Start With the Room’s Reality: Light, Heat, and Sightlines
Before you buy shelving or more plants, measure two things: light and usable footprint. A sunroom can be “bright” but still uneven, with blazing zones near the glass and dull pockets behind furniture. Most bromeliads do best with bright, indirect light indoors; too much direct sun can scorch leaves, while too little reduces color and slows growth.
Quick measurements that change everything
- Sunlight hours: Track direct sun on the sunroom floor for one day. Many sunrooms offer 3–6 hours of direct sun in winter on south/west windows, and 1–4 hours in summer due to higher sun angle and shades.
- Temperature swing: Check morning vs. afternoon. Bromeliads are comfortable in typical home ranges, but avoid repeated spikes above 85°F right at the glass.
- Footprint: Mark a rectangle you can dedicate without blocking pathways. A practical minimum display zone is 24 in x 60 in (2 ft x 5 ft). A generous collection zone might be 36 in x 84 in.
Design trick: stand in the doorway and identify your “hero view.” That’s where your most colorful bromeliads go. Everything else supports that moment—height changes, repeated pot colors, and negative space so the shapes read clearly.
Design Principles for a Bromeliad Display That Looks Curated
1) Build a three-tier composition (low, mid, high)
Bromeliads look best when you can see their rosettes from slightly above. A three-tier layout gives you that view and prevents the “all plants at the same height” flatline.
- Low tier (0–18 in): A tray garden on a waterproof bench or rolling plant caddy for heavier pots.
- Mid tier (24–42 in): Your main shelf height—ideal for the majority of plants.
- High tier (48–72 in): Hanging mounts, wall grids, or the top shelf for small Tillandsia and mini Neoregelia.
Spacing target: allow 6–10 inches between medium bromeliads (like Guzmania and Vriesea) so air can move and leaves don’t bruise each other. Tight clusters look lush in photos, but they trap moisture and invite scale insects indoors.
2) Repeat materials and limit pot colors
Bromeliads already bring fireworks—pink, red, orange, zebra striping. Let the container palette be calm. Choose one neutral (matte white or charcoal) plus one warm natural (terracotta or rattan). This is the fastest way to make a mixed collection look like a designed set.
3) Create a “water zone” to keep the sunroom clean
Most bromeliads prefer water in their central cup (for many tank bromeliads) and lightly moist media—not soggy. The mess comes from overflow and mineral rings. Design a water zone on purpose:
- A boot tray or waterproof shelf liner, minimum 24 in x 36 in
- Capillary mat or pebble tray for humidity (but keep pots above standing water)
- One watering can dedicated to rainwater or filtered water
According to the Royal Horticultural Society, many bromeliads are best watered by keeping the central “vase” topped up and refreshing it regularly to prevent stagnation (RHS, 2023).
Layout Strategies: Three Proven Sunroom Setups
Option A: The “Gallery Wall + Bench” (best for renters)
Use vertical space without drilling into window frames. Place a narrow bench under the brightest window and add a freestanding grid panel (like a leaning trellis or garment rack) for mounted bromeliads and air plants.
Recommended dimensions: bench 48 in L x 14–16 in D; grid panel 60–72 in H. Keep the bench 6–10 inches away from cold glass in winter to avoid chilled leaves.
Estimated cost: $80–$160 for a sturdy bench, $30–$90 for a panel/garment rack, $12–$25 per plant for common Guzmania/Vriesea.
Option B: The “Corner Conservatory Tower” (best for small footprints)
When floor space is tight, go up. A corner shelf unit with grow lights lets you build a dense collection while keeping pathways clear.
Recommended dimensions: footprint 18 in x 18 in or 24 in x 24 in; height 60–72 inches. Add two LED bars per shelf, aiming for 10–12 hours of supplemental light during darker months.
Estimated cost: $45–$120 shelf, $30–$80 lights, $15 timer. Budget-friendly, but you’ll spend a bit more on lighting.
Option C: The “Island Display” (best for larger sunrooms)
If your sunroom is a true room (not a narrow corridor), create an island plant table that you can walk around. It turns your collection into living decor and prevents the common issue of plants pressed against glass.
Recommended dimensions: table 30 in x 60 in (coffee table size) or 36 in x 72 in (worktable size). Maintain a clear circulation path of at least 30 inches around one side—36 inches feels luxurious.
Estimated cost: $120–$350 for a water-tolerant table or potting bench; $20 for a waterproof liner; $15–$40 for a gravel tray setup.
Plant Selection: Bromeliads That Behave Beautifully Indoors
For a display that stays attractive after the initial bloom, prioritize foliage and form. Bromeliads bloom once per rosette, but many look great for years and produce pups that keep the display going.
Reliable “tank bromeliads” for sunrooms
These hold water in their central cups and read as sculptural rosettes from across the room.
- Guzmania lingulata (scarlet star): Tall, clean lines; bracts can hold color for months. Best in bright, indirect light; keep the cup refreshed.
- Vriesea splendens (flaming sword): Dramatic flower spike and banded leaves; great as a focal point on the mid tier.
- Aechmea fasciata (silver vase): Tough, silvery foliage; handles slightly drier air better than many. Give it space—often 18–24 inches wide.
Color and pattern workhorses (for the “collection” look)
- Neoregelia ‘Fireball’: Compact and reddens in brighter light; ideal for the high tier or front edge of a shelf.
- Neoregelia ‘Zoe’ or other patterned hybrids: Speckling and striping give you year-round interest even when nothing is blooming.
- Cryptanthus bivittatus (earth star): Not a true bromeliad tank type, but a bromeliad relative often grouped with them; great for lower tier trays and terrarium-like vignettes.
Mounted accents for vertical displays
- Tillandsia ionantha: Compact, blushes colorfully, easy on mounts.
- Tillandsia xerographica: Architectural rosette; use one as a sculptural anchor (and budget for it).
Light note: the University of Florida IFAS Extension emphasizes that many bromeliads develop better color in brighter conditions, while too little light can leave foliage greener and less vivid (UF/IFAS Extension, 2018). In a sunroom, that means: put the most color-hungry varieties closer to the brightest window or under supplemental LEDs, and keep shade-tolerant types (some Guzmania) slightly back.
Comparison Table: Match Plants to Your Sunroom’s Conditions
| Plant | Best Light Indoors | Typical Mature Width | Watering Style | Best Role in Display | Typical Cost (US) |
|---|---|---|---|---|---|
| Guzmania lingulata | Bright, indirect; brief morning sun ok | 12–18 in | Keep cup lightly filled; refresh weekly | Mid-tier color focal | $12–$25 |
| Vriesea splendens | Bright, indirect; avoid hot midday sun | 12–18 in | Cup watering + lightly moist media | Vertical accent / focal spike | $18–$35 |
| Aechmea fasciata | Bright light; tolerates some direct sun | 18–24 in | Allow media to dry slightly between waterings | Anchor plant (one per grouping) | $20–$45 |
| Neoregelia ‘Fireball’ | Bright light; more light = more red | 8–12 in | Cup watering; don’t keep media soggy | Front-edge repetition | $10–$20 |
| Tillandsia ionantha | Bright, filtered light | 2–4 in | Soak/spray; fast dry-out needed | Mounted “sparkle” accents | $4–$12 |
Step-by-Step: Build the Display Like a Designer
This setup assumes a 60-inch wide window wall and a 24-inch deep usable strip—adjust as needed.
- Map the light. Mark the brightest zone within 18 inches of the glass and the medium-light zone 18–48 inches back.
- Choose a base. Place a bench or shelf unit. For a bench, aim for 14–16 inches depth so it doesn’t eat the room.
- Add waterproofing. Line shelves with a waterproof mat; add a tray at least 24 in x 36 in under the densest cluster.
- Set the anchors first. Place 1–2 larger plants (like Aechmea fasciata) at the ends or back corners to frame the collection.
- Create repetition. Use 3–5 similar-sized plants (like Neoregelia ‘Fireball’) along the front edge, spaced 6–8 inches apart.
- Layer heights. Add risers of 4–8 inches under a few pots so rosettes stagger instead of overlapping.
- Finish with mounted accents. Add 5–9 Tillandsia on the vertical panel for “airiness.” Keep them where they’ll dry within 4 hours after misting.
- Set a maintenance station. Store a small towel, pruning snips, and a squeeze bottle nearby—maintenance succeeds when tools are within 3 feet.
“Layering plants in vertical space increases visual complexity without increasing floor clutter, but only works long-term if you design access for watering and inspection.” — This principle is echoed in interior plantscaping research emphasizing maintenance access as a key factor in sustained plant health (see studies on indoor plant management and access planning, e.g., review literature summarized by horticultural extension programs).
Three Real-World Scenarios (and the Layout That Solves Them)
Scenario 1: The renter with bright windows but no drilling allowed
You have a great window and a strict lease. The move: a freestanding garment rack or ladder shelf becomes your vertical display. Use S-hooks to hang wire baskets with Tillandsia, and keep potted bromeliads on a bench below.
DIY alternative: A $25 clothing rack + $10 pack of S-hooks can replace a custom plant wall. Use removable silicone shelf liner to protect surfaces. Keep total depth under 16 inches so it feels like decor, not storage.
Scenario 2: The small sunroom that doubles as a breakfast nook
If chairs slide back into your plant zone, your collection will always look battered. Give plants a defined boundary: a corner tower shelf (18 in x 18 in) plus one narrow tray on the windowsill. Choose compact varieties (Neoregelia, Cryptanthus, small Guzmania) and skip the widest Aechmea unless you have a dedicated corner.
Budget note: This is where lights earn their keep. A $45 LED setup can stabilize winter color and prevent that slow fade into green.
Scenario 3: The homeowner with a big collection and a “plant person” reputation
You don’t need fewer plants—you need a museum layout. Use an island table (36 in x 72 in) so plants are viewable from multiple angles. Group by genus or color story: one end warm (Guzmania, Vriesea), the other end patterned foliage (Neoregelia, Cryptanthus), and one sculptural centerpiece (Tillandsia xerographica or a large Aechmea).
Collection management trick: Dedicate a “quarantine spot” on a separate small stand (12 in x 12 in) for new arrivals for 2 weeks. This protects the whole display from scale and mealybugs.
Budget and DIY: What to Spend Money On (and What Not To)
If you’re choosing where to invest, prioritize stable shelving and water protection first. Plants can be swapped and traded; water damage and tipping hazards are expensive.
- Worth spending: a sturdy shelf/bench ($80–$200), waterproof trays ($10–$25 each), a good timer for lights ($10–$20).
- DIY wins: upside-down ceramic bowls as risers (free), thrifted baking sheets as drip trays ($3–$8), fishing line for Tillandsia mounts ($4–$10).
- Where to be cautious: cheap, wobbly tiered stands. If it sways when you tap it, it will eventually dump a plant.
Expect to pay $12–$35 per common bromeliad in 4–6 inch pots, and $40–$120 for showier specimens like large Tillandsia xerographica depending on size. If you’re building a display of 12 plants, a realistic starter budget lands around $250–$600 including shelving, trays, and a few statement plants.
Care Built Into the Design: Maintenance Without the Fuss
A display only stays beautiful if it’s easy to maintain. Bromeliads are forgiving, but indoor conditions (dust, lower airflow, hard water) create predictable issues. Design for quick access and you’ll actually do the small tasks that prevent big problems.
Weekly rhythm (about 15–25 minutes per week)
- Refresh cups: Pour out and replace water in tank bromeliads once a week. Use rainwater or filtered water if possible to reduce mineral buildup.
- Inspect leaf bases: Look for scale/mealybugs in the sheltered leaf axils—this is where problems start.
- Rotate plants: A quarter-turn every 1–2 weeks keeps growth symmetrical if light is directional.
Seasonal tasks (10–30 minutes monthly, plus a seasonal reset)
- Winter: Move plants 6–12 inches back from cold glass at night if temperatures drop. Add supplemental light to reach 10–12 hours total light for color.
- Spring: Separate pups when they reach about 1/3 to 1/2 the size of the mother plant, if you want a tidier display.
- Summer: Watch for scorching in intense afternoon sun; a sheer curtain can cut edge-burn without dimming the whole room.
- Any season: Wipe leaves monthly with a damp cloth to remove dust so plants can photosynthesize efficiently.
One more practical note backed by research: many bromeliads absorb moisture and nutrients through leaf surfaces as well as roots, so maintaining clean leaves and appropriate humidity supports better performance indoors (UF/IFAS Extension, 2018).
Details That Make It Feel Like a Designed Collection
Use negative space like it’s a plant. Leave at least 20% of each shelf surface visible. That empty area is what makes the rosettes look sculptural instead of crowded.
Then add one unifying element: a stone bowl filled with pebbles, a slim piece of driftwood for mounted Tillandsia, or a consistent pot finish. Keep the accents to two or three items total so the plants remain the headline.
If you want a designer’s shortcut, do this: pick one bromeliad genus as your “signature” (say, Neoregelia for color) and repeat it in 3–7 plants across the display. The repetition reads as intentional collecting, not random shopping.
When your sunroom bromeliads are arranged in tiers, protected from water mess, and matched to the room’s actual light, they stop feeling like clutter and start acting like living art. The best part is how the display evolves: pups appear, colors deepen in brighter spots, and you can swap out a flowering plant without ever losing the overall structure. That’s the difference between owning bromeliads and curating them.