Dorm Room Gardening Without Natural Light
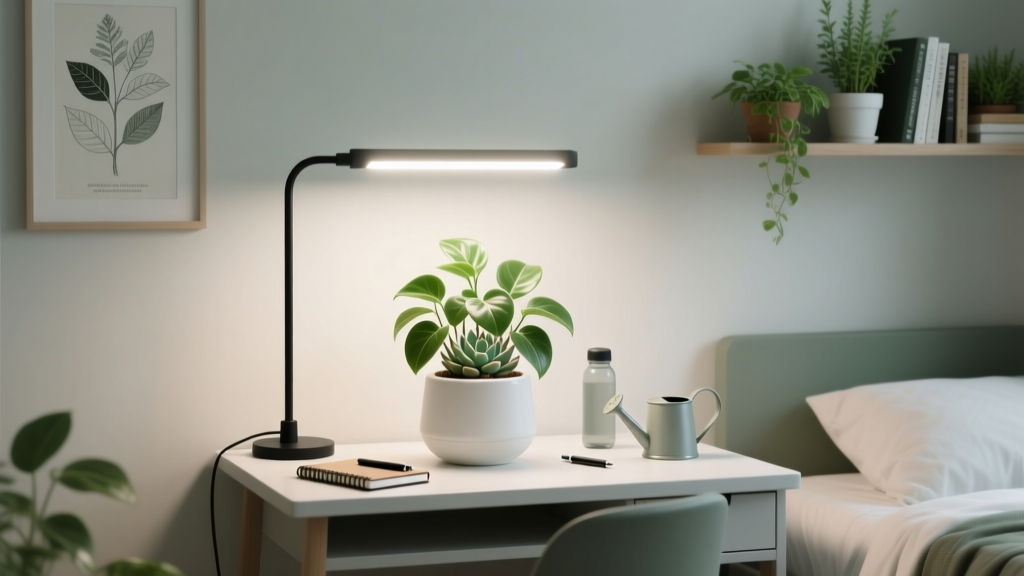
It’s 11:47 p.m., your desk lamp is the only “sun” in the room, and the nearest window looks out on a brick wall. You want something alive in here—something that softens the hard angles of a dorm room and makes the air feel less recycled. You’ve tried a pothos before. It survived, technically, but it didn’t thrive. The truth is, in a dorm with weak or zero daylight, you’re not “bad with plants”—you’re designing a micro-environment. And once you treat it like a design project (light plan, layout plan, plant palette, maintenance plan), indoor gardening becomes dependable and surprisingly beautiful.
Below, I’ll walk you through how I’d lay out a dorm room garden with no natural light: how to pick a footprint that won’t fight your lifestyle, how to create convincing “sun zones” using LEDs, and what plants actually perform in this setup—plus a few real-life scenarios you can copy.
Start Like a Designer: Define Your “Garden Footprint”
In a dorm, your garden needs a boundary. Otherwise, it becomes clutter—cords, trays, water bottles, and limp stems crammed wherever there’s a spare inch. Pick one primary footprint and one optional “satellite” spot.
Three footprints that work in tight rooms
1) Desktop garden strip (the “always in view” layout)
Target size: 24 in x 6 in along the back edge of a desk. This keeps plants close to a power source and puts them under a dedicated light bar. You’ll use smaller pots (2–4 inch) and one or two statement plants.
2) Vertical shelf bay (the “plant wall” layout)
Target size: a 12 in deep x 24–30 in wide shelf unit. This is my favorite for dorms because you can stack lighted layers and keep watering contained on trays.
3) Closet micro-greenhouse (the “hidden garden” layout)
Target size: a 18 in x 24 in section of closet floor or a low shelf. This is ideal if roommates don’t want bright grow lights at night. You’ll rely on reflective surfaces and timed lighting.
Design rule: choose one main footprint that you can water without moving furniture, and that sits within 6 ft of an outlet to avoid extension cords crossing walkways.
Lighting Without Windows: Build “Sun Zones” on Purpose
Without natural light, your grow light is your sun. Treat it like a ceiling fixture you’re specifying for a renovation: intensity, spread, and schedule matter more than brand names.
Light hours: set the rhythm before you buy plants
Most foliage houseplants hold steady at 10–12 hours/day of artificial light. Herbs and fruiting plants often need more intensity and may prefer 14–16 hours/day to stay compact and productive. Put your lights on a timer so your plants don’t depend on your memory during exam week.
Research supports that plants can be grown under electric light when intensity and duration are appropriate. Purdue University Extension notes that “most plants require 12 to 16 hours of supplemental light per day” for indoor growth (Purdue Extension, 2020).
Placement: distance is your dimmer switch
For a typical LED grow bar, plan for these starting distances (adjust after two weeks):
- Low-light foliage (snake plant, ZZ, pothos): 12–18 inches from the light
- Medium-light foliage (philodendron, peperomia): 8–12 inches
- Herbs/leafy greens (basil, lettuce): 6–10 inches
Keep the fixture centered over the plant canopy. If the light is off to one side, plants will lean, and you’ll spend your semester rotating pots like a slow-motion chore.
Color temperature and spectrum: keep it livable
If you’re studying under the same lights, choose a white “full-spectrum” LED rather than purple blurple fixtures. Look for 4000K–5000K if the product lists Kelvin; it reads like bright daylight without turning your room into a nightclub.
“Artificial lighting can successfully support indoor plants, but uniform coverage and consistent photoperiod are what keep growth balanced—more than any single ‘magic’ bulb.” — adapted from indoor lighting guidance used in extension horticulture programming (University of Maryland Extension, 2021)
Also worth noting: NASA’s indoor air study popularized certain houseplants, but later reviews caution that real-world air-cleaning effects are limited without high air exchange. A review in the Journal of Exposure Science & Environmental Epidemiology found that while plants can remove VOCs in chambers, the effect in buildings is much smaller without engineered airflow (Cummings & Waring, 2019). Translation: choose plants because you like them—air freshness will mostly come from cleanliness and ventilation.
Layout Strategies: Make Light, Water, and Mess Behave
Strategy 1: The “tiered canopy” on shelves
Think of a shelf as a garden bed with layers. Put the tallest plants on the top tier only if you can keep them within the right distance of a light. Otherwise, use the top shelf for supplies and keep plants where lighting is strongest and most even.
Spacing rule of thumb: leave 3–4 inches between pot edges so air can move and leaves don’t press against each other. Crowding increases fungus gnats and mildew risk, especially in dorm humidity swings.
Strategy 2: Containment trays under everything
Even if you never spill, you’ll eventually overwater once. Use a waterproof tray under each cluster. A simple 10 in x 20 in seed-starting tray works beautifully on a shelf, and you can slide it out like a drawer for watering.
Strategy 3: Reflective surfaces in “no-window” corners
When you’re fighting for photons, reflections help. Line the back of a shelf bay with white foam board or a reflective mylar sheet. It’s not about making the light brighter—it’s about reducing wasted sideways light.
Strategy 4: Separate “clean plants” from “messy plants”
Keep soil-based pots together. If you add hydroponics or self-watering systems, cluster them in their own zone. This prevents drips near textbooks and keeps maintenance faster. In design terms: separate hardscape and softscape functions.
A Quick Comparison: Lighting and Growing Systems
| Option | Best for | Typical footprint | Upfront cost (USD) | Ongoing cost | Notes |
|---|---|---|---|---|---|
| LED grow light bar (full-spectrum, 2 ft) | Shelves, desktops, multiple small pots | 24 in coverage width | $25–$60 | Low electricity; set on timer | Most dorm-friendly; bright but controllable |
| Clip-on grow light (2–3 heads) | One to three feature plants | Small, flexible | $20–$45 | Low electricity | Easy, but coverage can be uneven |
| Countertop hydroponic kit | Herbs/lettuce with fast results | ~12 in x 6–10 in | $60–$180 | Nutrients every 2–4 weeks | Great yield; more plastic and parts to clean |
| DIY “lighted shelf” (wire rack + lights) | Multiple plants, propagation, seedlings | 24 in x 12 in shelf tiers | $80–$200 | Low electricity | Best performance per dollar if you like DIY |
Plant Palette: What Actually Works Without Natural Light
“No natural light” doesn’t mean “no light.” It means your plants must be happy under consistent LED conditions, tolerate indoor dryness, and forgive occasional missed watering. Here are reliable performers, with specific varieties I’ve seen handle dorm life well.
Reliable foliage plants (the backbone plants)
ZZ Plant (Zamioculcas zamiifolia ‘Zenzi’)
Why it works: compact, slow-growing, and tolerant of lower light intensity. ‘Zenzi’ stays shorter than standard ZZ—ideal for shelves. Pot size: 6 inches. Water roughly every 2–3 weeks.
Snake Plant (Dracaena trifasciata ‘Laurentii’ or ‘Moonshine’)
Why it works: handles inconsistent watering and medium-to-low light. ‘Moonshine’ gives a modern silvery tone that looks intentional in small spaces. Spacing: give it a 6–8 inch radius so leaves don’t scrape walls.
Pothos (Epipremnum aureum ‘Neon’ or ‘Marble Queen’)
Why it works: tolerant and easy to shape. Under good LEDs, ‘Neon’ stays bright chartreuse; ‘Marble Queen’ needs a bit more intensity to keep variegation. Train it along a shelf edge with removable hooks. Trim vines back to keep it dense.
Heartleaf Philodendron (Philodendron hederaceum ‘Brasil’)
Why it works: more structured than pothos, with a lush trailing habit. ‘Brasil’ holds color well under white LEDs when kept 8–12 inches from the light.
Small “detail plants” for texture (great in 3–4 inch pots)
Peperomia obtusifolia ‘Variegata’
Why it works: thick leaves, compact footprint, and tidy growth. It reads like a mini shrub on a desk. Water when the top 1 inch dries.
Fittonia albivenis (Nerve Plant)
Why it works: vivid veining and low stature. Best in a humidity-helped zone (see the “closet greenhouse” scenario). Keep it evenly moist, not soggy.
Spider Plant (Chlorophytum comosum ‘Bonnie’)
Why it works: tolerant, fast, and playful. ‘Bonnie’ is curly and compact—excellent on a shelf where it can spill without taking over your desk.
Edibles in zero-window dorms (choose your battles)
If you want to harvest, choose plants that don’t demand intense sun-like light. Leafy greens and herbs are more realistic than tomatoes.
Basil (Ocimum basilicum ‘Genovese Compact’)
Why it works: compact basil that stays manageable indoors. Needs stronger light than foliage plants—keep it 6–8 inches from an LED bar and give 14–16 hours/day. Pinch tips weekly to prevent legginess.
Mint (Mentha spicata ‘Spearmint’)
Why it works: vigorous and forgiving. It’s also invasive outdoors, so a pot is actually the perfect containment strategy. Keep in its own pot (mint doesn’t share well). Note: strong scent—decide if your roommate will love it.
Leaf lettuce (Lactuca sativa ‘Black Seeded Simpson’)
Why it works: fast, cut-and-come-again harvest. Sow in a tray; harvest outer leaves at 3–4 inches tall. Needs steady moisture and close lighting.
Three Real-World Dorm Scenarios (and How I’d Design Each)
Scenario 1: The “Desk-Only” Student (No shelves, no floor space)
Constraints: One desk, one outlet, limited tolerance for clutter. You need plants that look good from your chair and won’t shed soil onto your keyboard.
Layout: Create a 24 in x 6 in plant strip behind your monitor. Mount a 2 ft LED light bar under the upper shelf (or use a monitor light stand if allowed). Use a single tray to unify the look.
Planting plan: One 6-inch snake plant centered, flanked by two 4-inch peperomias. Add a pothos in a 4-inch pot to trail toward the side away from your dominant hand.
Budget: Light bar $35, timer $8, tray $6, plants $30–$45. Total: roughly $79–$94.
Maintenance: 10–15 minutes/week. Water every 10–21 days depending on heat. Wipe leaves once a month to keep them glossy and efficient under LEDs.
Scenario 2: The “Plant Wall” Renter (A shelf becomes a living display)
Constraints: You can add a freestanding shelf but can’t drill holes. You want a lush look, but you also want to leave on weekends without panic.
Layout: A 24 in wide x 12 in deep shelving unit with 3 tiers. Install one 2-ft LED bar per tier. Put waterproof trays on each shelf.
Planting plan:
- Top tier (closest to eye level): ZZ ‘Zenzi’ + Peperomia + Spider plant ‘Bonnie’ for texture
- Middle tier (feature tier): Philodendron ‘Brasil’ as the hero + pothos ‘Neon’ trailing
- Bottom tier (easy care): snake plant + propagation jars (pothos cuttings root easily in water)
Design trick: Use two matching cachepots (decorative outer pots) to make the arrangement look intentional. Hide nursery pots inside for easy watering.
Budget: Shelf unit $45–$120, three light bars $90–$150, trays $18, plants $60–$120. Total: roughly $213–$408 depending on what you already own.
Maintenance: 20–30 minutes/week. Quick check every 3–4 days: feel soil moisture, empty any standing water in trays, and rotate plants a quarter-turn weekly for symmetry.
Scenario 3: The “Roommate-Friendly” Hidden Garden (Bright lights not welcome)
Constraints: Your roommate sleeps early. Bright LEDs in the open room are a no-go. You still want a small garden for stress relief and routine.
Layout: A closet corner garden: 18 in x 24 in footprint with a small wire shelf. Add a reflective white back panel. Put lights on a timer that runs while you’re in class (for example, 8 a.m. to 8 p.m. for 12 hours).
Planting plan: Fittonia (for color), pothos (for reliability), and a compact fern if you can keep humidity up. Add a shallow pebble tray with water beneath (not touching pot bottoms) to raise local humidity.
Budget DIY alternative: Instead of a grow tent, hang a light-blocking curtain inside the closet opening. Use a $10 tension rod—no drilling.
Maintenance: 15–25 minutes/week. Closet gardens can run warmer; check soil more often. Watch for fungus gnats—use yellow sticky traps ($6–$10) if they show up.
Step-by-Step Setup (A Practical Build You Can Finish in an Afternoon)
- Pick your footprint (desk strip, shelf bay, or closet). Measure it: aim for at least 24 in of width so plants aren’t cramped.
- Choose your lighting style (light bar for even coverage, clip-on for a single cluster). Buy a timer and set it to 12 hours/day to start.
- Install containment: trays under every pot group. If your desk is particleboard, this step is non-negotiable.
- Build a plant palette: start with 3–5 plants total. Use 1–2 “backbone” plants (snake/ZZ) and 2–3 smaller texture plants (peperomia/fittonia/spider plant).
- Pot for dorm reality: use nursery pots inside decorative cachepots, or add saucers. Choose pot sizes that match roots—most dorm plants are happiest in 4–6 inch pots.
- Set light distance: begin at 12 inches for foliage plants. For herbs, move closer to 6–8 inches.
- Water once, then wait: water thoroughly until it drains, then don’t “top off” daily. Check moisture with a finger test after 5–7 days.
- Label and log for two weeks: a sticky note with “watered on” dates prevents accidental overwatering—still the #1 dorm plant killer.
Budget Considerations and Smart DIY Swaps
If you’re trying to stay under $100, prioritize lighting and one excellent plant over a pile of cheap, struggling plants.
Spend here:
- Timer (often $7–$12): it’s the difference between consistent growth and stressed plants.
- One reliable LED bar (around $25–$60): even light distribution reduces legginess.
Save here (DIY alternatives):
- Use white poster board as a reflector instead of mylar.
- Convert food containers into drip trays (clean thoroughly).
- Propagate pothos or philodendron cuttings in water instead of buying multiple plants. A single healthy mother plant can produce 5–10 cuttings over time.
A note on electricity: LED grow lights are relatively efficient, but dorm power costs vary. A small setup with one or two LED bars is typically modest compared to space heaters or gaming PCs. If your dorm has rules about wattage or appliances, check them.
Maintenance Expectations: What You’ll Actually Do Week to Week
Plan on 15–30 minutes per week for a small dorm garden once it’s established. The key is short, consistent check-ins—not big rescue missions.
Weekly routine (10–30 minutes)
- Moisture check: test 2–3 pots with your finger; water only what’s dry.
- Leaf check: look for yellowing, pests, or dust buildup.
- Rotate: quarter-turn plants if you notice leaning.
- Trim: pinch basil, snip pothos tips to keep it full.
Monthly routine (20–40 minutes)
- Wipe leaves with a damp cloth so LEDs aren’t wasted on dust.
- Check roots: if a plant dries out extremely fast or stops growing, it may need a pot size up (usually from 4 inches to 6 inches).
- Clean trays to prevent algae or mineral buildup.
Seasonal tasks (yes, even indoors)
In winter, dorm heat can drop humidity and speed soil drying. In summer, rooms can run warmer and encourage gnats if soil stays wet. Adjust watering intervals rather than changing everything at once. If plants stretch (long gaps between leaves), move the light closer by 2–4 inches or add an extra hour of light per day.
When done well, a no-window dorm garden doesn’t feel like a science experiment—it feels like a small, intentional landscape: a lit shelf that glows softly while you study, a trailing vine that frames a bookcase, a compact basil pot that makes ramen smell like food you chose on purpose. Start with a defined footprint, give your plants a steady artificial “sun,” and let the layout do the heavy lifting. The room will still be a dorm—but it won’t feel so temporary.