Greenhouse Climate Zone Divider
The first time you notice it, it’s usually on a bright winter morning: the basil is sulking near the door, the seed trays are stretching toward the roof, and the citrus you babied all fall has a cold-stressed look—despite the heater running. You walk three steps and it’s a different world: one bench is toasty, another feels like a drafty porch. That’s not bad luck. It’s a design problem—and the fix is one of my favorite greenhouse upgrades: a climate zone divider that lets one greenhouse behave like two (or three) tailored growing environments.
A divider doesn’t have to be fancy. It can be a clear curtain, a polycarbonate wall, or even a row of shelving acting as a windbreak. What matters is intention: controlling airflow, heat loss, humidity pockets, and light angles so your plants stop competing for “average” conditions and start thriving in their own microclimates.
Start with the invisible: heat, airflow, and where your greenhouse leaks
Before you draw a line down the floor, think like warm air. In most hobby greenhouses, heat escapes fastest through the door, vents, glazing gaps, and any north-facing panel that stays cold. Warm air rises, then slides along the roof until it finds the easiest exit. Your divider’s job is to interrupt that path and reduce the volume you’re actively heating.
Design principle 1: Zone by function, not by plant wish list
A useful divider separates what needs different management: heat-loving crops vs. cool-season greens, seedlings vs. mature plants, high humidity vs. dry air. If you zone by “plants I like,” you’ll constantly rearrange. Zone by how you water, vent, and heat.
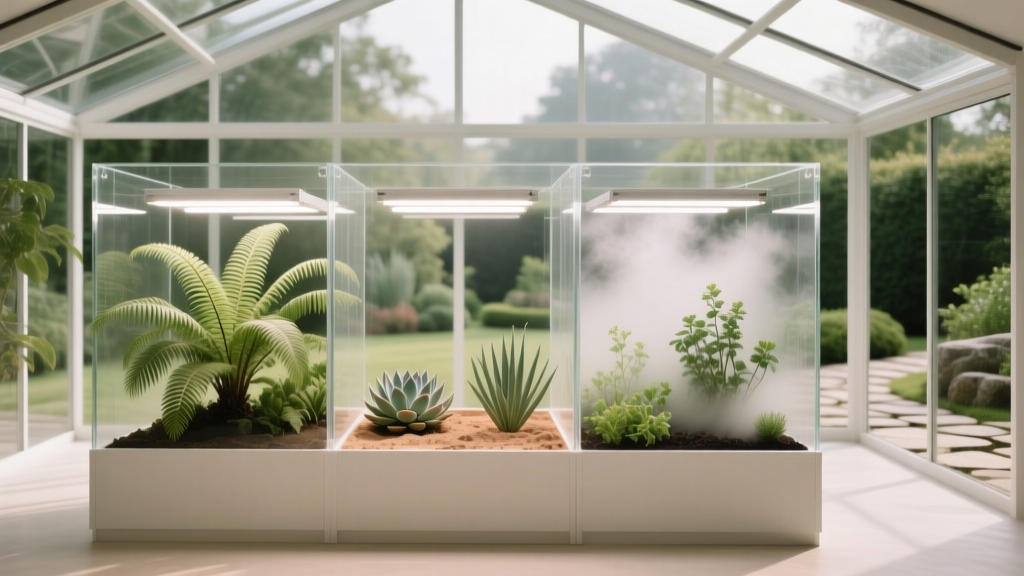
- Warm zone: propagation, tropicals, fruiting crops (tomatoes, peppers), overwintering tender plants.
- Cool zone: greens, brassicas, hardening-off seedlings, bulbs, tool/soil storage that benefits from staying dry.
- Buffer zone: entry/door area that catches cold drafts and reduces shock.
Design principle 2: Keep the divider short enough to live with
The best divider is the one you use every day without fuss. Aim for a door or overlap you can open one-handed while carrying a watering can. If it’s annoying, you’ll leave it open—defeating the point.
Design principle 3: Treat it like insulation first, partition second
The most dramatic performance gains come from reducing air exchange and radiant heat loss. The U.S. Department of Energy notes that weatherstripping and air sealing are among the most cost-effective ways to reduce heat loss (U.S. Department of Energy, 2023). In a greenhouse, that logic applies doubly because you’re typically heating a mostly-glazed structure.
Layout strategies that work in real greenhouses
Below are three layouts I use most often. Each assumes a typical hobby greenhouse footprint—something like 8 ft × 12 ft or 10 ft × 14 ft—but they scale up or down easily.
Strategy A: Crosswise “warm end” zone (best for drafty doors)
Place the divider 3–4 ft inside the door, creating an entry buffer. Then dedicate the back two-thirds as the warm zone. This layout works especially well if your heater is in the back and your door is leaky.
- Divider position: 36–48 inches from the door
- Best for: renters (curtain-style), windy sites, frequent door openings
- Bonus: the buffer zone becomes a tidy spot for potting soil and tools that prefer dry storage
Strategy B: Lengthwise split (best for mixed-light conditions)
If one side gets stronger sun (often the south-facing bench), split the greenhouse lengthwise so high-light plants live in the bright lane and shade-tolerant crops take the other. Use a clear divider to avoid blocking light.
- Divider position: centered along the ridge line, running the length
- Best for: greenhouses with one wall shaded by a fence/hedge
- Tip: keep the warmest zone on the sunniest side to maximize free solar gain
Strategy C: “Propagation pod” inside the greenhouse (best for seed starting)
Instead of dividing the entire structure, create a smaller inner room—a pod—using a mini frame and clear film. You heat the pod, not the whole greenhouse.
- Pod footprint: as small as 2 ft × 6 ft on a bench
- Target temp: 70–75°F for germination of warm-season crops
- Energy win: a small heat mat and low-watt heater can outperform a large heater fighting the whole volume
“The most expensive heat is the heat you pay for and then ventilate away.” — A.J. Both, greenhouse engineering researcher, summarizing the energy logic of controlled ventilation and heat retention (Rutgers/NJAES extension publications, 2010).
Divider material choices (and what they actually do)
Pick your divider based on insulation value, durability, and how permanent you want it to be. Here’s the quick comparison I use when advising homeowners and renters.
| Divider type | Typical cost (USD) | Best use | Light transmission | DIY difficulty |
|---|---|---|---|---|
| Clear greenhouse curtain (6 mil poly or vinyl) | $25–$90 for ~10 ft × 12 ft | Renters, seasonal zoning, draft control | High (clear film) | Easy |
| Twinwall polycarbonate panel wall (6–10 mm) | $150–$400 for a framed partition | Permanent split zones, better insulation | High (diffused) | Moderate |
| Rigid foam + reflective face (opaque) | $40–$120 | Creating a warm “dark side” for storage or dormant plants | Low (blocks light) | Easy–Moderate |
| Shelving wall + hanging film | $60–$220 | Space-saving divider that also stores plants | Medium–High | Easy |
My default recommendation for most home setups: a clear curtain divider with a weighted bottom edge, plus simple weatherstripping around the door. It’s affordable, reversible, and gives you immediate control over drafts.
Step-by-step: build a simple, effective climate zone divider
This setup works in an 8 ft × 12 ft greenhouse and scales easily. The goal is to create a warm zone you can keep stable with less energy and fewer cold shocks.
- Measure and choose the zone line. Mark a divider line 42 inches from the inside of the door for a buffer zone, or choose a lengthwise split if your light is uneven.
- Install an overhead support. Screw a treated wood batten (1×2 or 1×3) or an aluminum track across the greenhouse framing at the ceiling line. Budget $12–$25 for lumber and fasteners.
- Hang the curtain. Use clear greenhouse film or clear vinyl. Cut it so it kisses the floor, then add a 1-inch overlap at the sides to reduce air leakage.
- Weight the bottom edge. Slide a thin dowel, chain, or PVC pipe into a folded hem. A weighted edge prevents the “sail effect” when vents open.
- Create a pass-through. Cut a vertical slit and overlap two curtain panels by 6–8 inches to form a simple walk-through without a zipper.
- Seal the easy leaks. Add adhesive foam weatherstripping around the greenhouse door frame (usually $10–$18). This single step often improves temperature stability more than people expect.
- Place a thermometer/hygrometer in each zone. Put sensors at plant height, not near the roof. Even basic units at $12–$20 each help you “see” the divider working.
Sunlight target: plan warm-zone crop placement for 6–8 hours of winter sun if possible (more in summer). A clear divider preserves light, while opaque dividers must be positioned to avoid shading your productive bench.
Plant selection: varieties that shine in split-zone greenhouses
A divider is only worth building if you use it to grow smarter. Here are plants that reliably benefit from zoning, with specific varieties that behave well in protected culture.
Warm zone stars (steady warmth, higher humidity)
Tomato: ‘Sungold’ (cherry) and ‘Gardener’s Delight’ handle greenhouse life with vigor and reward you quickly. Space indeterminate tomatoes 18–24 inches apart in containers or beds, train to a single leader, and keep airflow moving to avoid fungal issues.
Sweet pepper: ‘Jimmy Nardello’ (frying type) and ‘California Wonder’ are dependable in container culture. Give peppers 14–18 inches spacing and consistent moisture—dividers help because peppers hate cold drafts.
Basil: ‘Genovese’ for classic flavor and ‘Prospera Compact’ (downy mildew resistance) for peace of mind. Basil performs best when nights stay above 55°F; the warm zone makes that possible earlier and later in the season.
Citrus (containers): Meyer lemon and Calamondin tolerate container life and benefit from a warmer, brighter zone with fewer cold swings. Keep them away from the door buffer to prevent leaf drop from chill.
Cool zone workhorses (draft-tolerant, steady but cooler temps)
Spinach: ‘Bloomsdale Long Standing’ is reliable and handles cool nights. Sow thickly, then thin to 3–4 inches spacing for baby leaves or 6 inches for full size.
Leaf lettuce: ‘Winter Density’ and ‘Red Sails’ keep shape under cool conditions and lower light. Plant at 8–10 inches for heads or closer for cut-and-come-again.
Kale: ‘Red Russian’ is forgiving and fast. Space 12 inches and harvest outer leaves weekly.
Herbs that don’t need tropical warmth: parsley (‘Italian Flat Leaf’) and chives thrive in the cool zone and act as “fill plants” along edges where drafts sneak through.
Buffer-zone picks (near the door: treat it like a mudroom)
This area experiences the most temperature shock. Use it for plants that tolerate cooler air or for non-plant functions.
- Hardening-off shelf: seedlings that need gradual exposure.
- Alliums in pots: garlic greens, bunching onions.
- Storage: bagged compost, empty pots, tools (kept dry and off the floor).
For edible plants, follow food safety basics and avoid storing chemicals in the same zone as harvest bins.
Real-world scenarios: how a divider solves common greenhouse headaches
Scenario 1: The renter with a 6 ft × 8 ft pop-up greenhouse
A renter in a windy courtyard wants to start seeds early without investing in permanent framing. The best move is a 2 ft deep buffer at the zipper door using a curtain hung from spring clamps. Inside, a 2 ft × 4 ft propagation pod sits on a shelf with a heat mat.
Budget snapshot: clear poly film $30, clamps $8, basic heat mat $25–$45, two thermometers $24 total. The practical win is stability: less cold shock when the zipper opens, and higher germination rates because the pod holds warmth.
Scenario 2: The homeowner with an 8 ft × 12 ft greenhouse and a high heating bill
Here the complaint is simple: “I can’t keep it warm without spending a fortune.” A crosswise divider placed 4 ft from the door reduces the heated zone volume by roughly one-third. Add weatherstripping and a door sweep, then move the heater into the warm zone so it isn’t constantly reheating the buffer.
Cost reality: A small curtain divider and seals often come in under $120. Compare that to running a typical electric heater; even modest reductions in runtime add up over a winter. The U.S. Department of Energy’s guidance on air sealing and heat loss reduction supports this approach in principle (U.S. Department of Energy, 2023).
Scenario 3: The serious hobby grower mixing orchids and vegetables
Orchids often want higher humidity and stable temperatures; tomatoes want airflow and lower leaf wetness. A lengthwise split with clear polycarbonate panels (diffused light) creates two management styles under one roof: a humid bench with trays and a small circulation fan for orchids, and a drier, brighter lane for vegetables with stronger ventilation.
Spacing and airflow details: keep at least 24 inches walkway between benches, and mount a clip fan so air moves gently across leaves, not directly blasting flowers. This is where a solid divider shines: it reduces humidity “creep” into the tomato lane.
Budget-minded choices and DIY alternatives that still look good
You don’t need custom greenhouse partitions to get professional results. Here are options I routinely recommend when budget or landlord rules matter.
- DIY curtain track: a straight 1×2 batten + screw-in cup hooks. Hang the film with binder clips. Materials often total $20–$35.
- Secondhand sliding door panels: sometimes available cheap or free. Use only if you can secure them safely and they don’t shade plants.
- Shelving as a divider: put a tall, open wire shelf perpendicular to airflow, then hang film from the top shelf down to the floor on the cold side. You gain storage and a calmer warm zone.
- Bubble wrap insulation (seasonal): line the warm zone walls with horticultural bubble wrap in winter. The Royal Horticultural Society notes bubble plastic can reduce heat loss in greenhouses when applied to glazing (RHS, 2022).
If you want the divider to feel intentional (not like a temporary construction zone), keep edges straight, choose clear materials that stay taut, and add a simple latch point so the pass-through doesn’t flap.
Maintenance expectations: what it takes to keep zones working
A divider changes your greenhouse “rhythm,” but it doesn’t have to add much work. Plan on 30–60 minutes per week for divider-related care if you’re already tending plants.
Weekly (10–15 minutes)
- Wipe condensation where it drips onto sensitive foliage (especially in the warm zone).
- Check that the weighted curtain edge still seals to the floor.
- Confirm both zone thermometers are reading sensibly (a dead battery can fool you for weeks).
Monthly (15–30 minutes)
- Clean the divider with mild soap to keep light transmission high.
- Inspect fasteners, clips, and any zipper/overlap seam for tearing.
- Adjust airflow: in winter, you may need only a small circulation fan; in summer, the divider may need to be pulled back to prevent overheating.
Seasonal tasks (1–2 hours at change of season)
- Late winter: tighten seals, clean glazing, set up the propagation pod.
- Spring: shift the buffer zone into a hardening-off runway; open the divider more often to prevent fungal issues as humidity rises.
- Summer: consider rolling the divider up during heat waves so the greenhouse vents as a single space.
- Fall: reinstall bubble wrap or insulation only in the warm zone to keep light strong elsewhere.
Small details that make the divider feel like a designed feature
If you want your greenhouse to feel like a well-composed workspace—not a science experiment—these finishing moves matter:
- Commit to a straight path. Maintain a 24-inch minimum walkway through the divider opening so carrying trays is easy.
- Place “like-with-like” tools. Keep watering cans and hose connections on the warm side if that’s where most irrigation happens. Put potting supplies in the buffer zone to keep humidity off paper bags and labels.
- Light discipline. If you add grow lights in the warm zone, hang them 12–18 inches above seedlings and keep the divider clear so light doesn’t bounce into the cool zone and trigger legginess in low-light greens.
A greenhouse climate zone divider is a quiet upgrade: it doesn’t shout for attention, but it changes everything you can grow—and how calmly you can grow it. Once your warm zone holds steady and your cool zone stops overheating, you’ll find yourself planning crops with more confidence: basil and peppers away from the door, spinach and lettuce in the calmer cool lane, and a buffer that keeps winter air where it belongs—at the threshold, not on your plants.
Sources: U.S. Department of Energy. “Air Sealing Your Home” (2023). Royal Horticultural Society (RHS). “Insulating your greenhouse” (2022). Rutgers/NJAES extension publications on greenhouse energy management and ventilation principles (Both et al., 2010).