Greenhouse Seed Starting Station
The first warm Saturday of late winter always starts the same way: you walk into the greenhouse with a mug of coffee, feeling optimistic, and immediately realize you’ve got seedlings on the floor, trays on a wobbly card table, and potting mix drifting into every corner like beach sand. The sun hits the glazing hard by 10 a.m., the air gets surprisingly hot, and suddenly you’re juggling a spray bottle, labels, and a flat of tomatoes that needs light yesterday. If your seed-starting “system” is a pile of supplies and good intentions, a dedicated seed starting station will feel like adding a calm, organized room inside your greenhouse.
This project is less about buying fancy gear and more about layout—placing light, water, heat, and workflow in the right order. I’ll walk you through a station you can scale for a rented 6’ x 8’ greenhouse or a backyard 10’ x 12’ structure, with real dimensions, plant choices, and a plan for the weekly maintenance that keeps seedlings stocky instead of spindly.
Start With the Workflow: A Seedling “Assembly Line”
When I design small garden spaces, I treat them like kitchens: the best layouts reduce steps. In a greenhouse, your three repeating tasks are potting, watering, and monitoring. Set your station up so you move in one direction—no backtracking with dripping trays.
The four zones you need
Zone 1: Dry storage (seeds, labels, clean pots). Keep it above splash range.
Zone 2: Potting bench (mixing, filling trays, sowing). This is your “dirty” zone.
Zone 3: Germination shelf (heat mat + humidity dome). Stable, protected, easy to check.
Zone 4: Growing-on shelf (bright light, airflow, room for watering). This is where seedlings spend most of their time.
Put Zone 2 closest to the door for easy replenishing and quick cleanup, and Zone 4 deeper inside where temperatures are steadier and wind gusts are less intense when you open the door.
Layout Strategies That Actually Fit Real Greenhouses
Your greenhouse is a light collector and a temperature swing machine. The station has to work with those two realities. Most seedlings want steady light and moderate temperatures; most greenhouses give you blazing midday sun and chilly nights. Good layout softens the extremes.
Bench depth and aisle width: the comfort math
For most adults, a bench deeper than 24 inches turns into a back-straining reach. A practical standard is a 18–24 inch deep bench with a clear aisle of 24–30 inches so you can carry trays without bumping foliage.
In a compact 6’ x 8’ greenhouse, a classic solution is one long bench on the north side (to avoid shading the rest of the house) and a narrow shelf on the opposite wall. In a 10’ x 12’ greenhouse, you can comfortably run two side benches with a center aisle.
Sunlight hours and orientation: place seedlings where light is stable
Seedlings grow best with long, consistent light. Many home greenhouses provide excellent sun on clear days, but in late winter and early spring you can still have low sun angles and cloudy stretches. For most fruiting crops (tomatoes, peppers, eggplant), plan for 14–16 hours of light daily once they’ve germinated if natural light is inconsistent.
Place your growing-on shelves where they get the most even light (typically the south or southeast side in the Northern Hemisphere). Use the brightest area for the growing-on zone, and keep the germination zone slightly more shaded; seeds don’t need light to sprout, but they do need steady warmth.
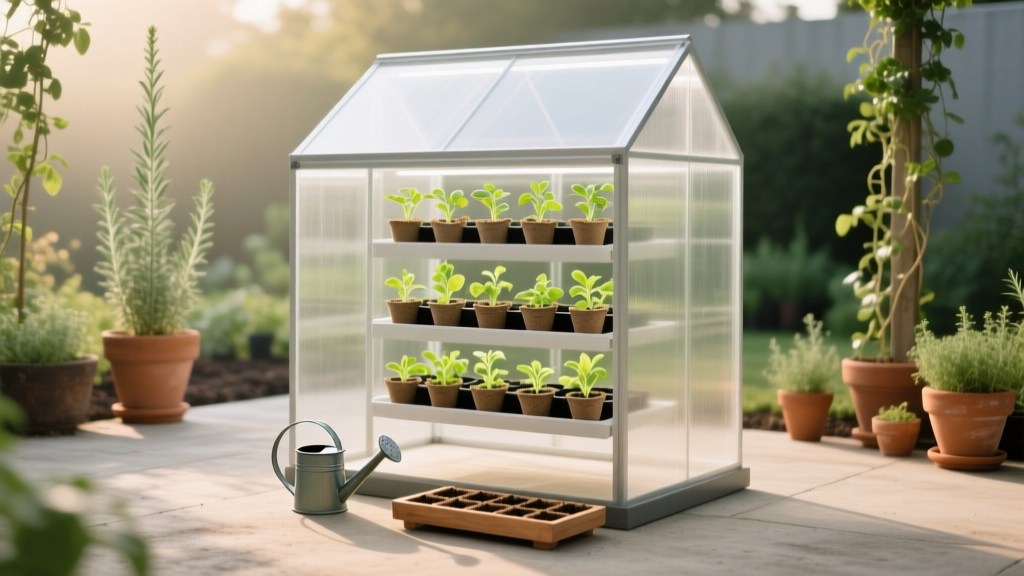
Vertical shelving: double your capacity without stealing floor space
If you’re short on square footage, go vertical. A shelving unit that’s 48 inches wide and 18 inches deep can hold two standard 1020 trays per shelf. Keep 16–18 inches of clearance between shelves if you’re using LED shop lights and growing compact starts.
Airflow matters more as you stack. Leave a 2–4 inch gap between shelves and the wall so warm, humid air doesn’t stagnate—this is one of the simplest ways to prevent damping-off and fungal issues.
The Station Blueprint: Three Scales That Work
Below are three station “recipes” you can adapt. They’re all built around common tray sizes and materials you can source locally.
Scenario 1: Renter with a mini greenhouse or shared yard (6’ x 8’)
Goal: Start 4–8 trays at a time, keep everything movable, avoid permanent attachments.
Layout: One 48” metal shelf unit + one narrow folding potting table.
Key move: Put the shelf along the north wall, so it doesn’t shade the rest of the greenhouse.
Budget tip: Use a heavy-duty utility shelf and hang lights from the shelf itself (zip ties and S-hooks), so you don’t drill into the greenhouse frame.
Scenario 2: Suburban homeowner with a walk-in greenhouse (8’ x 10’)
Goal: Dedicated potting bench and two-tier seedling shelves; room to harden off plants inside on cold nights.
Layout: A 24” deep bench on one side + a 18” deep shelving run on the other; keep a 30” center aisle.
Design trick: Put a shallow “landing zone” shelf (about 8–10” deep) at bench height for labels, dibber, and your watering can—this keeps tools out of your soil workspace.
Scenario 3: Backyard producer with a larger greenhouse (10’ x 12’ or bigger)
Goal: Start 12–20 trays, succession sowing, and hold transplants longer without overcrowding.
Layout: Two side benches (24” deep) plus a central rolling cart for potting or staging.
Add a small wash station if plumbing allows: even a 5-gallon water jug with a spigot over a bus tub makes cleanup faster and reduces soil-borne disease spread.
Materials and Costs: What You Spend (and Where to Save)
A seed starting station can be surprisingly affordable if you focus spending on light quality and water control. Below are typical cost ranges in the U.S. as of recent retail pricing (costs vary by region and season):
- 48” x 18” heavy-duty shelf: $60–$140
- 4-ft LED shop light (5000K): $20–$50 each (you’ll likely want 2 per shelf)
- Heat mat (10” x 20”): $25–$45
- Thermostat controller: $30–$60
- 1020 trays: $3–$10 each; inserts/cell packs $2–$6
- Small oscillating fan: $20–$40
- Capillary mat + waterproof tray: $20–$45
DIY alternatives that work: build a bench from 2x4s and exterior screws, top with a recycled slatted shelf or wire closet shelving. If you can salvage a sturdy table, spend your money on lighting and a thermostat—those two pieces control plant quality more than a pretty bench does.
Comparison: Three Watering Approaches for Seed Starting Stations
| Watering method | Best for | Upfront cost | Daily effort | Risk points |
|---|---|---|---|---|
| Top-watering with a fine rose | Small batches, hands-on gardeners | $10–$25 | 5–15 minutes | Overwatering; soil splash spreads disease |
| Bottom-watering in 1020 trays | Most home stations; cleaner foliage | $15–$60 (trays + inserts) | 5–10 minutes | Salt buildup; uneven moisture if trays warp |
| Capillary mat system | Consistent moisture; busy schedules | $20–$90 | 2–5 minutes | Algae if too wet; needs cleaning |
Step-by-Step Setup: Build Your Station in an Afternoon
Set aside a half day and aim for “finished enough” rather than perfect. The goal is a station that’s easy to use every day.
- Measure your greenhouse interior. Mark a 24–30 inch aisle with painter’s tape so you don’t accidentally design yourself into a tight squeeze.
- Place the bench and shelving first. Keep the potting surface near the door; place growing shelves where light is best and drafts are lowest.
- Install lighting. Hang LED fixtures so the bulbs sit 2–4 inches above seedlings at first, raising as plants grow. Use adjustable chains or rope ratchets.
- Set up germination heat. Put the heat mat on a stable shelf, plug into a thermostat, and place the probe in a tray of moist mix. Many warm-season crops germinate best around 75–85°F.
- Add airflow. Place a small fan to gently move air across the shelf line, not blast seedlings. This helps reduce fungal issues and strengthens stems.
- Create a watering zone. Decide on bottom watering, capillary mats, or a watering can, and keep a dedicated tub or tray beneath to contain spills.
- Organize the “tiny tools.” Put labels, marker, dibber, snips, and twist ties in a single bin on an upper shelf—if they scatter, your station will unravel fast.
- Run a 24-hour test. Watch temperature swings and check for condensation dripping onto lights or trays. Adjust shelf placement before you sow a single seed.
Design Principles That Keep Seedlings Compact and Healthy
Light intensity beats wishful thinking
Even in a greenhouse, seedlings can stretch on cloudy weeks. Supplemental lighting keeps growth compact. The University of Minnesota Extension notes that most seedlings need bright light and that insufficient light produces tall, weak plants (University of Minnesota Extension, 2020). Place lights close and extend day length as needed—especially for tomatoes and peppers.
Temperature stability is your secret weapon
Warm germination plus cooler growing-on temperatures is a classic professional rhythm: warm to sprout, slightly cooler to build sturdy stems. This aligns with recommendations that germination temperatures differ by crop and that too-warm conditions after emergence can encourage weak growth (Penn State Extension, 2019).
“Design is not just what it looks like and feels like. Design is how it works.” — Steve Jobs (quoted widely; principle applied here to garden workspaces)
In practical terms: a station that “works” keeps your most frequent tasks within arm’s reach, reduces spills, and makes it easy to keep seedlings in their ideal band of light and temperature.
Water management: consistent, not constant
Seedlings suffer more from fluctuating moisture than from a slightly dry day. Choose one watering method and commit to it. If you bottom-water, do it thoroughly, then let trays drain—don’t leave them sitting in water for hours. If you use capillary mats, keep them damp, not swampy.
Plant Selection: Varieties That Shine in a Greenhouse Seed Station
The station is only half the success; the other half is choosing varieties that match your indoor timeline and your local growing season. These are reliable, home-scale performers that respond well to transplanting.
Tomatoes (start 6–8 weeks before last frost)
‘Sungold’ (cherry): vigorous, early, forgiving; great payoff for a small space.
‘Celebrity’ (slicer): dependable yields and disease resistance; a steady backbone tomato.
‘Black Krim’ (heirloom): excellent flavor; benefit from sturdy starts because they can be more sensitive to stress.
Spacing note: Sow 1–2 seeds per cell in a 72-cell tray; pot up to 3–4” pots when true leaves appear.
Peppers (start 8–10 weeks before last frost; slower germination)
‘California Wonder’ (bell): classic, productive, good for beginners.
‘Jalapeño M’: uniform plants; great for container gardens.
‘Shishito’: quick to cook, high yields, ideal for small harvests often.
Why they work here: Peppers love bottom heat; keep germination near 80–85°F for best speed, then grow on slightly cooler with strong light to prevent legginess.
Lettuce and greens (start 3–5 weeks before planting out; cool season)
‘Winter Density’ (romaine): compact heads, tolerant of cool conditions.
‘Red Sails’: fast, attractive, handles variable spring light well.
‘Lacinato’ kale: sturdy transplant, long season value.
Spacing note: Use 128-cell trays for lettuce to maximize variety in limited space.
Herbs that transplant well
‘Genovese’ basil: start warm; pinch early for branching.
Chives: sow as clumps in cells; forgiving and tidy.
Parsley ‘Giant of Italy’: slow to germinate—start early and be patient.
Three Real-World Station Setups (and What They Teach)
Case 1: The balcony grower using a lean-to greenhouse. A renter with a narrow lean-to (about 2’ x 6’) installed one 18” deep shelf and used a single 4-ft LED light on chains. Result: only 3 trays at a time, but excellent success because everything was within reach and easy to monitor daily. The lesson: tight spaces thrive on simplicity—one shelf, one light, one watering method.
Case 2: The busy parent with a standard kit greenhouse. In an 8’ x 10’ greenhouse, the owner kept forgetting to water. Switching to bottom-watering plus a capillary mat on the busiest shelf reduced losses dramatically. The lesson: design for your life, not an ideal schedule.
Case 3: The hobby market gardener scaling up. In a 12’ x 16’ greenhouse, the grower added a second germination shelf with thermostats and used a rolling cart for potting. By keeping germination separate from growing-on, they avoided the common problem of domed trays hogging the brightest shelf space. The lesson: separating stages (sprout vs. grow) increases capacity without increasing chaos.
Maintenance Expectations: What It Takes Week to Week
If your station is set up well, maintenance is steady but not burdensome. Plan on 30–60 minutes per week for a small station (4–8 trays), and closer to 90 minutes per week for a larger one (12–20 trays), not counting potting-up days.
Weekly rhythm
- Water checks: 3–7 times per week depending on temperature and tray size.
- Light height adjustment: 1–2 times per week to keep lights 2–4 inches above seedlings.
- Rotate trays: once weekly to even out growth if light is stronger on one side.
- Fan and surface cleanup: 10 minutes weekly to remove spilled mix and reduce fungus gnat habitat.
Seasonal tasks that prevent headaches
- Late winter (before sowing): Disinfect trays, wipe shelves, test thermostat accuracy, and run lights for a day to confirm timers.
- Mid-spring: Add shading if midday leaf scorch appears; a 30–50% shade cloth can help on bright days.
- After transplant season: Deep clean the station, launder capillary mats, and store unused media sealed to keep fungus gnats down.
Small Upgrades That Make a Big Difference
Add a simple timer. A $10–$20 outlet timer keeps your lighting consistent—seedlings respond to regularity.
Use a thermometer you trust. Place one at seedling height, not up near the roof where heat collects. Greenhouses can swing dramatically, and you’ll make better decisions when you know the real shelf temperature.
Label like you mean it. If you sow five tomato varieties and lose track, the whole point of starting from seed evaporates. Keep labels and a marker attached to the station so they never wander.
Citations and credibility notes (so you can dig deeper)
For seedling light and early growth guidance, see: University of Minnesota Extension (2020), seed starting recommendations emphasizing bright light and preventing weak, leggy growth.
For temperature and germination considerations by crop, see: Penn State Extension (2019), seed starting and transplant production guidance discussing how temperature affects germination and seedling quality.
Your greenhouse seed starting station doesn’t need to be elaborate. It needs to be intentional: a place where the potting mess is contained, the light is consistent, the watering is easy, and the young plants are close enough to inspect with your morning coffee. When your trays sit neatly on a shelf, lights at the right height, and a gentle fan moving the air, you’ll feel it immediately—less scrambling, more growing, and a spring start that looks like you meant it.