Greenhouse Year-Round Growing Plan
It’s mid-January. The lawn is frozen, the patio pots are empty, and the only “green” in sight is the wilted basil you forgot on the kitchen sill. You step outside anyway—because gardeners do—and you imagine a pocket of warmth where lettuce is still crisp, seedlings are already queued for spring, and a lemon tree smells like sunlight. A year-round greenhouse plan isn’t about owning more stuff; it’s about designing a system that keeps plants moving forward when the weather is stuck.
Think of this like a landscape design project in miniature: circulation paths, light zones, microclimates, and a planting calendar that turns space into steady harvests. Below is a layout-first plan you can adapt to a rented patio, a suburban side yard, or a tight urban lot—complete with dimensions, spacing, costs, and specific varieties that actually behave in greenhouse conditions.
Start with the site: light, access, and your “winter minimum”
Before you buy polycarbonate panels or seed trays, decide what you need the greenhouse to do in the hardest month. That’s your design brief. If you only need greens and starts, you can run cooler and cheaper. If you want tomatoes in February, you’re designing a heated room.
Sunlight hours: aim for 6+ in winter
Most edible crops want strong light, and winter is the limiting season. Plan for at least 6 hours of direct sun in December/January if possible; 8 hours is excellent. Track sun with a phone app or take notes for a week. Even a small shadow from a fence can take your greenhouse from “salad all winter” to “seedlings that sulk.”
Orientation and placement that works in real yards
In the northern hemisphere, placing the long side facing south generally captures the most winter sun. If you’re tight on space, prioritize door access and hose/electric proximity. A greenhouse that’s annoying to enter won’t get vented, watered, or harvested on time.
Budget a simple “utility strip” outside the door: a 24-inch-wide spot for a potting tote, a watering can, and a boot tray. It’s not glamorous, but it prevents muddy chaos from migrating indoors.
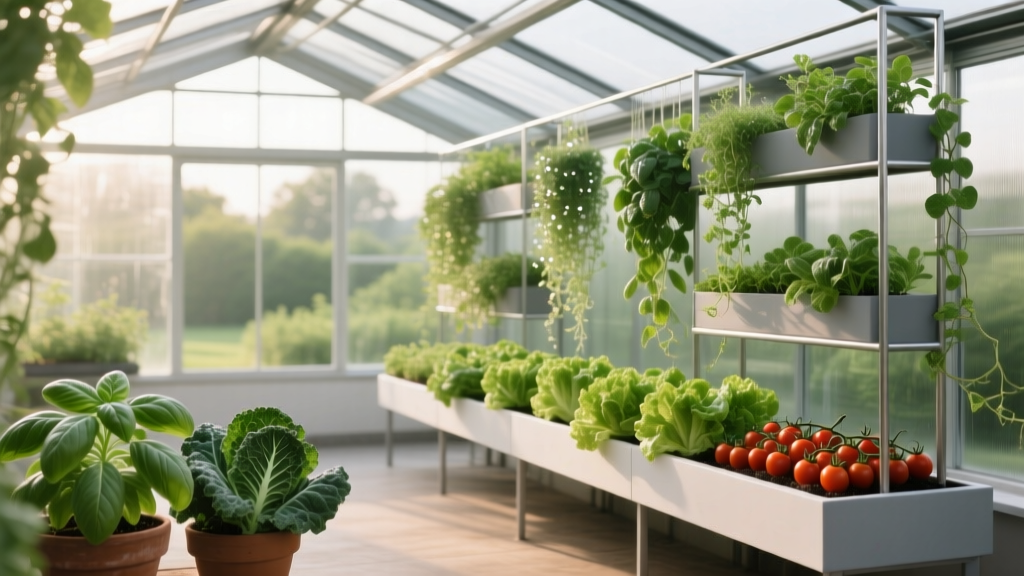
Layout strategies: divide your greenhouse into climate zones
A greenhouse is a controlled environment, but it’s rarely uniform. Temperature stratifies, corners stay cooler, and sunny edges spike at midday. Use that to your advantage by assigning zones the way you’d place plants in sun, part shade, and shade outdoors.
Three-zone plan (works in most sizes)
Design around three functional bands:
- Hot zone (south side / highest light): fruiting crops, citrus, seedling heat mats
- Cool zone (north side / lower light): greens, storage of dormant pots, hardening-off shelf
- Work zone (near door): potting bench, tool hooks, irrigation manifold
If you’re building or buying a compact greenhouse, a classic footprint is 6 ft x 8 ft (48 sq ft). It’s big enough for a 24-inch path and two productive benches without feeling like you’re gardening in a phone booth.
Bench + path dimensions you can actually move through
Here’s a practical interior layout for a 6x8 structure:
- Center path: 24 inches wide (enough for a harvest basket and kneeling)
- Side benches: 24 inches deep on both sides
- Bench height: 30–34 inches (comfortably waist-high for most adults)
That creates a tidy workflow: you enter, vent, check moisture, harvest, and exit without shuffling pots like a sliding puzzle.
Vertical growing: a second canopy without shading the first
Add a narrow upper shelf for propagation and small pots, but keep it shallow so it doesn’t steal light. A good rule is a 10–12 inch deep shelf mounted above the north bench only. This preserves the south bench as your prime solar real estate.
Materials and climate control: spend where it changes outcomes
Year-round success isn’t about maximum heat; it’s about stable conditions and quick ventilation. Most winter crop failures are from overheating on sunny days, then chilling at night.
Glazing choices (and what they mean for your plants)
For homeowners, 6 mm twin-wall polycarbonate is a strong balance of insulation, durability, and light diffusion. For renters, a mini greenhouse rack or pop-up poly greenhouse can still support a winter greens plan—just keep expectations realistic and use extra insulation tricks.
| Glazing option | Upfront cost (typical) | Durability | Best for | Notes |
|---|---|---|---|---|
| Single-pane glass | $800–$3,000+ | High (breakable) | Aesthetics + maximum clarity | Higher heat loss; needs careful ventilation |
| 6 mm twin-wall polycarbonate | $600–$2,500 | High | Year-round growing in most climates | Diffuses light; good for seedlings and leaf crops |
| Poly film (hoop house) | $150–$800 | Low–medium | Season extension + budget builds | Film replacement every few years; needs tight anchoring |
Ventilation is non-negotiable
Even in winter, a sunny day can push greenhouse temperatures into plant-stressing territory. Automatic vent openers are one of the best quality-of-life upgrades. Plan for at least one roof vent plus a louver or door vent to create airflow.
“Even in winter, unventilated greenhouses can overheat rapidly on sunny days; effective ventilation is essential to avoid plant stress and disease pressure.” — University of Georgia Extension, Greenhouse Ventilation guidance (updated 2019)
For a small greenhouse, a solar or wax-cylinder auto vent opener often runs about $35–$80. Pair it with a small circulating fan (often $25–$60) to reduce condensation on leaves.
Heating: choose a target temperature, not a heater size
Set a realistic “winter minimum” temperature based on what you want to grow:
- 35–40°F (2–4°C): overwinter hardy greens, protect dormant plants
- 45°F (7°C): steady winter salads, parsley, cilantro, seedlings with extra light
- 55–60°F (13–16°C): citrus, active growth on herbs, earlier spring starts
A small electric space heater with a thermostat can cost $40–$120, but operating cost is the bigger story. The U.S. Department of Energy notes that thermostat setbacks can reduce heating costs by around 10% per year (DOE, 2022). In greenhouse terms: heat only to the minimum that supports your crop plan, and insulate at night with bubble insulation or thermal curtains.
Step-by-step setup: build the workflow before you plant
These steps keep you from doing the common thing—filling the space with pots first, then realizing you have no path, no staging area, and no place to mix soil.
- Map the interior at full scale. Use painter’s tape on the floor or sketch a 6x8 grid. Mark a 24-inch center path and 24-inch benches.
- Install benches and a potting surface. Prioritize a stable bench; wobbly shelving becomes a daily irritation.
- Create a water plan. At minimum, place a 5-gallon watering can and a hose quick-connect nearby. If you can, add a simple drip line with a battery timer (often $35–$60).
- Set up ventilation. Install the auto vent opener and a small fan. Test on a sunny day before plants move in.
- Add a thermometer/hygrometer. Put one at plant height, not up near the roof. Aim for humidity control via airflow, not constant misting.
- Define zones with trays. Use boot trays or nursery flats to group plants by watering needs. This is your “microclimate management.”
- Bring in plants in waves. Start with hardy greens, then seedlings, then tender crops once temperatures stabilize.
Plant selection: varieties that thrive in greenhouse rhythm
Year-round growing is less about exotic plants and more about choosing varieties that tolerate temperature swings, grow well in containers, and don’t demand perfect pollination or endless vertical space.
Winter (low light, cool nights): dependable greens and roots
These crops are forgiving when nights dip and growth slows:
- Spinach ‘Bloomsdale Long Standing’: cold-tolerant, productive in cool greenhouse conditions; sow every 2–3 weeks for continuity.
- Claytonia (miner’s lettuce): thrives in low light and cool temps; a true winter specialist for small spaces.
- Kale ‘Red Russian’: handles cold and rebounds quickly; harvest outer leaves weekly.
- Carrot ‘Napoli’: bred for cold-season sweetness; use deep containers (at least 10–12 inches).
- Scallion ‘Evergreen Hardy White’: compact, reliable, and perfect for succession sowing.
Spacing guidance that keeps airflow healthy: plant spinach and kale at about 6 inches apart for baby leaf, 10–12 inches for mature plants. In tight greenhouses, air movement matters as much as yield per square foot.
Shoulder seasons (spring/fall): seedlings, herbs, and fast turnover
- Lettuce ‘Salanova’ types: uniform heads and quick harvest; ideal for repeated sowing.
- Cilantro ‘Calypso’: slower to bolt than many, useful in cool greenhouse spring.
- Parsley ‘Giant of Italy’: steady producer; tolerates cool nights.
- Radish ‘French Breakfast’: 25–30 day crop; perfect filler between larger plants.
If you’re raising transplants, keep seedling trays on the upper north shelf under a small LED grow light. A simple 2-ft LED shop light is often $20–$40, and it helps prevent leggy seedlings during cloudy weeks.
Summer (high heat potential): fruiting crops with greenhouse manners
- Tomato ‘Sungold’ (cherry): high yield and forgiving; train vertically and prune to manage jungle factor.
- Tomato ‘Gardener’s Delight’: reliable set and good flavor; a classic greenhouse performer.
- Sweet pepper ‘Lunchbox Red’: compact plants suited to containers; great for smaller structures.
- Cucumber ‘Diva’: parthenocarpic (sets fruit without pollination), making it easier inside enclosed spaces.
- Basil ‘Genovese’: loves warmth; keep in the hot zone and pinch weekly to prevent flowering.
Plan vertical supports from day one: string trellis or cattle panel sections. Give tomatoes 18–24 inches between plants, cucumbers 12–18 inches. Overcrowding is the fastest route to mildew and disappointment.
Three real-world layouts (with the tradeoffs spelled out)
Scenario 1: Renter on a balcony (2 ft x 4 ft mini greenhouse rack)
You’ve got a narrow balcony, neighbors close by, and limited ability to install anything permanent. Use a 4-tier mini greenhouse rack (often $50–$120) and turn it into a winter salad station.
Layout move: Put greens on the top two shelves for maximum light; place a water tray and heavier pots (like parsley) on the bottom for stability. Add bubble insulation to the back panel if wind strips heat.
Plant plan: Claytonia, spinach, mache (corn salad), scallions, and compact lettuce. Skip fruiting crops unless you add supplemental light and accept smaller yields.
Maintenance expectation: 20–30 minutes, 3x per week for watering checks, venting zippers on warm days, and harvesting.
Scenario 2: Suburban homeowner with a 6 ft x 8 ft greenhouse (unheated, insulated nights)
This is the sweet spot: enough space for a true bench-and-path design and a crop rotation that never stops.
Layout move: Two 24-inch benches, 24-inch center path, north upper shelf for seedlings. Hang a small fan mid-height to move air across both benches.
Plant plan by season: Winter greens and carrots in deep tubs; spring seedlings on the shelf; summer tomatoes and cucumbers trained high; fall back to brassicas and salads.
DIY insulation: Clip-on bubble insulation on the north wall and a simple thermal curtain at night. It’s cheap, removable, and renter-friendly if you ever move the structure.
Maintenance expectation: About 2–4 hours per week in peak season (pruning, training, watering), and 1–2 hours per week in winter (harvest, vent checks, occasional watering).
Scenario 3: Cold-climate gardener with a 10 ft x 12 ft greenhouse (heated, citrus + winter harvest)
If your goal includes citrus, year-round herbs, and early tomatoes, design for heat efficiency and workflow. A 10x12 gives you 120 sq ft—enough to create a true warm corner.
Layout move: Keep a 30-inch main path (you’ll carry bigger pots), add an L-shaped bench plus one dedicated “warm zone” corner with a heat mat shelf for starts.
Plant plan: A dwarf lemon like ‘Improved Meyer’ in a large container, plus peppers and basil in the hot zone; greens and propagation in the cool zone. Use parthenocarpic cucumber to avoid pollination headaches.
Energy reality: Heating is the main cost driver. Focus on night insulation, sealing drafts, and only heating to your crop minimum (for citrus, often around 55°F at night).
Maintenance expectation: 4–6 hours per week in summer (training vines, pest checks, frequent watering), and 2–3 hours per week in winter (watering, monitoring heat/condensation, harvesting).
Budget planning and DIY alternatives (so it doesn’t get away from you)
A year-round greenhouse can be built on a modest budget, but you’ll want to decide what you’re paying for: structure longevity, temperature control, or convenience.
- Budget build ($150–$500): hoop house with poly film, salvaged lumber base, DIY benches from cinder blocks + 2x6 boards. Best for season extension and cool-weather crops.
- Midrange ($600–$2,500): 6 mm polycarbonate kit greenhouse, auto vent opener, fan, basic irrigation timer. Best for true year-round greens plus summer fruiting crops.
- High investment ($3,000+): larger structure, upgraded glazing, electric heat, insulated north wall, automated controls. Best for citrus/tropicals and early/high yields.
DIY swaps that work: use black water jugs or barrels as thermal mass along the north wall (they absorb heat by day and release at night), and repurpose wire shelving as adjustable staging. These aren’t magical heat solutions, but they smooth temperature swings and help plants avoid stress dips.
Maintenance rhythm: what you’ll actually do week to week
Greenhouses reward small, frequent actions. Most problems come from “set and forget” habits—especially in shoulder seasons when the sun suddenly returns and temperatures spike.
Weekly checklist (15–45 minutes per session)
- Vent check: confirm vents open/close freely; manually vent during surprise warm spells
- Water audit: feel container weight; water deeply, then let the surface dry slightly to reduce fungus gnats
- Airflow and humidity: run the fan; wipe heavy condensation if needed
- Training/pruning: tie tomatoes/cucumbers; remove crowded leaves to keep airflow
- Pest scouting: check undersides for aphids/whiteflies; address early
Seasonal tasks that keep the plan running
- Late winter: start onions, brassicas, and early flowers on heat mats; sanitize trays
- Spring: harden seedlings by gradually increasing vent time; watch for midday overheating
- Summer: shade cloth on the hottest weeks (30–50% shade is common), aggressive ventilation, frequent watering
- Fall: remove tired summer crops, refresh potting mix, sow greens every 2–3 weeks
For spacing and timing, it helps to remember that plants slow down dramatically as light drops. The University of Minnesota Extension notes that low light reduces growth rates in winter greenhouse conditions (University of Minnesota Extension, 2020). That’s why succession sowing and choosing cold-tolerant varieties matters more than stuffing every inch with plants.
A simple year-round crop flow (so the space stays productive)
Instead of thinking “winter crops” and “summer crops,” think in rotations. Keep the greenhouse 70–80% full, leaving a little open bench space for transplants and surprises.
Example flow for a 6x8: January–March: spinach, mache, scallions, parsley; March–May: lettuce, radish, seedlings; June–September: tomatoes + cucumbers + basil; October–December: kale, claytonia, carrots in tubs. That pattern turns the greenhouse into a relay race—each crop handing off to the next.
If you build your layout around zones, keep your paths clear, and pick varieties that match your winter minimum temperature, you’ll stop “waiting for spring” and start managing a living room of plants—one that pays rent in salads, seedlings, and the quiet pleasure of warm soil while the rest of the yard sleeps.
Sources: U.S. Department of Energy (2022) guidance on thermostat setbacks and heating savings; University of Minnesota Extension (2020) notes on low-light effects in winter greenhouse growing; University of Georgia Extension (2019) guidance emphasizing the importance of greenhouse ventilation.