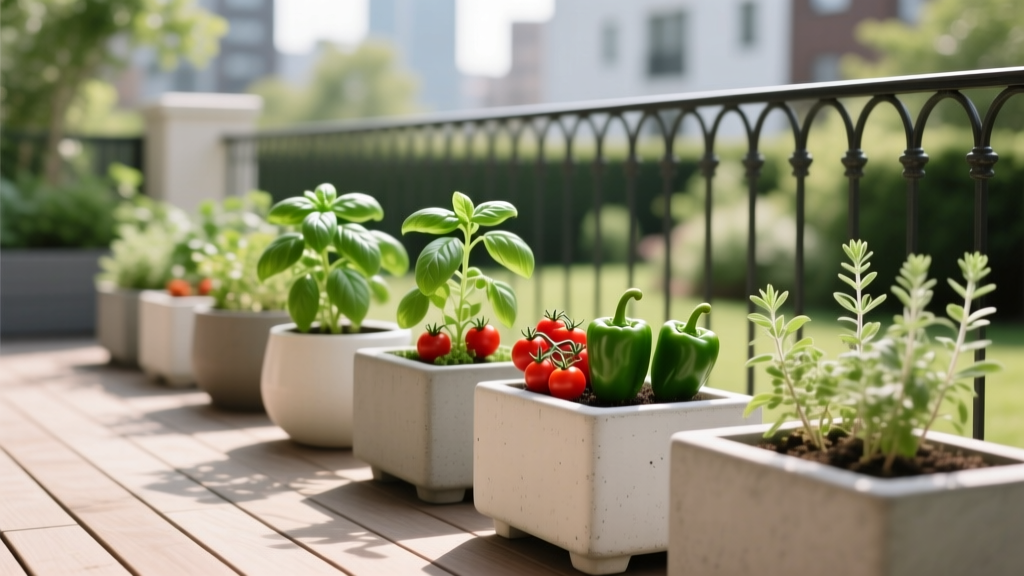
Patio Pizza Garden in Containers
The delivery app is open, the oven is preheating, and you realize the missing ingredient isn’t mozzarella—it’s freshness. The basil is limp, the “vine-ripened” tomatoes taste like cold storage, and the arugula has that tired edge that shows up after a long trip. If you’ve got even a slim strip of patio, a sunny front stoop, or one decent balcony corner, you can fix this with a container “pizza garden”: a small layout designed to supply the core flavors of pizza night—right outside your door.
Think like a landscape designer for a moment: you’re not just placing pots. You’re building an edible composition with height, access, sun angles, and a little theater (because tearing basil leaves five steps from the kitchen feels like luxury). Below is a practical, creative layout you can copy, scale up, or adapt to whatever outdoor real estate you have.
Design Principles: How a Pizza Garden Should Function
Start with the “pizza path”: kitchen door to harvest in under 60 seconds
Good edible design is proximity design. Place your most-used herbs—basil and oregano—closest to the door or the grill/oven station. Aim for a walking loop that lets you snip, rinse, and return without weaving through furniture. A working target: keep the primary herb pot within 6–10 feet of your kitchen exit if possible.
Sun is the main ingredient: plan for 6–8 hours
Most pizza staples want full sun. Tomatoes and peppers produce best with at least 6–8 hours of direct sunlight. Basil is happiest in full sun but tolerates partial sun, especially in hot climates where 5–6 hours plus afternoon shade can prevent scorching.
As a reference point, the USDA notes that many vegetables require 6 to 8 hours of direct sunlight per day for best performance (USDA, 2023). Use that number as your baseline, then adjust with shade cloth if your patio reflects heat.
Choose containers by root volume, not aesthetics (then make them pretty)
In container design, pot size is plant health. Tomatoes don’t want “cute.” They want soil volume. Plan around these minimums:
- Tomatoes: 15–20 gallon container per plant (about 18–24 inches diameter)
- Peppers: 5–10 gallon container per plant
- Basil: 2–5 gallon container (or clustered in a larger herb trough)
- Oregano/thyme: 1–3 gallon container each (they like it a bit drier)
These sizes aren’t arbitrary—containerized plants have limited buffering against heat and drought, so more soil volume means more stable moisture and fewer “my tomato collapsed overnight” surprises.
Build vertical layers to save floor space
Let tomatoes climb and herbs mound. Use one tall element (tomato + trellis), a mid-layer (peppers), and a low layer (trailing thyme or compact oregano). This keeps your patio feeling designed, not crowded. A simple trellis or tomato cage adds height without widening the footprint.
“In small gardens, vertical structure is the easiest way to increase usable growing space without sacrificing access.” — Royal Horticultural Society (RHS), container and small-space growing guidance (RHS, 2022)
Layout Strategies for Real Patios and Balconies
The 4-Container “Pizza Corner” (fits about 4' x 4')
This is the smallest layout that still feels abundant. It occupies roughly 16 sq ft and can tuck into a sunny corner near a railing.
- Back corner (tall): 20-gallon tomato pot with cage/trellis
- Side (mid): 7-gallon pepper pot
- Front (low): 3–5 gallon basil pot
- Front edge (low/trailing): 12–18 inch herb bowl with oregano + thyme
Spacing: Leave 12–16 inches between containers so leaves dry quickly after watering (less disease pressure) and you can reach in with pruners.
The Rail-and-Floor “Galley Kitchen” Layout (fits a 2' x 8' balcony)
If your balcony is long and narrow, copy a kitchen galley: tall items at one end, frequently harvested herbs mid-run, and rail planters for spillover greens.
- End cap: 15–20 gallon tomato + trellis
- Mid-run: 5-gallon basil + 5-gallon pepper
- Railing planters: oregano, thyme, and compact greens like arugula
Keep the walking lane at least 24 inches clear so you can actually use the balcony—this is a garden you live with, not a garden you squeeze past.
The Entertainer’s “Pizza Station” (fits about 6' x 10')
If you host, anchor the garden near your prep area. Place a small bistro table or grill with a harvesting arc around it—like an outdoor mise en place.
- Behind grill/table: two 20-gallon tomatoes (sauce + slicer types)
- Side flank: two 7-gallon peppers (sweet + hot)
- Near seating: large herb trough (24–36 inches long) with basil varieties
- Edge softener: trailing thyme in a low bowl
Design tip: repeat container materials (all terracotta-look, or all matte black) to make the space feel intentional, even if the plants are doing their chaotic summer thing.
Plant Selection: Varieties That Earn Their Space
A pizza garden succeeds when plants are flavorful, compact enough for containers, and productive in a small footprint. Here are reliable picks, with the “why” behind each.
Tomatoes (the backbone of pizza night)
- ‘San Marzano’ (paste type): Classic sauce flavor and thicker flesh. Best in a 20-gallon container with a sturdy trellis. If your patio is windy, choose a heavy pot or add 10–15 lb of pea gravel in the bottom for ballast (keep drainage open).
- ‘Sungold’ (cherry): Extremely sweet for fresh topping bursts. Vigorous; prune to 1–2 main stems to prevent it from swallowing your seating area.
- ‘Bush Early Girl’ (compact slicer): More container-friendly than indeterminate giants; good if you want slices without a 7-foot vine takeover.
Container tomatoes crave steady moisture and regular feeding. The University of Minnesota Extension recommends consistent watering and notes that containers dry quickly in summer (University of Minnesota Extension, 2020).
Basil (your most-picked plant—design for convenience)
- ‘Genovese’: The standard for pesto and pizza garnish; large leaves, strong aroma.
- ‘Prospera’ (downy mildew resistant): If you’ve ever watched basil collapse in August, choose this. Resistance matters in humid areas.
- ‘Greek Columnar’: Naturally narrow, great for tight patios; stays neat without constant pinching.
Spacing: Plant basil 8–12 inches apart in a trough, or keep one robust plant per 3–5 gallon pot for easy harvesting.
Oregano and thyme (the drought-tolerant flavor anchors)
- Greek oregano (Origanum vulgare subsp. hirtum): Punchier flavor than common oregano; loves sun and slightly drier soil.
- ‘English’ thyme (Thymus vulgaris): A low, aromatic edge plant; handles heat and leaner soil well.
Design move: plant thyme at the lip of a pot so it can trail and soften hard container edges—like a living mulch that also tastes great.
Peppers (fresh heat, sweet crunch)
- ‘Jimmy Nardello’ (sweet): Thin-walled, fast to blister, and productive in containers.
- ‘Shishito’ (mild): Perfect for quick pan blistering while the pizza cooks.
- ‘Jalapeño’ (classic heat): Compact, reliable, and a true pizza-night utility player.
Spacing: One pepper per 12–14 inch pot (5–7 gallons). Stake if fruit load starts to pull stems sideways.
Optional “topping” plants that behave in containers
- Arugula ‘Astro’: Fast, compact, and you can cut-and-come-again from a shallow trough.
- Chives: Great for white pizza or finishing oil; perennial in many climates.
- Strawberries (for dessert pizza vibes): A fun edge plant in hanging baskets if you have more sun than space.
Container Comparison Table: Pick the Right Pot Without Guessing
| Container Type | Best For | Typical Size to Use | Watering Frequency (summer) | Notes |
|---|---|---|---|---|
| Fabric grow bag | Tomatoes, peppers | 10–20 gallons | Daily in heat waves | Excellent drainage; dries faster; easy storage off-season |
| Glazed ceramic pot | Herbs, peppers | 12–18" diameter | Every 2–3 days | Holds moisture well; heavier (good for windy patios) |
| Self-watering container | Basil, greens | 12–24" long or 5–15 gallons | Refill reservoir 1–2x/week | Great for renters who travel; reduces drought stress |
| Railing planter | Oregano, thyme, arugula | 24–30" long, 6–8" deep | Every 1–2 days | Watch wind exposure; choose secure mounting hardware |
Step-by-Step Setup: Build Your Patio Pizza Garden in a Weekend
This sequence is the one I use when I’m designing small edible spaces: start with sun, then containers, then soil, then plants, then irrigation habits.
- Map your sun in 10 minutes. On a sunny day, note when direct sun hits your intended spot. You’re aiming for 6+ hours. If you only have 4–5 hours, lean into herbs and greens, and choose a compact tomato like ‘Bush Early Girl.’
- Pick a footprint and mark it. Use painter’s tape or a spare hose to outline a 4' x 4' square (or your balcony run). Make sure doors and chairs still work.
- Choose containers with drainage. No drainage hole = no deal. For a basic set, plan on: one 20-gallon for tomato, one 7-gallon for pepper, one 5-gallon for basil, and one 12–18" bowl for oregano/thyme.
- Add pot feet or spacers. Lift pots 1/2–1 inch so water can drain freely (and to avoid staining patios).
- Fill with quality potting mix. Use container mix, not garden soil. For tomatoes, blend in a slow-release organic fertilizer per label. Expect to use about 2–3 cubic feet of mix for a 20-gallon container.
- Plant and water in thoroughly. Water until it runs from the drainage holes. For tomatoes, plant deeply (bury part of the stem) to encourage more rooting along the stem.
- Install supports on day one. Put the cage/trellis in at planting time so you don’t spear roots later. Tomato cages should be at least 48–60 inches tall for vigorous varieties.
- Mulch the surface. Add 1 inch of fine bark or straw to reduce evaporation and soil splash (helps disease control).
- Set a simple watering routine. In warm weather, check daily. Most patios need watering 4–7 days/week in peak summer; self-watering containers can reduce that.
Budget and DIY Alternatives (Real Numbers, Flexible Choices)
A patio pizza garden can be a splurge-worthy design feature or a scrappy DIY project. Here are realistic cost ranges (USD) to help you plan.
- 20-gallon container: $25–$70 (fabric bags often $10–$20)
- Potting mix: $12–$20 per 2 cu ft bag (you may need 2–4 bags depending on container count)
- Tomato plant: $4–$8 (seed packets $2–$4)
- Herb starts: $3–$6 each
- Tomato cage/trellis: $8–$35
Typical totals: A minimal four-container setup often lands around $90–$220 depending on pot style. If you already own containers and buy smaller plants, you can come in under $75. If you choose matching ceramic containers and self-watering planters, it can climb to $250–$400—still less than many single patio furniture pieces, and it feeds you.
DIY swaps: Use food-safe 5-gallon buckets (drill 8–10 drainage holes), build a bamboo teepee trellis, or repurpose a sturdy laundry basket lined with landscape fabric (drainage required). For renters, fabric grow bags are light, inexpensive, and easy to move at lease-end.
Three Real-World Patio Scenarios (And How I’d Design Each)
Scenario 1: The renter’s shaded balcony (only 4–5 hours of sun)
You can still make a pizza garden—just shift expectations. With 4–5 hours of sun, focus on herbs and greens, then add one compact tomato as an experiment in your brightest spot.
Plan: One 10–15 gallon ‘Bush Early Girl’ tomato, a self-watering trough of ‘Prospera’ basil, Greek oregano, thyme, and a railing planter of arugula ‘Astro.’ Keep containers light (fabric bags + plastic self-watering) for easy moving. Add a reflective surface (a light-colored wall or privacy screen) to bounce a little extra light toward the plants.
Scenario 2: The windy high-rise patio (sunny, but harsh)
Wind is a design constraint, not a deal-breaker. It dries containers quickly and can snap tomato stems right when fruit sets.
Plan: Heavy containers (glazed ceramic or weighted planters), a 60-inch sturdy trellis, and a wind buffer: a slatted screen or clear balcony panel. Use ‘San Marzano’ or ‘Bush Early Girl’ with strong staking; choose ‘Greek Columnar’ basil (less floppy). Expect watering closer to daily in midsummer.
Scenario 3: The family patio with limited floor space (needs room for chairs)
This is where vertical layering pays off. We keep the footprint tight and push volume upward.
Plan: One tall tomato in a corner, peppers flanking it, and herbs in railing planters. Put basil in a movable pot on a rolling plant caddy so you can pull it closer to the kitchen door on pizza nights and tuck it aside when kids need open space.
Scenario 4: The enthusiastic cook who wants sauce, toppings, and garnish (bigger harvest)
If your goal is weekly sauce, plan for two tomato plants, not one, and keep them pruned.
Plan: Two 20-gallon tomatoes (‘San Marzano’ + ‘Sungold’), two peppers (‘Jimmy Nardello’ + jalapeño), and a 36-inch herb trough with ‘Genovese’ + ‘Prospera’ basil, oregano, and thyme. This layout fits comfortably in about 6' x 10' with good access.
Maintenance Expectations: What This Garden Asks of You
Container gardens are generous, but they’re not “set it and forget it.” The tradeoff for growing on a patio is that you become the irrigation system.
Weekly time: Plan on 30–60 minutes per week total for checking moisture, pruning, tying tomatoes, and harvesting. In peak heat, you’ll spend an extra 5 minutes/day doing a quick water check.
Your weekly rhythm (simple and effective)
- Water: Check daily; water when the top 1 inch is dry. Water deeply until drainage runs.
- Feed: Tomatoes and peppers appreciate regular feeding. Use a liquid fertilizer every 7–14 days once flowering begins (follow label rates).
- Prune: Pinch basil tips weekly to keep it leafy. For indeterminate tomatoes, remove suckers as needed to keep airflow.
- Scout: Look under leaves for aphids or mite stippling; catch problems early with a firm spray of water or insecticidal soap if needed.
Seasonal tasks (so the garden stays attractive)
- Spring: Harden off plants over 7–10 days before full outdoor life; set supports immediately.
- Mid-summer: Refresh mulch; consider 30–40% shade cloth if your patio reflects intense heat and basil scorches.
- Late summer: Let oregano and thyme dry slightly between watering to intensify flavor; harvest basil heavily before nights cool.
- Fall: Pull warm-season plants at frost; compost if healthy. Store pots, clean trellises, and save cages for next year.
Small Design Details That Make It Feel Like a Designed Space
If you want the garden to look intentional (not like a nursery shelf tipped onto your patio), repeat materials and control the edges. Use 2–3 container sizes max, and group pots in odd numbers—three is an easy designer’s trick. Hide drip trays with a low herb bowl in front. Add one solar light or lantern so the space reads as a “room” after sunset.
And don’t underestimate harvest ergonomics: place your basil where your hand naturally goes when you step outside. Put the tomato where it can climb without shading everything else. Keep one clean, open spot where you can set a bowl while you snip. That’s the difference between a patio that merely grows food and a patio that supports a ritual.
When pizza night rolls around, you’ll step outside with scissors, clip basil still warm from the sun, grab a handful of oregano tips, and maybe one reckless jalapeño. The garden won’t feel like a project anymore—it’ll feel like part of how your home works.
Sources: USDA (2023) vegetable gardening sunlight guidance; Royal Horticultural Society (RHS, 2022) small-space/container growing guidance; University of Minnesota Extension (2020) container vegetable care and watering considerations.