Terrace Bonsai Display Garden
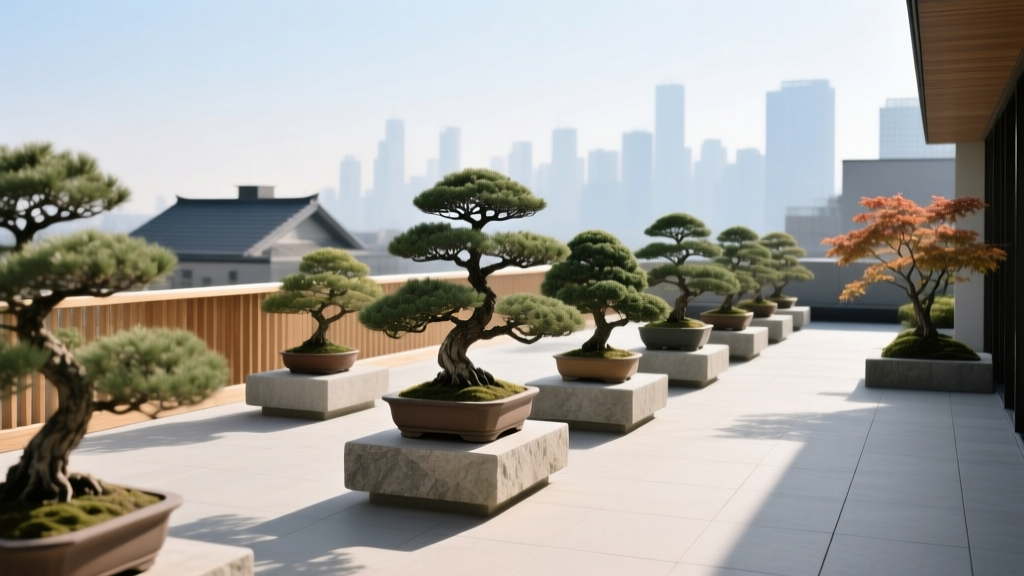
The terrace was perfect on paper: a sunny rectangle outside the sliding door, just big enough for coffee and a couple of pots. In real life, it became a clutter zone—miscellaneous planters, a hose coiled like a sleeping snake, and a folding chair that never quite sat level. Then you bring home one bonsai—maybe a small juniper from a weekend market—and suddenly everything feels wrong. The tree is quiet, deliberate, and scaled like a poem. The terrace around it looks loud.
This is the moment a terrace bonsai display garden shines: it’s not about cramming in more plants, it’s about editing. We’ll design a layout that makes a few small trees feel intentional, keeps them healthy in a challenging microclimate, and still leaves room for living.
Start with the “viewing angle” (and design backward)
Bonsai are meant to be seen from a primary angle—like a sculpture. On a terrace, your primary viewing angle is usually from indoors (through glass) and from your main seating spot. Pick one “gallery wall” edge—often the railing side or the longest wall—and make that your display line.
Practical target: a display zone that’s 60–90 cm (24–36 in) deep along one edge of the terrace. That depth is enough for a bench, airflow behind pots, and a narrow maintenance path without consuming the entire space.
Measure three things before you buy anything
Take five minutes and measure:
- Clear walking width: keep at least 75 cm (30 in) for comfortable passage.
- Railing height: many terraces are 90–110 cm (35–43 in). This affects how tall your display should be so trees don’t disappear behind the rail visually.
- Sun hours: track direct sun on a weekend—bonsai respond dramatically to light. A terrace with 4–6 hours of sun supports many outdoor species; 6–8 hours opens the door to pines, junipers, and sun-hungry flowering types (with careful watering).
Layout strategy: build a “tiered gallery” that still reads calm
The cleanest terrace bonsai gardens use a simple hierarchy: one anchor tree, a supporting group, and negative space. Negative space isn’t empty—it’s what makes the bonsai feel precious instead of crowded.
The three-tier display rule (works in small footprints)
Use three heights so the foliage masses don’t line up like soldiers:
- Low tier: 30–45 cm (12–18 in) high—good for accent kusamono (grass plantings) or smaller shohin.
- Mid tier: 60–75 cm (24–30 in) high—the “main stage” for most bonsai.
- High tier: 90–105 cm (35–41 in) high—used sparingly for one special piece or seasonal feature.
If your terrace is narrow, one continuous bench at mid-height plus one or two “spotlight” pedestals will read intentional and keep maintenance simple.
Spacing that prevents problems (and looks better)
Bonsai need airflow; terraces often trap heat against walls. Plan for these minimums:
- Between pots: 10–15 cm (4–6 in) gap so foliage doesn’t touch and pests don’t hop easily.
- Behind pots to a wall: 7–10 cm (3–4 in) to prevent heat scorch and allow cleaning.
- From railing edge: keep trees 15 cm (6 in) back to reduce wind-rock and accidental knocks.
Microclimate control: wind, heat, and water are the real design brief
A terrace is a weather amplifier. Wind dries soil fast, reflected heat bakes shallow pots, and rain can be oddly uneven if you’re under an overhang. Designing your terrace bonsai garden is really designing its microclimate.
“Wind is a major driver of plant water loss; even moderate wind can increase transpiration and evaporative demand.” — Royal Horticultural Society (RHS), 2023
This matters because bonsai pots are intentionally small. You’ll protect your collection more with smart placement than with heroic watering.
Wind buffering without blocking light
Try one of these practical options:
- Reed or bamboo screening on the railing (about 1.5 m x 3 m roll): reduces gusts while filtering light.
- Slatted wood panel with 1–2 cm gaps: a designer look, good airflow, strong wind reduction.
- Clear polycarbonate panel on the windward side: best when you need maximum light, but watch heat buildup.
Heat management: treat paving like a radiator
If your terrace is tiled or concrete, it radiates heat upward. Place bonsai on stands so pots aren’t sitting directly on hot paving. Aim for 5–10 cm (2–4 in) clearance under each pot for airflow.
Also consider a light-colored outdoor rug under the display zone. It can reduce heat reflection and makes fallen leaves easier to sweep.
Material palette: benches, stands, and a floor plan that feels “designed”
Think of the terrace as a small gallery room. You want a consistent material story so the bonsai remain the stars.
Bench choices that work for bonsai
For most terraces, a bench at 70 cm (28 in) high is ideal: you can inspect branch structure without crouching, and watering is comfortable.
Suggested dimensions for a versatile bench: 120 cm (48 in) long and 30 cm (12 in) deep. That fits 3–5 medium bonsai depending on pot size and spacing.
Cost ranges (so you can plan realistically)
- DIY cinder block + cedar plank bench: about $45–$90 total (depending on plank quality).
- Powder-coated metal plant bench (120 cm): typically $120–$250.
- Hardwood or teak bench: often $250–$600.
- Bamboo privacy screen roll: about $40–$80.
- Basic drip irrigation kit for container plants: around $35–$90.
Plant selection: bonsai varieties that behave well on terraces
Terraces reward resilient species—trees that tolerate wind, sun shifts, and slightly irregular watering. Below are specific bonsai candidates with clear reasons they work in terrace conditions. Always match choices to your winter lows and summer heat.
Reliable outdoor bonsai for sunny terraces (6–8 hours sun)
- Juniper (Juniperus procumbens ‘Nana’): tough, wind-tolerant, classic silhouette; excellent for beginners and renters because it handles relocation better than many conifers.
- Japanese black pine (Pinus thunbergii): loves sun and airflow; a strong choice if you can commit to technique (candling, needle work) and consistent watering.
- Trident maple (Acer buergerianum): great ramification potential and strong response to pruning; appreciates protection from scorching reflected heat in the hottest afternoons.
Part-sun terrace bonsai (4–6 hours sun, bright shade the rest)
- Japanese maple (Acer palmatum ‘Kiyohime’): compact habit and refined leaves; needs protection from harsh midday sun and wind to prevent leaf scorch.
- Chinese elm (Ulmus parvifolia): forgiving, fast to develop, tolerates urban conditions well; excellent if your terrace has variable light.
- Flowering quince (Chaenomeles japonica): spring flowers and tough constitution; looks fantastic as a seasonal “feature” tree near seating.
Accent plants (kusamono) that finish the composition
Accents make a bonsai terrace feel curated rather than like a plant storage area.
- Hakone grass (Hakonechloa macra ‘Aureola’): soft movement, bright color, thrives in part shade and looks elegant in shallow ceramics.
- Dwarf mondo grass (Ophiopogon japonicus ‘Nana’): tidy, drought-tolerant once established, great for edge accents.
- Mini hosta (Hosta ‘Blue Mouse Ears’): bold leaf texture for shadier terraces; keep well-watered and protect from hot wind.
Quick comparison: which bonsai suits your terrace conditions?
| Species/Variety | Best Sun | Wind Tolerance | Water Demand (Terrace) | Design Role |
|---|---|---|---|---|
| Juniperus procumbens ‘Nana’ | 6–8 hrs | High | Medium (can dry fast) | Evergreen anchor |
| Ulmus parvifolia (Chinese elm) | 4–6 hrs | Medium | Medium | Reliable “workhorse” tree |
| Acer palmatum ‘Kiyohime’ | AM sun, PM shade | Low–Medium | Higher (hates drying out) | Delicate focal point |
| Pinus thunbergii | 6–8 hrs | High | Medium | Sculptural statement |
| Chaenomeles japonica | 4–6+ hrs | Medium | Medium | Seasonal flower feature |
Step-by-step: set up a terrace bonsai display in a weekend
This is the practical build order I use when designing small-space displays—because it prevents the common mistake of buying trees first and discovering you have nowhere stable to put them.
- Clear and mark zones: tape off a 60–90 cm deep display strip and a 75 cm clear walkway. Live with it for a day.
- Add wind filtering: attach a screen to the windward side first. Even a partial screen can reduce drying dramatically.
- Install the main bench: aim for 70 cm height, 120 cm length. Confirm it’s level—shims are fine.
- Create one “spotlight” pedestal: a small stand at 90–105 cm for a feature tree. This makes the whole terrace feel designed.
- Place drip trays or risers: raise pots 5–10 cm off the surface for airflow; add trays only where runoff is an issue (standing water invites root trouble).
- Set trees by light needs: sun lovers on the brightest end; maples and delicate deciduous slightly back where they get afternoon protection.
- Add one accent cluster: 1–3 kusamono plants grouped at the low tier. Stop there. Leave negative space.
- Plan water: position a small watering can and hose connection so you don’t drag water across seating every day.
Three real-world layout scenarios (with workable numbers)
Scenario 1: The renter’s narrow balcony terrace (1.2 m x 3 m)
You’re renting, so drilling into walls may be limited. The trick is a single linear gallery that doesn’t steal floor space.
Layout: Put a 120 cm x 30 cm bench along the railing, leaving 75 cm walkway. Add one vertical plant stand in a back corner for height. Use a bamboo screen zip-tied to the railing for wind.
Tree mix: Juniper ‘Nana’ as the evergreen anchor, Chinese elm for resilience, and one flowering quince for seasonal drama. Keep delicate maples for calmer, sheltered balconies.
Budget approach: cinder blocks + plank bench ($45–$90), plus a $40–$80 screen. Total setup can stay around $100–$200 before trees, and it moves with you.
Scenario 2: The family terrace that must still function (4 m x 5 m)
This terrace needs to host dinner, kids, and plants. The design move here is to treat bonsai like a “sideboard” rather than a full garden.
Layout: Use an L-shaped display: one 180 cm bench along the wall (mid tier) and two pedestals near the corner for seasonal rotation. Keep the center open for a table, with at least 90 cm clearance behind chairs.
Tree mix: One Japanese black pine as the sculptural anchor, plus trident maple for deciduous texture. Use accents like dwarf mondo grass to soften edges without inviting chaos.
Maintenance hack: put the thirstiest trees closest to the water source. It sounds obvious, but it’s the difference between consistent care and skipped days.
Scenario 3: The high-rise wind tunnel (2 m x 4 m, strong gusts)
High-rise terraces often have intense wind that desiccates foliage and wobbles stands. The priority is stability and wind filtering.
Layout: Choose heavier benches (metal or solid wood) and keep trees 15–30 cm back from the railing. Add a slatted screen panel on the windward end. Use tie-down wire or discreet museum putty for display pots on especially gusty days.
Tree mix: Junipers and pines tolerate wind better than thin-leaved deciduous trees. If you want a maple, place it behind the wind screen and consider a slightly deeper pot to slow drying.
Water reality: Expect watering once daily in summer, sometimes twice during heat waves. The University of California Agriculture and Natural Resources notes that container plants can require frequent irrigation during warm conditions because they dry faster than in-ground plantings (UC ANR, 2020).
Sunlight planning: simple placement rules that protect trees
Bonsai are sensitive to small shifts—two feet closer to a white wall can mean leaf scorch from reflected heat. Use these placement rules:
- Most conifers: give the brightest zone, typically 6–8 hours direct sun.
- Japanese maples: aim for 3–5 hours of morning sun, then bright shade.
- Rotate weekly: turn pots a quarter turn every 7–10 days for balanced growth (unless you’re intentionally developing one-sided movement).
DIY alternatives that still look designer
If you want the refined “bonsai terrace” look without boutique pricing, focus on consistency rather than expensive materials.
- Stands: paint all mismatched stands the same matte charcoal. A unified color reads intentional and makes foliage pop.
- Backdrop: use an outdoor fabric panel or reed fencing to create a calm background. The trees read better against one quiet surface than against busy railings and neighboring balconies.
- Topdressing: a thin layer of matching topdressing (like fine gravel) on accent pots ties the display together visually and reduces splash when watering.
Maintenance expectations: what it really takes (and how to keep it pleasant)
A terrace bonsai display is not high labor, but it is high consistency. You’re trading lawn mowing for frequent small check-ins.
Weekly time budget
- Spring/summer: plan 30–60 minutes per week beyond watering for pruning, cleaning, and turning pots. Watering itself may be 5–10 minutes daily depending on heat and wind.
- Fall: about 20–40 minutes per week—less growth, more leaf cleanup for deciduous trees.
- Winter (outdoor hardy trees): 10–20 minutes per week checking moisture and wind protection, plus after storms.
Seasonal tasks you can schedule
- Early spring: repot as needed (many bonsai are repotted every 1–3 years depending on species and vigor); refresh topdressing; inspect wire bite.
- Late spring/summer: pest monitoring (aphids, spider mites); pinching and selective pruning; manage sun scorch with shade cloth if needed.
- Fall: reduce nitrogen-heavy feeding; prepare windbreaks; clean benches and check stability before winter storms.
- Winter: protect pots from freeze-thaw if your climate demands it (group pots, insulate, move to a sheltered corner).
One practical note: if your terrace is fully exposed and you travel often, build the design around drought-tolerant species and add a simple drip line. A basic kit in the $35–$90 range can pay for itself by preventing one missed watering from becoming a serious setback.
Small details that make the terrace feel like a bonsai garden (not a plant shelf)
Design lives in the details: what you see from the sofa, what the eye lands on first, and what’s intentionally absent.
- One hero tree per season: rotate a flowering quince in spring, a lush elm in summer, a maple with fall color, and an evergreen pine or juniper for winter structure.
- Keep tools hidden: a slim outdoor storage bench prevents visual noise. Clutter is the fastest way to make bonsai feel like chores.
- Lighting (optional but powerful): one warm spotlight aimed at the anchor tree makes the terrace feel like an evening room. A simple low-voltage light can be $20–$60.
When it’s working, a terrace bonsai display garden feels like you’re stepping into a calm, miniature landscape—one you can adjust with a turn of a pot or a clipped shoot. And the best part is that it stays flexible: as your collection changes, the gallery changes with it, without ever needing more square footage—just better decisions.
Sources: Royal Horticultural Society (RHS), “Wind and plants” (2023). University of California Agriculture and Natural Resources (UC ANR), guidance on container plant irrigation and drying rates (2020).