Rooftop Urban Farm Setup Guide
The elevator doors open, and the roof hits you first: a gust of warm air, a glare off white membrane roofing, and the unmistakable sound of wind scraping past vent stacks. You came up here with a dream of baskets of tomatoes—but the reality looks like a hostile parking lot for HVAC units. The good news is that rooftops don’t need to be “garden-friendly” to become productive. They need a clear plan: weight, wind, water, and a layout that turns harsh exposure into a dependable growing space.
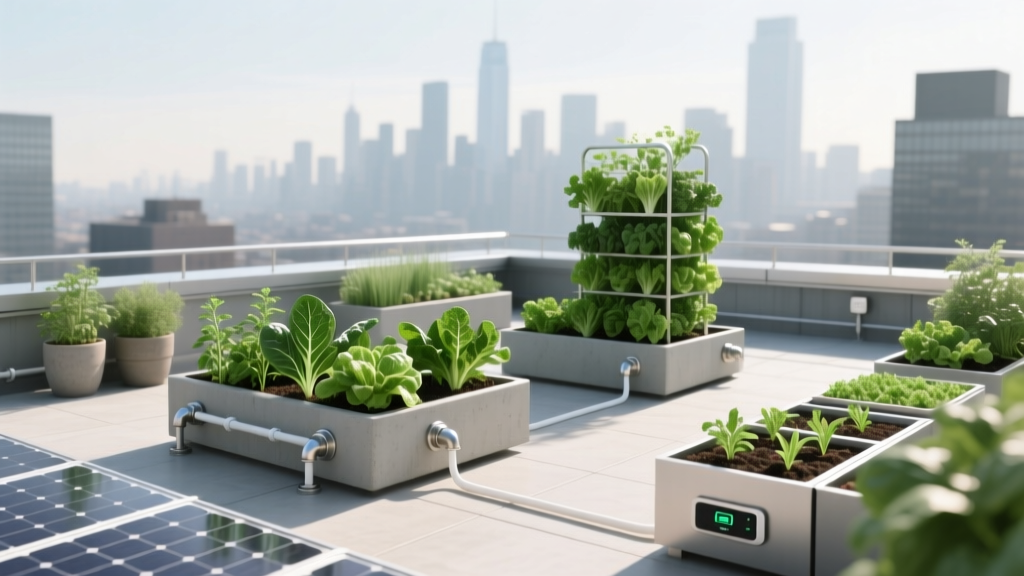
I’m going to walk you through a rooftop farm setup the way I’d design it on a site visit: starting with constraints, then establishing a layout grid, then selecting plants and containers that behave well up high. Along the way, you’ll see real dimensions, costs, and three common rooftop scenarios—because your roof may be tiny, shared, shaded, or all three.
Start with the roof’s reality check (before you buy anything)
1) Load capacity: the number you can’t guess
Rooftop farming is as much about engineering as it is about growing. Saturated soil is heavy, and containers concentrate load in small footprints. The American Society of Landscape Architects notes that intensive green roofs can range from 80–150 lb/ft² saturated, while extensive systems are much lighter (ASLA, 2023). That doesn’t mean your roof can handle it—only a building professional can confirm allowable live loads.
If you rent or you’re unsure, design around conservative assumptions: use lightweight potting mixes, smaller containers, and distribute weight on paver “runways” or load-spreading boards. Aim to keep the heaviest elements (water barrels, large planters) near structural supports or parapet walls where load is often better supported—confirm with your building team.
2) Sun and wind: rooftop microclimate is extreme
Most roofs offer fantastic sun but punishing wind. Fruit crops typically want 6–8 hours of direct sun; leafy greens can produce with 4–6 hours. Wind, however, can shred leaves, topple trellises, and dry containers in a day. A windbreak isn’t optional; it’s the roof’s version of a fence.
3) Water access and drainage: plan for the boring parts
Dragging a watering can up stairs gets old by week two. If there’s no hose bib, plan for a narrow-profile water storage strategy and drip irrigation fed by a timer. Also: never block roof drains. Keep a clear 24-inch access zone around drains and mechanical equipment so maintenance crews can work and water can move during storms.
For safe irrigation and water quality, follow local codes and use backflow prevention where required. For general best practices on edible gardening, the USDA’s home gardening guidance emphasizes consistent moisture and soil fertility management (USDA, 2020).
Design principles that make rooftop farms work
Define your “working spine” first
The best rooftop layouts begin with circulation. Think of a simple spine—a clear walkway that connects the door/hatch to your main growing zone and the water source. Make the primary path 36 inches wide if you’ll carry bins or use a small cart; 24 inches is workable for tight roofs.
Then branch short “aisles” into growing bays. This prevents the classic rooftop problem: pots scattered everywhere, forcing you to step over irrigation lines and squash basil every time you harvest.
Use a grid so you can scale up without chaos
I like a rooftop grid based on standard module sizes that fit through doors and elevators: 2' x 4' and 2' x 6' planters, plus 5–20 gallon containers. A grid lets you swap crops seasonally without redesigning the whole roof.
As a starting point for a small but serious edible roof, design a 10' x 12' growing area (120 ft²) with:
- One 36-inch main path (runs 12')
- Two growing bays on either side (~4' wide each)
- Planters aligned so irrigation can run straight lines
Design for wind like you would for deer in a backyard
Rooftops need protective edges. A simple windbreak approach:
- Permeable barrier (50–60% open) like lattice or snow fence reduces turbulence better than a solid wall.
- Place windbreaks on the prevailing wind side; keep them a few inches off the roof surface so water and debris don’t accumulate.
- Anchor carefully—never penetrate roofing without professional approval.
“Windbreaks are most effective when they are semi-permeable; solid barriers tend to create strong turbulence on the leeward side.” — USDA National Agroforestry Center, windbreak guidance (USDA NAC, 2015)
Choose container depth by crop, not by guesswork
Container depth dictates root temperature stability and water holding. Practical minimums:
- Leafy greens: 6–8 inches
- Herbs: 8–10 inches (woody herbs prefer deeper)
- Peppers and bush tomatoes: 12–18 inches
- Cucumbers (trellised): 12–18 inches
- Carrots: 10–12 inches for shorter types; deeper for storage carrots
For rooftop durability, prioritize food-safe fabric grow bags, fiberglass planters, or cedar boxes lined appropriately. Avoid untreated construction lumber that can warp quickly under rooftop exposure.
Layout strategies you can copy (with step-by-step setup)
Strategy A: The “U-Shape Farm” for easy access
This layout is ideal when your roof door opens into a usable rectangle. You get a central standing zone with planters on three sides—like an outdoor kitchen, but for harvesting.
- Measure your workable zone (exclude drains/HVAC clearance). Mark a rectangle with chalk. Example: 12' x 14'.
- Mark a 36" center aisle from the entry to your standing zone.
- Set three planter runs: left, right, and far end. Keep 24" between planters and any parapet to allow airflow and inspection.
- Add a windbreak line on the windward edge: 6' tall lattice panels zip-tied to a freestanding frame weighted with sandbags.
- Install drip irrigation with a battery timer. Run a main line along the spine; branch with 1/4" lines to each planter.
- Mulch immediately (1–2" of straw or compost) to slow rooftop evaporation.
Strategy B: The “Linear Rail” for narrow roofs
If your roof is long and skinny—common on rowhouses—go linear. Keep everything against one side so you’re not weaving through pots.
- Reserve a continuous path at least 24" wide the entire length.
- Cluster planters in blocks of 2' x 6' with 12" gaps between blocks for access.
- Trellis vertically with a tensioned wire system to keep the footprint tight (great for cucumbers and pole beans).
- Add a narrow potting station (18" deep shelf) near the entry for tools and harvesting bins.
Strategy C: The “Shared Roof Pods” for renters
On shared roofs, you need a layout that looks tidy, moves if necessary, and doesn’t sprawl. Pods are clusters of matched containers with a single irrigation zone.
- Choose one pod size: for example, six 10-gallon fabric pots on a 4' x 6' outdoor mat.
- Assign one crop family per pod (nightshades, greens, herbs) to simplify fertilizing and pest checks.
- Use a freestanding screen behind pods for wind protection and privacy.
- Label everything with waterproof tags—shared roofs benefit from clarity.
Plant selection: varieties that behave well on rooftops
Rooftops reward compact plants, quick harvests, and varieties bred for containers. They also punish anything that needs constant even moisture without help—so pick plants that forgive a missed watering and respond well to drip irrigation.
Tomatoes: choose compact, productive types
- ‘Sun Gold’ (cherry): heavy producer, great flavor, reliable in high heat; needs sturdy trellis and 18–24" spacing in large containers.
- ‘Patio Choice Yellow’: compact habit, earlier fruiting, ideal for a 10–15 gallon pot.
- ‘Celebrity’ (semi-determinate): dependable slicer with manageable size; give it a 15–20 gallon container and strong cage.
Peppers: wind-tolerant and container-happy
- ‘Shishito’: prolific, quick to harvest, handles container culture well; space 12–16".
- ‘Jalapeño M’: reliable set in heat; sturdy plants that don’t demand massive root volume.
- ‘Lunchbox’ mini sweet peppers: compact, kid-friendly, high yield per square foot.
Greens that don’t sulk in rooftop conditions
- ‘Lacinato’ kale: tougher leaves, good wind tolerance, long season.
- ‘Red Russian’ kale: fast growth, tender leaves, cold-tolerant for shoulder seasons.
- ‘Space’ spinach: dependable germination; best in spring/fall when rooftops cool at night.
- ‘Buttercrunch’ lettuce: reliable head lettuce; appreciates partial afternoon shade in peak summer.
Herbs: pick the ones that love heat and neglect
- Thyme (‘English’): thrives in dry-ish containers; great edging plant.
- Oregano (‘Greek’): vigorous and forgiving; perfect for a “perennial corner” pot.
- Basil (‘Genovese’ and ‘Prospera’ downy mildew resistant): high payoff; ‘Prospera’ is a smart rooftop choice where humidity spikes after storms.
- Chives: perennial, compact, early spring harvest.
Climbers for vertical yield
- ‘Diva’ cucumber: productive, good flavor, performs well on trellis; provide 12–18" spacing.
- ‘Fortex’ pole bean: long harvest window, climbs readily, high yield per footprint.
Comparison table: containers and systems that make sense up high
| System | Best for | Typical depth | Water needs | Approx. cost (USD) | Notes for rooftops |
|---|---|---|---|---|---|
| Fabric grow bags (10–20 gal) | Tomatoes, peppers, herbs | 12–18 in | Higher (dries faster) | $6–$15 each | Lightweight and breathable; add saucers/trays only if drainage won’t be blocked |
| Cedar raised bed (2' x 4') | Greens, mixed plantings | 10–12 in | Moderate | $80–$200 | Stable and tidy; line to protect wood and avoid soil loss |
| Self-watering planter (SIP) | Renters, consistency seekers | 10–16 in + reservoir | Lower (more consistent) | $40–$120 | Excellent for reducing missed-watering stress; watch total weight when full |
| Vertical pocket planter | Strawberries, herbs, lettuces | 4–6 in pockets | High (small volume) | $25–$80 | Great wind profile if anchored; best with drip line at top |
Real-world scenarios (and how the design changes)
Scenario 1: The micro-roof (8' x 10') with full sun and high wind
On a tiny roof, you’re not building a farm—you’re building a menu. Prioritize vertical yield and daily-harvest crops.
Layout: One 24" path, two 2' x 4' beds (or four 10-gallon bags) along the leeward side, plus a 6' trellis panel. Keep everything inside a single “wind shadow” created by a permeable screen.
Planting plan:
- 1 cherry tomato (‘Sun Gold’) in a 20-gallon bag
- 2 peppers (‘Shishito’) in 10-gallon bags
- 1 cucumber (‘Diva’) at the trellis base
- 1 bed of cut-and-come-again greens (kale + lettuce)
Cost reality: A tight, high-function setup with drip can land around $250–$600 depending on how much you DIY (containers, soil, timer, trellis materials).
Scenario 2: The shared rental roof with partial shade (4–5 sun hours)
Shade is not a dealbreaker; it’s a crop selector. Focus on greens, herbs, and a few fruiting plants if the brightest zone gets afternoon sun.
Layout: Two pods (each 4' x 6') using matching containers for a clean look. Add a narrow shelf for a communal tool bin. Keep your footprint consistent so neighbors and building management see order, not sprawl.
Planting plan:
- Greens: ‘Buttercrunch’ lettuce, ‘Lacinato’ kale, arugula (succession sow every 2–3 weeks)
- Herbs: chives, parsley, mint (mint in its own pot)
- Optional: 1 compact tomato (‘Patio Choice Yellow’) only if you truly get 6 hours in one corner
DIY alternative: Build SIPs from two food-grade totes per planter. Budget $20–$35 per DIY SIP (tote, bulkhead fitting, wicking cups, overflow hole hardware), instead of buying premium self-watering planters.
Scenario 3: The big roof (20' x 30') with a hose bib—going “small farm”
If you have real square footage and water access, you can set up zones: production, propagation, composting (if allowed), and a small seating edge. The design goal is to keep it from becoming a maze.
Layout: A 36" main spine with three perpendicular “crop streets.” Use six to eight 2' x 6' raised beds, leaving 30" between beds for harvesting and a small cart. Place a potting bench near the door and a dedicated harvest wash tub (collapsible if needed).
Planting plan:
- Two beds for tomatoes + basil companion planting
- One bed for peppers + scallions
- Two beds for greens (spring/fall) and bush beans (summer)
- One bed for carrots (‘Nelson’) and beets (‘Detroit Dark Red’)
- One trellis line for cucumbers and pole beans
Budget reality: A larger setup can range from $900–$2,500, driven by raised bed materials, soil volume, trellis strength, and irrigation. The cost per harvest drops over time if you keep your infrastructure durable.
Soil, fertilizer, and irrigation: the rooftop trifecta
Lightweight soil mix that still holds water
Skip digging soil from the ground; rooftops do best with a high-quality potting mix designed for containers. A practical blend is potting mix plus compost, and a moisture-retentive amendment (like coconut coir). For raised beds, calculate volume: a 2' x 6' bed at 12" depth holds about 12 cubic feet of mix.
Drip irrigation pays for itself in saved plants
A basic drip kit with timer often costs $60–$150. On hot, windy roofs, that’s insurance. Start with two watering “programs”: one for thirsty fruiting crops, one for greens and herbs. Adjust seasonally as nights cool.
Fertilizing: containers need steady nutrition
Expect to feed fruiting crops regularly. A simple approach is an organic granular fertilizer at planting plus a liquid feed every 2–3 weeks once flowering begins. For greens, lighter feeding keeps leaves tender and prevents bitter growth in heat.
Maintenance expectations (so it stays fun)
Rooftop farms reward consistency more than intensity. Plan for 45–90 minutes per week in the main season for a small setup (watering checks, pruning, harvesting, scouting). Bigger roofs can take 2–3 hours per week, especially during peak tomato season.
Weekly rhythm
- 10 minutes: walk-through and pest check (undersides of leaves, new growth)
- 15–30 minutes: harvest and quick replanting of greens
- 10 minutes: trellis tie-ins and pruning tomatoes
- 10–20 minutes: refill reservoirs / verify drip emitters aren’t clogged
Seasonal tasks you’ll actually do
- Spring (2–3 weeks before last frost): start hardy greens; inspect containers, replace brittle irrigation lines
- Early summer: add shade cloth (30–40%) if lettuces bolt; increase mulch depth
- Mid-summer heat: water timing matters—early morning reduces stress; monitor for spider mites in dry wind
- Fall: sow spinach and kale again; clean and store stakes; top-dress beds with compost
Budget choices and smart DIY swaps
If you want your rooftop farm to feel designed—not improvised—spend where structure matters and DIY where it doesn’t.
- Spend on: a reliable timer, UV-resistant tubing, sturdy trellis hardware, and high-quality potting mix.
- DIY on: windbreak frames (freestanding), SIP planters from totes, and simple benches from sealed wood or recycled composite.
A practical starter list for a productive roof corner might look like this:
- 4 fabric grow bags (15–20 gal): $40–$60
- Potting mix + compost (approx. 20–25 cu ft): $120–$220
- Drip kit + timer: $60–$150
- Trellis materials: $30–$120
- Seeds/starts: $20–$60
That places many first builds in the $270–$610 range—less if you source containers secondhand, more if you buy finished planters.
Make it feel like part of your home (not an afterthought)
The final layer is design: repeat container styles, limit the color palette, and keep one clear edge for movement and views. Add a small seat only after your layout is working—one chair can be the difference between “I visit the roof to work” and “I go up there every evening and notice problems early.”
When the roof is organized—paths defined, irrigation predictable, wind softened—the plants stop feeling like a gamble. You’ll learn the roof’s patterns quickly: where the sun lingers, which corner dries first, and how a trellis can create a pocket of calm air. And that’s when a once-hostile rooftop starts producing in a steady, generous way—salad bowls, herb bundles, peppers by the handful—right where you least expected a garden could thrive.
Sources: American Society of Landscape Architects (ASLA), 2023; USDA Home and Garden guidance, 2020; USDA National Agroforestry Center windbreak guidance, 2015.