Backyard Garden Room Design Concepts
You step outside with a mug of coffee and immediately start doing mental math: the grill needs space, the dog needs a run, the sunniest corner is currently a dumping zone for pots, and the “lawn” is really a patchwork of compacted soil and wishful thinking. The yard isn’t small so much as it’s undefined—one big leftover space that never quite feels finished.
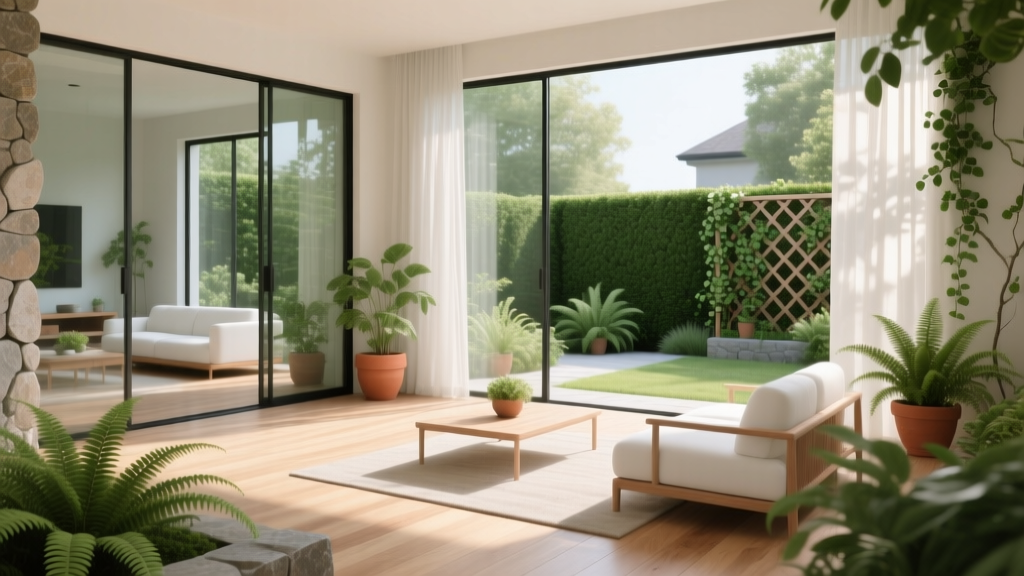
A garden room fixes that. Not a literal room with four walls, but an outdoor “space with purpose” defined by edges, a floor plane, and a focal point—just like an interior. The goal isn’t to fill the yard with plants; it’s to shape a series of comfortable, usable places: a dining nook, a reading corner, a fire circle, a kids’ play patch, a cutting garden you can actually reach.
Below, I’ll walk you through practical design principles, layout strategies, plant choices that behave well, and three real-world scenarios—so you can design a backyard that feels intentional, even if you’re renting or working with a tight budget.
Start With a “Room Program,” Not a Plant List
Before we talk plants, decide what your garden room needs to do. I like to write a quick program the way an architect would, then translate it into shapes and measurements.
Pick 1–3 primary uses
Most backyards fail because they try to do six things in one open rectangle. Choose your top uses and give each one a defined footprint.
- Dining: A table zone wants a minimum of 10 ft x 10 ft for a 4-seat set, and 12 ft x 14 ft for 6 seats with chair clearance.
- Lounge/reading: Two chairs + small table fits in 7 ft x 7 ft, but feels better at 8 ft x 10 ft.
- Fire pit circle: Aim for a 12–14 ft diameter circle so seating doesn’t feel cramped.
As a reference point for comfort, the American Society of Landscape Architects notes that outdoor spaces work best when circulation and use zones are sized for real human movement, not just “what fits.” Think in clearances and pathways, not just square footage (ASLA, 2020).
Design Principles That Make a Garden Room Feel Like a Room
1) Define edges with “soft walls” and “hard walls”
Edges are what turn a yard into rooms. You don’t need fencing everywhere; you need enclosure in the right places.
- Soft walls: hedges, tall grasses, layered shrubs, espaliers, trellised vines.
- Hard walls: fences, screens, pergolas, raised planters, retaining walls.
For a room-like feel, aim for at least 30–60% enclosure on two or three sides. In a small yard, a single L-shaped screen plus planting can do the job.
2) Give the room a “floor”
Inside, you know where the living room is because the flooring changes. Outside, it’s the same. Choose one primary surface per room:
- Gravel: DIY-friendly, drains well; best with edging to keep it crisp.
- Pavers: clean, durable; higher cost but low maintenance.
- Deck tiles (renter-friendly): quick install over compacted soil or an existing patio.
- Turf/groundcover: soft underfoot; needs sun and irrigation planning.
Practical number: a comfortable main path is 36–42 inches wide. If two people will walk side-by-side, go 48 inches.
3) Create a focal point on purpose
A room without a focal point feels like a hallway. Your focal point can be:
- a small tree in a raised planter
- a sculptural pot (20–24 inches wide reads well from 15–25 feet)
- a water bowl or wall fountain
- a fire feature
“People feel comfortable in outdoor spaces that offer both prospect and refuge—an open view paired with a sense of protection.” — Stephen Kaplan, environmental psychologist, summarized in landscape research on preference patterns (Kaplan, 1995)
Translation: give yourself a place to sit with your back protected (a hedge, fence, or pergola), while you look out into a more open area.
Layout Strategies You Can Apply to Almost Any Backyard
The “Two-Room Split” for medium yards
If you have a typical suburban backyard—say 30 ft x 50 ft—divide it into two main rooms: a close-to-house living room and a back-of-yard garden room. Link them with one clear path.
- Room 1 (near house): dining + grill + herb pots, hard surface.
- Room 2 (back): lounge, fire pit, or a quiet reading nook with more planting.
This split stops the yard from feeling like a single empty stretch and makes the back area feel like a destination.
The “Diagonal Walk” for narrow side yards and long rectangles
Long yards can feel like bowling alleys. A diagonal path (even a stepping-stone line) breaks the tunnel effect and creates triangular planting beds that feel generous.
Use stepping stones set 18–24 inches apart (center-to-center) for comfortable adult stride. Add low lighting or reflective gravel if you’ll use it at night.
The “Courtyard Pocket” for renters and tiny patios
If you’re renting, the “garden room” is often a patio plus boundary planting in pots. Focus on vertical structure: a freestanding trellis, a slim bench, and two tall containers to create that sense of enclosure without permanent changes.
A good rule: use containers in 18–22 inch diameters for shrubs or small trees. Anything smaller dries too fast in summer and makes maintenance feel fussy.
Three Real-World Scenarios (with workable layouts)
Scenario 1: The 12 ft x 20 ft rental patio that feels exposed
Problem: You have space, but no privacy, no shade, and you don’t want to invest in permanent hardscape.
Design move: Build a “U-shaped” room with pots and a screen.
- Place a 6–8 ft freestanding screen (wood slats or metal panel) along the most exposed edge.
- Add two large containers (20 inch diameter) flanking the screen with tall evergreens.
- Lay interlocking deck tiles for a “floor” over 8 ft x 10 ft to define a seating area.
Budget notes: Deck tiles often run about $3–$8 per sq ft. An 8 x 10 area is 80 sq ft, so plan roughly $240–$640 for the floor plane. DIY screen panels vary widely, but a basic kit can be done around $150–$400.
Scenario 2: The 30 ft x 50 ft family yard with “nothing happening”
Problem: Big lawn, no structure. Kids play in the middle, adults hover near the door.
Design move: Create two rooms plus a simple loop path so everyone circulates naturally.
- Near-house room: 12 ft x 14 ft paver or gravel dining terrace.
- Back room: 14 ft diameter fire pit circle with gravel and chairs.
- Loop path: 42-inch wide decomposed granite connecting both rooms and skirting the lawn play area.
Cost reality check: Decomposed granite installed DIY (fabric + edging + DG) can land around $2–$5 per sq ft depending on base prep. If your path and pads total 250 sq ft, that’s roughly $500–$1,250 in materials.
Scenario 3: The sunny corner garden room for a couple who loves to cook
Problem: The yard gets sun, but the planting is random; herbs struggle in shade and the seating bakes in afternoon heat.
Design move: Combine an herb-and-citrus “kitchen room” with filtered shade.
- Place a small table in a 8 ft x 8 ft gravel pad.
- Add a pergola or shade sail targeting the hottest window (usually 2–6 pm).
- Install a raised herb bed: 2 ft x 6 ft is enough for a serious cook and stays reachable from both sides.
Sunlight target: Most culinary herbs want 6+ hours of sun for strong flavor; partial sun (4–6 hours) works for parsley and chives but can weaken basil and rosemary. This aligns with common extension guidance on herb productivity in full sun (e.g., University of Minnesota Extension, 2022).
Step-by-Step: Laying Out Your Garden Room on the Ground
Don’t design only on paper. Mark it in real scale so you can feel the clearances.
- Measure the yard and sketch it with fixed elements (doors, trees, property lines). Use a simple scale like 1 square = 1 ft.
- Mark your primary room with a hose or string. Start with a rectangle: 10 x 12 ft is a great “first room” size.
- Stand in it with a chair and a small table (or boxes). Check chair pull-out space: you want about 24–30 inches behind a chair for comfortable movement.
- Lay out paths using string lines: 36–42 inches wide for a main route.
- Place a focal point and view it from indoors. If it looks centered from the kitchen window, the whole yard immediately feels more intentional.
- Identify sun and shade: note where you get 6+ hours of sun, where you get morning-only sun, and where it’s bright shade.
- Decide on edges (screens, hedges, tall planters) to add enclosure to the seating zone.
Plant Selection: Specific Varieties That Act Like Architecture
In a garden room, plants aren’t just decoration—they’re walls, ceilings, and furnishings. Choose varieties that hold shape, tolerate pruning, and won’t outgrow their role in two seasons.
Evergreen structure (your “walls”)
- ‘Green Mountain’ boxwood (Buxus): dense, responds well to clipping; great for low hedges at 18–30 inches. Space plants about 18–24 inches apart for a continuous line. Works best with 4–6 hours sun or more.
- ‘Emerald Green’ arborvitae (Thuja occidentalis): a classic narrow screen for privacy. Expect mature width around 3–4 ft; space 30–36 inches apart for a solid screen without crowding.
- Wax leaf privet (Ligustrum japonicum, warmer zones): glossy, tough, fast privacy. Good choice when you need screening quickly and can commit to pruning.
Flowering shrubs for seasonal “softening”
- Hydrangea paniculata ‘Little Lime’: sturdy stems, reliable bloom, and it reads well as a mass. Give it about 3–5 ft width; space plants 3–4 ft apart.
- Rosa ‘Knock Out’ (landscape shrub rose): long bloom season with straightforward care; great for the outer edge of a room where you want color without staking.
- Viburnum carlesii (Korean spice viburnum): fragrance transforms a sitting area in spring; use near a bench so you actually notice it.
Ornamental grasses for movement and light (great in modern rooms)
- Calamagrostis ‘Karl Foerster’: upright, architectural, holds shape into winter. Space 24–30 inches apart.
- Pennisetum alopecuroides ‘Hameln’: soft fountain form, excellent along paths; space 24–30 inches.
Small trees to anchor a room (your “ceiling”)
- Amelanchier (serviceberry): multi-season interest (spring flowers, berries, fall color), generally well-mannered in residential gardens. Great as a focal point in a 4–6 ft diameter bed.
- Japanese maple (Acer palmatum, many cultivars): ideal for dappled shade rooms; place where it gets protection from harsh afternoon sun in hotter climates.
- Bay laurel (Laurus nobilis) in a pot: a “renters’ tree” for the kitchen garden feel; move it to shelter in cold winters.
Edibles that behave (productive without taking over)
- Thyme ‘Creeping’ between stepping stones (full sun; drought tolerant once established).
- Chives as an edging plant (easy, neat clumps, pollinator-friendly flowers).
- Compact blueberries like ‘Jelly Bean’ (check local suitability): ornamental plus edible; needs acidic soil and consistent moisture.
Material Choices: A Practical Comparison
| Surface | Best for | DIY difficulty | Typical cost (materials) | Maintenance notes |
|---|---|---|---|---|
| Decomposed granite (DG) | Paths, casual seating pads | Medium | $2–$5 per sq ft | Needs edging; occasional top-up and raking |
| Gravel (3/8" crushed) | Fast, affordable “floor” | Easy-Medium | $1.50–$4 per sq ft | Weed fabric helps; expect some migration without edging |
| Concrete pavers | Dining terraces, clean modern rooms | Medium-Hard | $4–$12 per sq ft | Weeds in joints unless polymeric sand is used; long lifespan |
| Interlocking deck tiles | Renters, quick patio refresh | Easy | $3–$8 per sq ft | Sweep debris; ensure drainage under tiles |
Budget Planning and DIY Alternatives That Still Look Designed
If you’re prioritizing impact per dollar, spend first on layout and edges. Plants can fill in over time, but a good plan makes even a sparse garden feel finished.
- Best “design return” purchase: edging. A crisp line instantly upgrades gravel and planting beds. Consider steel edging or even pressure-treated bender board as a budget option.
- DIY privacy wall: cattle panel + wood frame with a fast vine (annual) while perennials establish. The panel is sturdy, slim, and looks modern.
- Shop small trees smart: a 5–7 gallon tree often establishes faster than a stressed bargain tree in a tiny pot. It’s also easier to plant than a heavy boxed specimen.
- Phased planting: buy structure first (evergreens + small tree), then perennials, then “extras” like seasonal pots.
For renters, focus spending on things you can take with you: containers, trellises, furniture, solar lighting, and deck tiles.
Lighting and Comfort: The Details That Make You Use the Space
A garden room that looks good at noon but feels gloomy at dusk won’t get used. Plan simple layers:
- Path lights: space about 6–8 ft apart for guidance (lower brightness, more fixtures is better than harsh flood lighting).
- Warm white string lights: attach to a pergola or between two posts to create an “outdoor ceiling.”
- Task light by the grill so you’re not cooking in the dark.
And don’t skip shade. A shade sail over an 8 x 10 ft seating pad is often the difference between “pretty” and “livable,” especially in yards with 8+ hours of direct summer sun.
Maintenance Expectations: What It Takes to Keep a Garden Room Crisp
A well-designed garden room is easier to maintain because it has fewer messy edges and more intentional surfaces.
- Weekly (typical): plan on 30–60 minutes per week in the growing season for deadheading, quick weeding, and checking irrigation/containers.
- Monthly: rake gravel back into place, clip hedge tips lightly, refresh mulch where it thins.
- Spring: cut back ornamental grasses, feed container plants, top-dress beds with compost.
- Summer: deep water shrubs/trees during heat spells; containers may need water 3–5 times per week during hot weather.
- Fall: clean up leaves (especially off gravel), plant bulbs, prune only as needed (save major pruning for appropriate seasons per species).
- Winter: protect tender container plants; check that screens and trellises are secure after storms.
If you want lower maintenance, lean into larger mulched beds, fewer fussy perennials, and more structural shrubs and grasses. It’s the difference between a room that stays tidy with a quick “reset” and a room that always looks mid-project.
Citations and Design References Worth Trusting
Two sources I routinely align with for homeowner-friendly, research-backed guidance:
- American Society of Landscape Architects (ASLA). Residential Landscape Architecture principles and outdoor space planning resources (ASLA, 2020).
- University of Minnesota Extension. Growing herbs in home gardens: light needs and productivity considerations (University of Minnesota Extension, 2022).
And for the underlying comfort principle of refuge and view, the research lineage is strong:
- Kaplan, S. The restorative benefits of nature: Toward an integrative framework (Kaplan, 1995).
A Sample “Garden Room Recipe” You Can Steal
If you want a fast, reliable starting point, here’s a simple recipe that works in many climates and yard sizes:
- Make a room: an 10 x 12 ft gravel pad with steel edging.
- Add enclosure: one 6 ft tall screen panel plus a row of ‘Karl Foerster’ grasses spaced 24 inches apart.
- Anchor it: one serviceberry (or climate-appropriate small tree) as the focal point.
- Layer shrubs: 3 ‘Little Lime’ hydrangeas spaced 3–4 ft apart on the outside edge.
- Finish with a lived-in detail: a pot of bay laurel near seating, plus thyme near stepping stones for scent.
Once that core is in, the rest is customization—color themes, a second room, a small water bowl, or swapping plants for your climate. The best part is this approach doesn’t require a massive overhaul. You’re simply giving the backyard what it’s been missing: a clear layout, comfortable proportions, and plant choices that act like structure, not clutter.
When you step back inside after the first weekend of marking and building, the yard will already feel different. Not because it’s full, but because it finally has edges, purpose, and a place you can picture yourself using—morning coffee, late dinner, or a quiet five minutes with your phone facedown on the table.