Deck Edible Ornamental Plant Choices
You step onto your deck with a mug of coffee and a plan: sit, breathe, enjoy. But the view is a little flat—maybe a couple of tired pots, a railing that feels exposed, and summer heat bouncing off the boards. You want privacy without building a wall, color without committing to a full garden bed, and snacks within arm’s reach. The trick is designing a deck planting layout that looks intentional from the start and still earns its keep in herbs, fruit, and edible flowers.
Think of your deck like an outdoor room. We’ll “furnish” it with plants that do double duty: ornamental structure plus something you can harvest. I’ll walk you through layout strategies, plant choices (with specific varieties), and three real-world scenarios—renter-friendly, family deck, and a narrow shaded deck—so you can copy what fits your space.
Design principles that make deck plantings feel designed (not “random pots”)
Start with circulation: keep a 36-inch walkway
Before you buy a single plant, mark where people actually walk. A comfortable path on a deck is about 36 inches wide—enough to pass someone carrying a tray without bumping pots. On smaller decks, you can tighten to 30 inches in a pinch, but you’ll feel it during gatherings.
Practical move: use painter’s tape to outline your “no-pot zone.” Everything else becomes planting territory—corners, rail edges, and the perimeter.
Use the “three heights” rule for instant structure
A deck planting reads well when it has:
- High: something vertical for privacy and a backdrop (3–6 ft tall)
- Mid: flowering or leafy fillers (12–30 in)
- Low: spillers or edging that softens container rims (6–12 in)
This is the same visual logic designers use in borders—just translated into containers. The bonus: the tall layer also casts a little shade, reducing pot drying in mid-summer.
Design around sun hours, not wishful thinking
On most decks, light is complicated: overhead sun, reflected heat from siding, and shade from railings or trees. Use these benchmarks:
- Full sun: 6–8+ hours (best for tomatoes, peppers, basil, most fruit)
- Part sun: 4–6 hours (great for many herbs, strawberries, leafy greens)
- Bright shade: 2–4 hours (mint, chives, some greens; ornamental leafy plants)
If you only do one “data” step: track sun for one day. A quick check at 9 a.m., 12 p.m., and 3 p.m. tells you more than guessing all season.
Right-size containers: volume matters more than diameter
Containers on a deck are a root environment. Too small and plants stall, bolt, or need constant watering.
- Tomatoes: 10–15 gallons per plant (a 16–20 in pot works)
- Peppers: 5–7 gallons
- Strawberries: 1 plant per 8–10 in pot, or 6–8 plants in a 24 in window box
- Dwarf blueberries: 15–20 gallons
- Herbs: 1–3 gallons each, unless you’re doing a mixed trough
Budget note: a sturdy 15-gallon resin pot often runs $25–$45, while a fabric grow bag is typically $6–$12 for a similar volume. Grow bags aren’t as “furniture-like,” but they’re light and renter-friendly.
Layout strategies: three deck “zones” that solve the common problems
Zone 1: The privacy-and-windbreak edge (rail line)
This is where edible ornamentals really shine. Along the railing, think in a repeating rhythm: tall, medium, medium, tall. Use long planters or grouped pots so the line reads continuous rather than spotty.
Spacing guideline: place large pots 18–24 inches apart along the rail so plants can fill in without crowding. If you’re using a single railing planter, aim for 24–36 inches long per “module.”
Zone 2: The harvest kitchen strip (closest to the door)
Put your most-used herbs within 6–10 steps of the kitchen door. You’ll actually harvest them if they’re convenient. This zone is also where scent matters—basil, thyme, rosemary, and lemon verbena are a daily pleasure.
Design cue: limit this area to 3–5 containers. Too many little pots get messy fast. If you want variety, use a single trough planter (roughly 24 x 10 inches) divided by plant habit—upright herbs in the back, trailers in front.
Zone 3: The “feature pot” focal point (the corner that needs a reason)
Every deck has a weak corner—too sunny, too empty, or visually noisy. Give that corner one statement container: a dwarf fruit, a dramatic edible ornamental, or a trellised vine. This is where people’s eyes land.
Choose a pot at least 18 inches wide for stability, especially if you’re training something upward. Wind on decks can topple narrow containers.
Step-by-step setup (a designer’s order of operations)
- Measure the deck and sketch a simple rectangle. Mark doors, grill area, and seating footprints.
- Mark a 36-inch path with tape so pots don’t creep into circulation.
- Identify sun zones: full sun (6–8+ hours), part sun (4–6), bright shade (2–4).
- Choose your “big three”: one tall privacy plant, one mid-layer flowering edible, one low spiller.
- Buy containers first (not plants). Match pot size to plant needs; plan 10–15 gallons for any large fruiting crop.
- Use a high-quality potting mix and add slow-release fertilizer if desired. A common approach is mixing in compost at about 20–30% by volume.
- Install supports now: tomato cages, trellis, railing hooks—before plants get big.
- Group pots in odd numbers (3 or 5) for a natural look, and repeat the same pot color to calm the scene.
- Mulch the surface (even in containers) with a thin layer to slow evaporation and reduce algae.
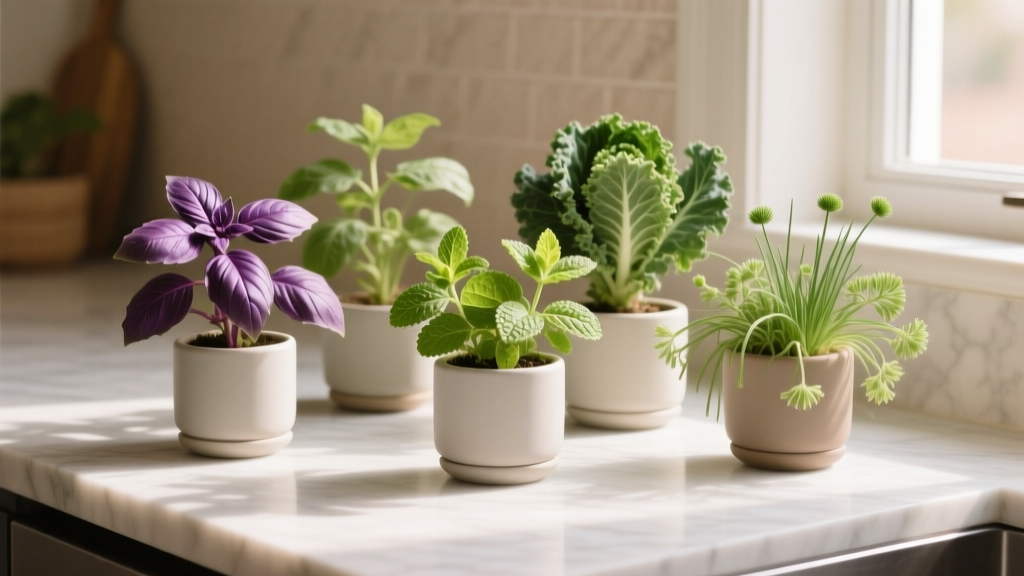
Plant selection: edible ornamentals that look intentional on a deck
These choices are curated for container performance, visual impact, and the reality of deck heat and wind. I’m including specific varieties that consistently work.
Tall layer (privacy + architecture)
Dwarf blueberry (Vaccinium) is one of the best edible “shrubs” for a deck—year-round structure, spring flowers, summer berries, and fiery fall color.
- ‘Jelly Bean’ blueberry: compact, attractive foliage; works well in a 15–20 gallon container.
- ‘Sunshine Blue’: evergreen in mild climates, pink flowers; a great focal plant.
Why it works: it reads like landscaping, not a vegetable garden. Just remember blueberries need acidic conditions; use an ericaceous potting mix and consistent moisture.
Okra ‘Red Burgundy’ is an edible ornamental that looks like a tropical flower spike. In full sun, it can reach 3–5 ft in a large pot and produces burgundy stems and pods.
Swiss chard ‘Bright Lights’ can act as a “privacy filler” in mid-height plantings, especially in long planters. The neon stems look like ornamentals, but you can harvest leaves for months.
Mid layer (color, scent, and repeatable rhythm)
Peppers are the deck designer’s secret: glossy foliage, flowers, fruit that changes color, and neat form.
- ‘Purple Flash’ ornamental pepper: purple-black foliage, red fruit; edible but usually hot and used as accent.
- ‘Lunchbox’ mini sweet peppers: productive, compact, kid-friendly snacking.
- ‘Numex Twilight’: clusters of upright peppers in shifting colors (ornamental impact for weeks).
Nasturtium ‘Empress of India’ gives you deep, velvety red flowers and round leaves that spill over pot edges. Flowers and leaves are edible (peppery), and it thrives even when soil is slightly lean—handy for beginners.
Calendula ‘Pacific Beauty’ brings warm orange/yellow blooms; petals are edible and bright in salads. It also handles cooler shoulder seasons, extending your deck color.
Low layer and spillers (soften edges + edible garnish)
- Thyme ‘Creeping’: fragrant, low, drought-tolerant once established; great along pot rims.
- Strawberries ‘Albion’ (day-neutral): tidy plants, continual fruiting in season, and attractive white flowers.
- Oregano ‘Kent Beauty’: ornamental trailing habit with pretty bracts; edible leaves and a soft drape.
Spacing note: in a 24-inch window box, plant strawberries about 8–10 inches apart so each crown can expand without crowding.
A quick comparison of top deck-friendly edible ornamentals
| Plant (Variety) | Best Sun | Recommended Container | Spacing | Ornamental Value | Edible Use |
|---|---|---|---|---|---|
| Blueberry (‘Sunshine Blue’) | 6–8+ hrs | 15–20 gal pot | 1 per pot | Year-round structure, fall color | Berries |
| Swiss chard (‘Bright Lights’) | 4–8 hrs | 3–5 gal or trough | 8–10 in | Neon stems, bold foliage | Leaves, stems |
| Pepper (‘Purple Flash’) | 6–8+ hrs | 5–7 gal | 1 per pot | Dark foliage, colorful fruit | Hot peppers (accent) |
| Nasturtium (‘Empress of India’) | 4–8 hrs | 2–3 gal or window box | 10–12 in | Trailing habit, rich flowers | Leaves, flowers |
| Strawberry (‘Albion’) | 6+ hrs (best) | Hanging basket/window box | 8–10 in | Flowers + cascading fruit | Berries |
Real-world scenarios (copy these layouts)
Scenario 1: The renter’s 6 x 10 ft deck (no drilling, low weight)
This is the classic rental: you can’t attach trellises to siding, and you don’t want to haul heavy ceramic pots up stairs. The goal is privacy and harvest without permanent changes.
Layout: Place two large grow bags in the back corners, plus a single 24-inch railing planter near the door for herbs.
- Corner grow bag #1 (15 gal): ‘Sunshine Blue’ blueberry (structure)
- Corner grow bag #2 (10–15 gal): okra ‘Red Burgundy’ or a patio tomato (summer height)
- Railing planter (24 in): thyme, chives, basil (3 herbs total)
- One hanging basket: strawberry ‘Albion’ (keeps fruit off the boards)
Cost snapshot: Two fabric grow bags ($20 total), one railing planter ($25–$40), potting mix ($15–$30), and plants ($25–$60) puts this plan in the ballpark of $85–$150, depending on plant size.
DIY alternative: Use food-safe 5-gallon buckets with drainage holes for peppers and herbs. Add a cheap saucer to protect decking.
Scenario 2: The family deck 12 x 16 ft (entertaining + kid-friendly harvest)
Here, the deck is a social space. The design needs to keep a wide path, hide the railing, and avoid plants that shed messy fruit right where people sit.
Layout: Run a repeating rail line of taller planters on the far edge, keep the grill side clear, and create a “snack station” near the seating.
- Rail edge: 4 large pots spaced 24 inches apart: two ‘Lunchbox’ sweet peppers (5–7 gal each) alternating with two ‘Bright Lights’ chard planters (long troughs or 5 gal)
- Feature corner: one 20-gal pot with ‘Sunshine Blue’ blueberry underplanted with creeping thyme
- Snack station: one 24 x 10 in trough with basil + chives + parsley (kept within 6–10 steps of the door)
Kid-friendly add-on: nasturtiums in a low pot at the edge of seating. Kids love picking the flowers, and you get a steady supply of salad garnish.
Scenario 3: The narrow, partly shaded condo deck (3–4 hours of sun)
This is where many edible gardens fail—too much ambition, not enough light. The right edible ornamentals still make it feel lush.
Layout: Focus on leafy and herb crops with ornamental foliage, and use vertical elements sparingly to avoid casting more shade.
- Mid-height backbone: Swiss chard ‘Bright Lights’ (color even in part sun)
- Herbs that tolerate part sun: mint (in its own pot), chives, parsley, lemon balm
- Edible flowers: calendula (often still blooms with 4–6 hours), nasturtium if you can give it the brightest spot
Spacing trick: Use fewer, larger containers rather than many small ones. Three 16-inch pots read calmer than nine mixed small pots, and the soil stays moist longer.
Sun, water, and heat: what decks do to plants (and how to respond)
Decks are harsher than ground beds. Wind increases transpiration; sun reflects from windows and siding; containers heat quickly. Plan on watering in midsummer once per day for thirsty fruiting plants in full sun, and 3–4 times per week for herbs and leafy greens in part sun. Self-watering containers can reduce frequency, but they cost more upfront (often $35–$80 each depending on size).
“Container plants can dry out quickly, especially on sunny, windy days; check them daily in hot weather.” — Royal Horticultural Society (RHS), 2023
For edible ornamentals, consistent moisture is also a flavor issue—basil and leafy greens turn bitter when stressed.
Maintenance expectations (so the deck doesn’t become a chore)
Weekly time: plan on 30–60 minutes per week for a deck setup of 8–12 containers. In peak summer heat, add quick daily watering checks (2–5 minutes).
Simple seasonal task list
- Spring (setup month): refresh potting mix top 2–3 inches; plant cool-season options like calendula and chard early.
- Early summer: pinch basil tips weekly; tie peppers/tomatoes to supports; start light liquid feeding every 2 weeks for heavy fruiters.
- Midsummer: deadhead calendula; harvest chard outer leaves; watch for aphids on peppers and rinse with water if needed.
- Fall: keep harvesting chard and herbs; protect blueberries from early frost if you want extended color; clean up spent annuals.
- Winter (if you store pots): empty and stack lightweight containers; move tender perennials indoors or treat as annuals.
Blueberries in containers may need winter protection in colder zones (moving pots close to the building or insulating around the container), because roots are more exposed than in-ground plantings.
Budget planning: three cost tiers that still look designed
Tier 1: Under $100 (starter, renter-friendly)
Choose 3–4 containers max: one 10–15 gal grow bag for a statement edible (okra or tomato), one herb trough, one strawberry basket. Use budget potting mix and one bag of compost. You’ll get impact without clutter.
Tier 2: $150–$300 (balanced design)
Add two large “anchor” pots (blueberry + pepper grouping), repeat container style for cohesion, and consider one self-watering container for the thirstiest plant. This tier usually looks the most professionally composed for the least effort.
Tier 3: $300–$600 (deck-as-garden-room)
Invest in matching large containers, a simple drip irrigation kit, and a few specialty plants (multiple blueberries for cross-pollination, or curated pepper varieties). This is where you can create a true green wall effect along the rail.
Notes backed by research (so your plant choices aren’t guesswork)
Edible ornamentals succeed when basic cultural needs are met—especially light and soil acidity for certain fruits.
- Blueberries require acidic conditions; extension guidance commonly recommends a soil pH around 4.5–5.5 for best performance. See University of Minnesota Extension’s blueberry guidance (2020).
- Container plantings dry quickly and need close monitoring during warm weather, especially in wind-exposed sites like decks. The RHS container care guidance emphasizes frequent checking in hot weather (RHS, 2023).
Citations:
Royal Horticultural Society (RHS). 2023. “Containers: compost, watering and feeding” (container plant care guidance).
University of Minnesota Extension. 2020. “Growing blueberries in home gardens” (pH and cultural requirements).
When your deck planting is built on these basics—sun hours, container volume, and a clear layout—you get the fun part: stepping outside to a space that feels finished. A blueberry with glossy leaves becomes your “shrub border,” peppers become living décor, chard reads like modern foliage design, and nasturtiums soften every hard edge while offering edible color.
Set your walkway first, anchor the corners with one or two big plants, then repeat a few reliable edible ornamentals down the rail. By the time you’re trimming basil for dinner, the deck won’t feel like a collection of pots—it’ll feel like a small garden room that just happens to feed you.