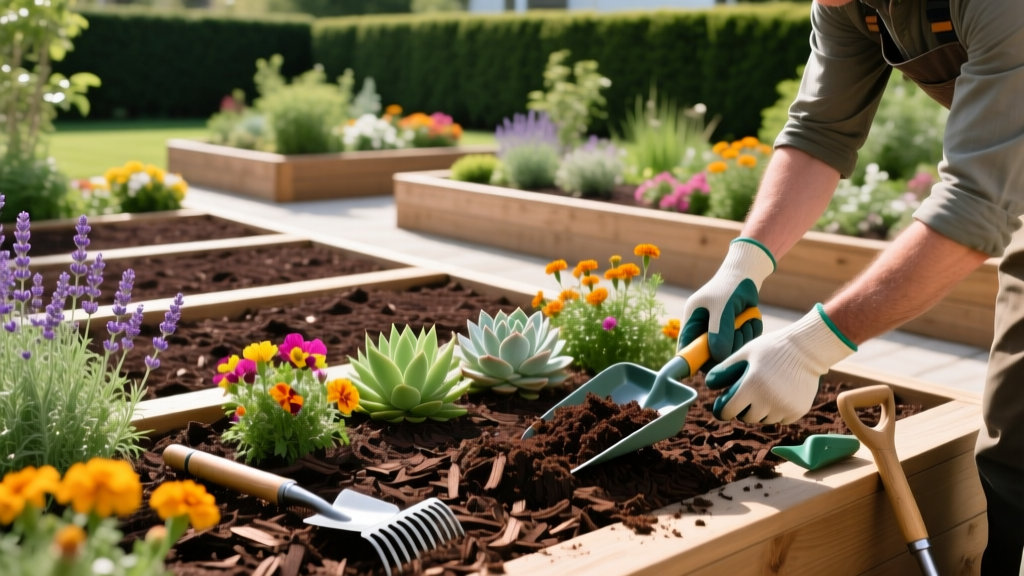
12 Garden Hacks for Garden Mulch Application
The most common mulching mistake isn’t choosing the “wrong” mulch—it’s using the right mulch in the wrong way. I see it all the time: a thin dusting that weeds laugh at, or a volcano piled against trunks that invites rot and rodents. Mulch is incredibly forgiving, but only if you treat it like a tool with a few rules of physics (and a couple of garden shortcuts).
Below are 12 mulch-application hacks I lean on in real gardens—raised beds, sloped yards, windy sites, and drought-prone summers—organized so you can pick what you need and get it done fast.
Before You Spread: Prep Tricks That Make Mulch Work Harder
1) “Donut, Not Volcano” Around Trees and Shrubs
Keep mulch 3–6 inches away from trunks and shrub crowns, then spread it outward like a donut. Piling mulch against bark traps moisture and can encourage decay, borers, and girdling roots over time. Aim for 2–4 inches deep in the root zone, tapering down near the base.
Real-world example: A neighbor’s young maple started struggling after a “helpful” spring mulch volcano. We pulled mulch back to a 5-inch gap, reduced depth to ~3 inches, and the trunk dried out within a week—new growth returned that season.
2) Use the “Cardboard + Mulch” One-Two Punch for Weed Resets
If you’re battling persistent weeds (crabgrass, bindweed seedlings, random lawn incursions), lay down overlapping cardboard by 6 inches before mulching. Wet it thoroughly so it conforms to the soil, then add 3–4 inches of mulch on top. This blocks light immediately while still letting water move through.
Timing hack: Do this after a rain or the day after watering—cardboard is far easier to work with when damp.
“Organic mulches… are effective in reducing weed emergence by limiting light and acting as a physical barrier.” — Washington State University Extension, Mulches (2017)
3) Mulch Depth Cheat Sheet: Stop Guessing
Most beds do best with 2–3 inches of shredded bark or wood chips; go to 3–4 inches if weeds are your main enemy. For compost used as a mulch, keep it thinner—1–2 inches—so it doesn’t crust over or smother small crowns. Too thin invites weeds; too thick can reduce oxygen at the soil surface, especially in heavy clay.
Quick measuring hack: Cut a scrap of wood (or an old plant label) to 3 inches and use it as your “dipstick” in a few spots per bed.
4) Water First, Then Mulch (Yes, Even If Rain Is Coming)
Mulch slows evaporation—great—but it also slows water penetration if the soil below is bone-dry and hydrophobic. Before mulching, water the bed deeply (or mulch right after a soaking rain) so you’re “sealing in” moisture instead of sealing out the first good drink. Give it 20–30 minutes of irrigation per zone for typical garden beds, then spread mulch.
Scenario: In a hot-summer veggie patch, pre-watering before mulching reduced midday wilting dramatically for one client—same watering schedule, less stress, better tomato set.
Faster Application: Tools, Layout, and Less Back Pain
5) The Tarp Trick: Move Mulch Like a Pro (Without a Wheelbarrow)
Dump mulch onto a tarp, drag it to where you need it, then “pour” from the corner like a giant bag. This saves trips, protects lawns from tire ruts, and is shockingly fast for side yards or tight gates. A 6 ft x 8 ft tarp usually handles a generous load without being impossible to drag.
Cost note: A basic tarp is often $10–$20, and it replaces the need for a second wheelbarrow trip every time you mulch.
6) Pre-Mark Your Depth With “Mulch Stakes”
In big beds, uneven mulch is the norm unless you give yourself reference points. Push in a few short sticks (or bamboo skewers) cut to your target depth—say 3 inches—then rake mulch until the tops are just visible, and pull them out. It’s like screeding concrete, but for gardeners.
Where it shines: Long foundation beds where you want a crisp, uniform look (and no random bald patches where weeds pop through).
7) Rake First, Then Flip the Rake Backwards to “Feather” Edges
Spread mulch quickly with the tines facing down, then flip the rake and use the back to feather edges and keep mulch off patios and crowns. This leaves a cleaner line and prevents mulch from washing onto hardscape during storms. It also helps avoid burying low plants like thyme or sedum.
Mini hack: Keep a stiff broom nearby for patios—mulch is easier to sweep immediately than after it’s been walked into cracks.
8) Edge It Once, Save Hours Later
Cut a crisp edge (spade or half-moon edger) before mulching, and you’ll trap mulch where it belongs. A shallow trench edge—about 2 inches deep—acts like a moat that catches chips during heavy rain. You’ll spend less time re-mulching paths and more time actually gardening.
Case example: On a slight slope, a simple 2-inch edge reduced mulch creep onto a sidewalk enough that the homeowner stopped needing weekly sweeping.
Smarter Mulch Choices: Matching Material to the Job
9) Use Bigger Chips on Slopes, Finer Mulch in Flat Beds
On slopes, shredded mulch can “float” downhill in heavy rain. Choose chunkier arborist wood chips (often free) that interlock better, and apply at 3–4 inches. In flat perennial beds, shredded bark knits together nicely and looks more finished.
Scenario: A rain-prone hillside bed kept sliding until we switched from shredded bark to arborist chips and added a slightly thicker 4-inch layer—far less runoff after storms.
10) Free Mulch Hack: Ask for Arborist Chips, But Request “Aged if Possible”
Many tree services will drop a load for free or cheap because it saves disposal fees. Fresh chips are fine around trees and shrubs, but if you’re mulching veggie beds or planting areas, aged chips (even 3–6 months old) are nicer to work with and less “hot” as they begin breaking down. If you do use fresh chips near veggies, keep them on the surface and don’t dig them in.
Cost comparison: Bagged mulch often runs $4–$7 per 2 cu ft bag (and you need ~13.5 bags to equal 1 cubic yard), while bulk mulch might be $25–$45 per yard plus delivery. Free arborist chips can be the best deal in gardening—if you have a place to put them.
| Mulch option | Typical cost | Best use | Watch-outs |
|---|---|---|---|
| Bagged shredded bark | $4–$7 per 2 cu ft bag | Front beds, uniform look | Higher cost per volume; lots of plastic bags |
| Bulk bark/wood mulch (delivered) | $25–$45 per cubic yard + delivery | Big beds, fast coverage | Needs driveway space; wheelbarrow/tarp hauling |
| Arborist wood chips (often free) | $0–$20 (sometimes free delivery) | Tree rings, shrubs, slopes, pathways | Mixed sizes; may include leaves; freshness varies |
| Compost (as mulch) | Varies; often $30–$60 per yard | Veggie beds, topdressing perennials | Use 1–2 inches; can grow weeds if not finished well |
11) “Two-Layer Mulch” for Show Beds: Compost Under, Wood Over
For beds where you want both nutrition and weed suppression, lay 1 inch of finished compost first, then cap with 2 inches of shredded bark or wood mulch. Compost feeds soil biology and improves structure, while the wood layer reduces evaporation and blocks light. This combo is especially helpful in sandy soils that dry fast.
Real-world example: In a new perennial border with tired soil, this 1-inch compost + 2-inch mulch stack noticeably improved moisture retention by mid-summer—plants established faster with fewer “rescue waterings.”
Problem-Solvers: Targeted Hacks for Weeds, Water, and Pests
12) The “Mulch Ring + Drip Loop” Trick for Water Efficiency
Place drip tubing or a soaker loop on the soil, then mulch over it with 2–3 inches, keeping emitters from being buried too deeply in fine mulch. This reduces evaporation and protects lines from UV damage. Check flow once a month—mulch can shift and kink tubing if it’s pulled taut.
Money saver: A simple drip setup can reduce water use compared to overhead watering, and mulching over the line keeps it working efficiently longer. University of California Agriculture and Natural Resources notes mulches help reduce evaporation and moderate soil temperature (UC ANR, 2020).
Extra Tricks for Specific Real-World Gardens
Scenario: Windy Yard That Blows Mulch Everywhere
Use heavier, chunkier chips and wet them after spreading. A quick overhead spray for 2–3 minutes per bed helps settle light pieces so they knit together. Avoid super-fine shredded mulch in high wind corridors between houses—it’s basically confetti.
Scenario: Veggie Beds Where You Direct-Seed
Mulch after seedlings are established, not before. For direct-sown carrots or beans, wait until plants are 3–4 inches tall, then tuck mulch between rows at 1–2 inches deep so you don’t smother them. If weeds are already popping, use the cardboard trick in the paths only, and keep planting rows clear.
Scenario: New Perennial Bed With Tiny Starts
Mulch in two passes: first a thin layer (1 inch) right after planting to stabilize moisture, then add the rest later once plants are taller and easier to see. This prevents burying crowns and losing small perennials under a fresh “mulch snowfall.” It also makes it easier to spot gaps where you might want to add another plant.
Mulch Math (So You Don’t Overbuy)
If you want one quick formula: 1 cubic yard covers about 108 sq ft at 3 inches deep. That means a 12 ft x 9 ft bed (108 sq ft) needs roughly 1 yard for a solid 3-inch layer. For a 200 sq ft area at 3 inches, you’re looking at about 1.85 yards—round up to 2 if you want a little cushion for touch-ups.
And if you’re stuck buying bags: at 3 inches deep, 1 bag (2 cu ft) covers about 8 sq ft. So a 100 sq ft bed takes around 12–13 bags for a proper layer—one reason bulk (or arborist chips) often wins on cost.
Mulch is one of those rare garden jobs where a couple of small “pro moves” save you money, save your back, and make the result look cleaner for months. Keep the crowns clear, hit the right depth, and use the material that matches your site (wind, slope, or veggie rows). Once you see how much easier weeds and watering become, you’ll start treating mulching like a seasonal reset button—because that’s exactly what it is.