DIY Garden Path from Recycled Bricks
The most common brick-path mistake isn’t crooked lines or mismatched colors—it’s skipping the base. People set bricks straight on soil, the first rain turns the subgrade into pudding, and within a season the path looks like a row of loose teeth. Brick is heavy (a standard clay brick is roughly 4–5 lb), and that weight needs a firm, drained foundation or you’ll be re-leveling forever.
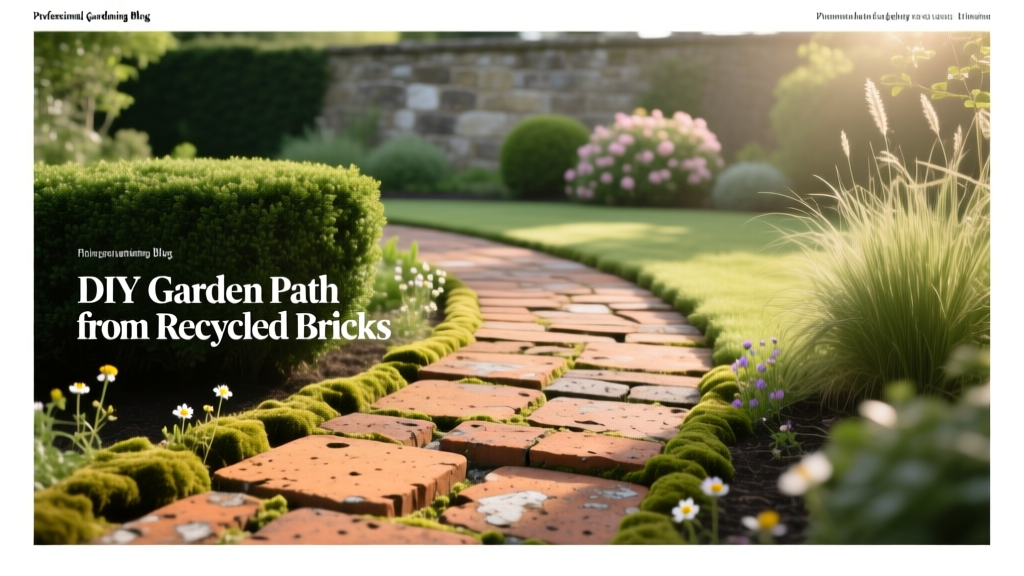
Recycled bricks are one of the best budget materials in the garden because they’re forgiving, easy to source, and they get better-looking with age. The trick is to build them like a tiny road: predictable depth, compacted layers, and edges that lock everything in.
Plan It Like a Path You’ll Use (Not Just One That Looks Cute)
Tip: Make the path wide enough for the “real” job
A decorative 18-inch path looks fine in photos, then you try hauling a wheelbarrow and end up mowing a new route through the beds. For comfortable one-person walking, aim for 30–36 inches; for a wheelbarrow or garden cart, 36–48 inches is the sweet spot. Example: a 36-inch path lets you roll a 26–28 inch wheelbarrow tray without clipping plants every trip.
Tip: Pre-mark curves with a hose—then measure twice
Garden hose curves lie less than your eyes do. Lay a hose where you think the path should go, walk it a few times, then measure from fixed points (like fence posts) so you can recreate the curve after you start digging. If you’re doing a gentle curve, keep the radius generous—tight curves eat bricks and make edging harder.
Tip: Decide the brick pattern based on foot traffic, not style
Running bond (straight rows) is fast and works great for low-traffic side paths, while herringbone resists shifting under repeated turning forces (like wheelbarrows). If your path leads to a compost bin or veggie beds, go herringbone; it’s more stable because it interlocks. Real-world example: a 40-foot compost run in herringbone typically needs fewer “fix-it Saturdays” than a straight-lay path on the same base.
Source Recycled Bricks Without Bringing Home Problems
Tip: Reject spalling bricks before they crumble into sand
Recycled bricks can be gorgeous, but avoid bricks that are flaking (spalling) or powdery—freeze/thaw cycles will finish them off. Do a quick test: tap two bricks together; a solid “clink” is good, a dull thud often means internal cracks. If you live in a cold-winter zone, prioritize harder-fired clay bricks over soft, chalky ones.
Tip: Clean old mortar the lazy-smart way (and protect your fingers)
A cold chisel works, but the fastest combo is a 3-inch masonry chisel plus a small sledge, then a stiff wire brush. If mortar is stubborn, soak bricks in water for 30–60 minutes—it can soften old lime-based mortar enough to chip off cleanly. Example: for 150 bricks, soaking and chiseling in batches often saves an hour versus dry-chipping every piece.
Tip: Mix brick sizes intentionally so the path doesn’t look “patched”
Recycled bricks often vary by up to 1/4 inch in thickness. Instead of fighting that, sort into “thick,” “medium,” and “thin” stacks and use the thick ones in low spots, thin ones in high spots. This single sorting step makes leveling dramatically easier, especially on long runs.
Base Prep: The Boring Part That Makes It Last 10+ Years
Tip: Dig deeper than you think—then match it to your soil
For most garden paths, a reliable build is 4–6 inches of compacted base plus 1 inch of bedding sand, plus the brick thickness. In clay soil or areas with freeze/thaw, lean toward 6–8 inches of base to reduce heaving. The point is drainage and compaction, not brute force.
Tip: Use “road base” (crusher run) instead of pea gravel
Pea gravel rolls and won’t lock; crusher run (a mix of fines and angular stone) compacts into a firm layer. A common recipe is 3/4-inch minus compacted in 2-inch lifts, watering lightly between lifts so it knits together. This mirrors what many extension services recommend for stable, well-drained surfaces, especially in variable weather.
“Proper compaction and a well-graded aggregate base are what keep small pavements from settling and rutting under repeated use.” — Interlocking Concrete Pavement Institute (ICPI), 2020
Tip: Rent a plate compactor for two hours and save years of rework
Hand tampers work for tiny sections, but for anything over about 30 sq ft, a plate compactor is the shortcut that pays back fast. Typical rental runs about $50–$90 per day depending on region; many rental shops offer half-day rates. Example: a 60 sq ft path compacted with a machine usually settles far less after the first heavy rain than one tamped by hand.
Tip: Give the path a slight slope so puddles can’t form
You don’t need dramatic grade—just enough to shed water. Aim for a slope of about 1/8 inch per foot (roughly 1%) away from buildings and toward a bed edge. If you’ve ever had algae slime on shady bricks, that tiny slope is your best prevention.
Edging: The Quiet MVP That Keeps Bricks From Walking Away
Tip: Lock the sides first so your pattern stays tight
Without edging, bricks creep outward over time and gaps appear in the middle. Use heavy-duty plastic or metal edging set on the compacted base, with spikes every 8–12 inches on curves and 12–18 inches on straight runs. Real-world example: a herringbone pattern without edging will “relax” after a season of wheelbarrow turns, even if the base is good.
Tip: DIY edge option—make a brick soldier course
If you hate the look of plastic edging, set a border of bricks on edge (a soldier course) in a shallow concrete collar. Keep the collar modest—about 2 inches thick and 3 inches wide—so it stabilizes without becoming a hard-to-remove curb. This is especially nice for cottage-style gardens where you want everything to look old and intentional.
Setting Bricks Fast (Without the Wobble)
Tip: Screed your bedding sand with two pipes for perfect height
Lay two straight pipes (like 3/4-inch conduit) on the compacted base, dump bedding sand between them, and pull a straight 2x4 across as a screed. You’re aiming for about 1 inch of sand after screeding—thicker sand beds are more likely to settle unevenly. Example: on a 10-foot run, this method keeps you from “fixing” each brick individually for hours.
Tip: Set bricks slightly proud, then compact them down
Place bricks about 1/8 inch higher than your final grade so they end up flush after compaction. After laying, run a plate compactor over the surface (with a rubber mat if you’re worried about scuffing) to seat them into the sand. This is a pro paver move that prevents the “one brick is lower” ankle-twist problem.
Tip: Use string lines for straight runs—even in informal gardens
Casual garden style doesn’t mean random alignment. Run a mason’s string line along the path edges and check every few feet; small drift becomes a big problem by the time you hit the end. A straight reference makes a recycled-brick path look intentional instead of “we did our best.”
Joints, Fillers, and Weed Control That Doesn’t Rely on Chemicals
Tip: Skip landscape fabric under the whole path (use it strategically instead)
Fabric under brick paths often clogs with fine soil and reduces drainage over time—then you get puddles and frost heave. Many university extension resources note that geotextiles are best used as separators in specific conditions (like very soft subgrades), not as a universal weed cure. If your soil is silty or the base wants to sink, use a non-woven geotextile between soil and aggregate base; otherwise, focus on tight joints and a solid edge.
Citation: University of Minnesota Extension discusses the limits of landscape fabric for weed control and long-term performance (2019).
Tip: Choose joint fill based on sun exposure and your tolerance for maintenance
For classic brick looks, sweep in polymeric sand (great for stability, less weed germination), but it costs more—often $25–$40 per 50 lb bag. For a cheaper route, use dry masonry sand and plan to top up once or twice a year; it’s usually under $10 per 50 lb. Example: on a 70 sq ft path, polymeric sand can be a “pay once, fuss less” upgrade if the path is in full sun where weeds thrive.
Tip: If weeds show up, fix the joint—not the symptom
Weeds in brick joints usually mean you’ve lost joint material, not that the earth is “invading.” Pull the weed, scrape out loose debris, and re-sweep sand into the gap—then compact or tamp. A 10-minute joint touch-up after a heavy rain beats spraying anything and still having gaps next month.
Drainage and Freeze/Thaw Tricks (The Stuff That Separates “Okay” from “Still Flat in 5 Years”)
Tip: In clay soil, build a deeper base and add a gentle crown
Clay holds water; water plus freezing equals heave. In heavy clay, go with 6–8 inches of compacted crusher run and consider a slight crown (a subtle high point in the center) so water sheds to both sides. Case example: a side-yard path in sticky clay that puddled every winter can often be cured by adding 2 inches more base and regrading to a 1% slope.
Tip: Keep mulch and soil from washing onto the path
Brick paths fail fastest when garden soil constantly migrates into the joints. Leave a tiny reveal—about 1/2 inch—so the path sits slightly above the surrounding bed, or install a brick border that acts like a mini dam. Real-world example: if your bed is 1 inch higher than the path, every rain will feed silt into the joints and grow a green “fuzz” line.
Money-Saving Moves (Without Cutting the Wrong Corners)
Tip: Price your path by the square foot before you commit
Recycled brick costs vary wildly: you might pay $0.25–$1.00 per brick from a demolition salvage pile, or $1.50+ from a curated salvage yard. A quick rule of thumb: standard bricks laid flat often take around 4.5 bricks per sq ft (depending on joint width and pattern). Example: a 60 sq ft path could need roughly 270 bricks—at $0.50 each, that’s about $135 for brick, versus $405 at $1.50 each.
Tip: Spend on base material, save on visible brick
If you’re trimming the budget, don’t skimp on aggregate base—skimp on the “perfect match” bricks instead. Mixed reds and weathered tones look charming, and the base is what prevents repair costs later. A typical crusher-run base might cost $40–$70 per cubic yard plus delivery, and it’s the best money you’ll spend on the whole project.
Tip: Use a “hidden ugly brick” strategy
Put your chipped, stained, or off-size bricks where they won’t be noticed: under a bench area, along the far edge, or in sections you’ll partly cover with pots. Save the best faces for the centerline and entry points where eyes naturally land. This is how pros stretch a limited stash without the path looking like a patchwork repair.
Comparison Table: Two Reliable Ways to Build a Recycled Brick Path
| Build Method | Base Layers | Best For | Typical Cost (DIY) | Maintenance Level |
|---|---|---|---|---|
| Dry-laid on compacted aggregate (recommended) | 4–8 in crusher run + 1 in bedding sand | Most gardens; easy repairs; good drainage | Often $6–$12/sq ft depending on brick cost | Low to moderate (top up joints occasionally) |
| Mortared (set in concrete) | Concrete slab + mortar joints | Formal patios; areas needing rigid surface | Often $12–$25/sq ft plus more labor | Low weeds, but harder repairs if it cracks |
Real-World Scenarios: What I’d Do in Your Yard
Scenario: Shady side yard that stays damp
Go dry-laid with a slightly steeper slope—closer to 1/4 inch per foot if you can hide it visually. Avoid polymeric sand if the area stays wet and algae-prone; instead, use clean masonry sand and plan a quick spring touch-up so the joints stay full and less hospitable to moss. Also, keep the path a little more open to airflow by trimming plants back 2–4 inches from the edges.
Scenario: High-traffic route to compost bins and raised beds
Use herringbone, install solid edging, and don’t compromise on compaction. Build at least 36 inches wide so you’re not grinding cart wheels against the border. If you’re turning a wheelbarrow at the end, add a small “parking pad” that’s 4 ft x 4 ft—it reduces twisting forces that loosen bricks over time.
Scenario: Rental property or you want the option to change layouts later
Dry-laid is your friend because you can lift and re-lay bricks without jackhammers. Use metal edging (it pulls up and re-installs cleanly) and keep your joint fill simple—masonry sand is easy to refresh. Example: if you later add drip lines or new planting beds, you can pop out a section in under an hour, do the work, and put the bricks back.
Small Details That Make the Finished Path Look Like a Pro Did It
Tip: Stagger cuts so you don’t create a “zipper line”
If your path has curves, you’ll cut bricks along the edges. Don’t stack cut joints in a straight line—stagger them so the edge looks natural and holds better. A simple approach: avoid having two cut bricks touching if you can; alternate full and cut pieces along the curve.
Tip: Cut bricks with less mess using a wet saw (or a budget alternative)
A wet saw gives clean cuts and keeps dust down—worth renting if you have lots of curves. If you’re only doing a handful of cuts, a masonry blade in an angle grinder works; just wear eye and lung protection and cut outdoors. Time saver: mark cuts with a wax pencil and batch-cut 10–15 bricks at once instead of stopping every few minutes.
Tip: Let the path “settle,” then do one final tightening pass
After the first good rain (or after you hose it lightly), inspect for low bricks and refill any joints that sank. This is normal—the bedding sand and joint sand settle into tiny voids. A 20-minute tune-up in week one can prevent a wobbly spot from becoming a permanent ankle-grabber.
If you build your recycled brick path like a mini roadway—compacted base, restrained edges, and joints that stay filled—you’ll get that old-garden charm without the constant fixing. And the best part is it’s never permanent in a scary way: if you change your garden layout later, you can lift bricks, tweak the base, and reuse everything again. That’s the kind of “DIY” that keeps paying you back every season.
Sources: Interlocking Concrete Pavement Institute (ICPI), 2020; University of Minnesota Extension, 2019.