Indoor Grow Tent Setup for Herbs
The winter kitchen is quiet except for the hum of the refrigerator, and your herb pots sit on the windowsill like hopeful passengers waiting for a train that never comes. The basil leans toward the glass, leggy and pale. The mint looks fine—until you pinch it and realize it tastes like water. If you’ve ever tried to “just grow a little herb garden indoors,” you already know the problem: our homes aren’t designed like greenhouses. A grow tent is how you carve out a small, controlled climate—an herb nook with reliable light, steady moisture, and enough vertical room to keep plants compact and flavorful.
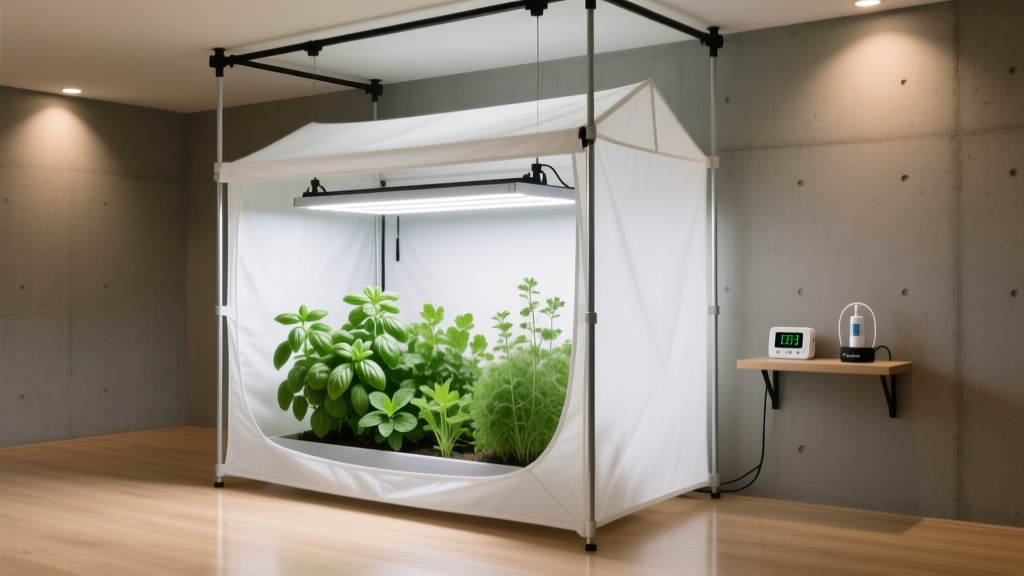
Think of this project like designing a tiny room inside a room. You’re working with walls (reflective fabric), a ceiling (light fixture), and a ventilation plan (fresh air in, warm humid air out). Get the layout right and you’ll harvest clean bunches of basil, cilantro, dill, parsley, thyme, oregano, and chives in a footprint smaller than a laundry hamper.
Start with the “room”: size, placement, and a realistic goal
A good grow tent setup begins with a clear intention: are you aiming for garnish herbs (small weekly pinches) or cooking herbs (weekly handfuls)? That determines tent size, light strength, and how many pots you can fit without creating a jungle that invites mildew.
Recommended tent sizes (and what they’re actually for)
For most homes and rentals, two tent sizes hit the sweet spot:
- 2' x 2' x 4' (60 x 60 x 120 cm): compact herbs, propagation, and 4–6 small pots.
- 2' x 4' x 5' (60 x 120 x 150 cm): family cooking supply, 8–12 pots, plus room for airflow and a small fan.
Place the tent where you can live with it: a spare closet with the door removed, a laundry corner, or a home office wall. You’ll want 6–12 inches of clearance around at least one side to zip open and work comfortably, plus access to an outlet.
Noise and heat matter in real homes. Inline fans and clip fans are easiest to tolerate if the tent sits on a rug or foam mat, not directly on a hollow wood floor. If you’re in an apartment, plan to keep nighttime fan noise modest—herbs don’t need hurricane-force extraction.
Design principles that keep herbs compact, flavorful, and disease-free
Herbs are forgiving, but indoor air isn’t. The winning layouts follow a few consistent principles: even light coverage, predictable airflow, and a watering system that doesn’t turn the tent floor into a swamp.
Principle 1: Even light beats “bright in one spot”
In a small tent, the center is always brightest. Your layout should rotate plants or distribute them by height so nothing gets shaded for long. Most culinary herbs do well with 14–16 hours of light daily for steady growth. (If you want a slower pace and less frequent pruning, run 12–14 hours.)
Mount the light centered, and keep the canopy level by using plant risers (upturned bowls, small crates) under shorter herbs like thyme. A level canopy means consistent growth and fewer weak, stretched stems.
Principle 2: Airflow is part of the layout, not an accessory
Plan airflow like you’d plan a pathway in a garden bed: it should reach every plant. A small oscillating or clip fan aimed to lightly ruffle leaves is usually enough. For humidity management, pair it with an inline fan and carbon filter if odors matter (basil and mint can be surprisingly aromatic in tight spaces).
“Good air movement in controlled environments reduces localized humidity at the leaf surface, lowering disease risk.” — University of Minnesota Extension (2020)
That’s not just theory. Powdery mildew and fungus gnats thrive when still air meets wet media. Layout solution: keep pots slightly separated (not touching) and leave a “service lane” along the front of the tent so you can inspect stems and soil.
Principle 3: Water should be easy, repeatable, and clean
The best indoor gardens are the ones that don’t feel fussy. If you dread watering day, you’ll overwater or forget. Design the floor with spills in mind: a waterproof tray or boot tray under your pots prevents a slow leak from becoming a flooring issue.
For pot spacing, aim for 4–6 inches between small herb pots and 8 inches between larger basil or mint containers. This gives room for airflow and makes it easier to prune without snapping stems.
Layout strategies: three “designer” floor plans that work
Below are layouts that behave like planting plans—each has a logic for light, access, and growth habit.
Layout A: The U-shaped countertop plan (best for frequent harvesters)
Place taller herbs (basil, dill) in the back row, medium herbs (parsley, cilantro) in the middle, and compact woody herbs (thyme, oregano) along the front edge. Leave the center open for a small tray or a scale for mixing nutrients. This layout shines in a 2' x 4' tent because it preserves a hand-access corridor.
Layout B: The “one shelf, two stories” plan (best for renters with limited floor space)
Add a single wire shelf (coated metal) about halfway up the tent, creating two growth zones. Use the top zone for light-hungry herbs like basil, and the lower zone for shade-tolerant herbs like mint and chives, with a small supplemental LED bar if needed. Keep at least 18 inches between each light source and the plant tops, adjusting based on your fixture.
Layout C: The nursery-to-kitchen conveyor (best for constant seedlings)
Dedicate one side to seed trays and small starter pots, and the other side to mature plants. Every week, you “promote” the best seedlings into the mature zone. This stops the cycle where everything gets planted at once, then bolts or crashes at once.
A quick equipment comparison (so you can budget with eyes open)
| Component | Budget Choice | Midrange Choice | What to expect for herbs |
|---|---|---|---|
| Grow tent | 2' x 2' x 4' (~$60–$90) | 2' x 4' x 5' (~$110–$180) | Bigger tents are easier to manage humidity and crowding. |
| LED grow light | 100W board (~$60–$120) | 200W board (~$140–$260) | Herbs are comfortable under moderate intensity; basil likes the brighter end. |
| Inline fan | 4-inch (~$40–$80) | 4-inch w/ controller (~$90–$160) | Controllers reduce noise and keep humidity steadier. |
| Carbon filter | Optional (~$40–$70) | Recommended for shared spaces (~$70–$120) | Helps with herb aroma and general “tent smell.” |
| Pots | 3–5" nursery pots ($1–$3 each) | 1–2 gallon fabric pots ($4–$8 each) | Small pots dry faster; fabric pots reduce soggy roots. |
Plant selection: varieties that behave well in a tent
Indoor herbs need more than good flavor—they need a growth habit that stays manageable and a harvest style that rewards frequent snipping. These varieties are reliable in tight, bright spaces.
Basil (compact, fast, high reward)
Recommended varieties:
- ‘Genovese’ basil: classic flavor, vigorous; thrives with regular topping.
- ‘Greek Columnar’ basil: upright and narrow, ideal when footprint is limited.
- ‘Spicy Globe’ basil: naturally mounded; great for front-row placement.
Why they work: Basil loves bright light and responds beautifully to pruning, which means you can shape it like a miniature hedge. Keep basil in 1–2 gallon pots for steady growth.
Parsley (steady producer, cool-tolerant)
- ‘Giant of Italy’ (flat-leaf): strong stems and flavor, good for cooking.
- ‘Moss Curled’: compact, tidy, good for edging the layout.
Why it works: Parsley is patient. It won’t explode overnight, but it keeps giving if you harvest outer stems first. It tolerates slightly cooler temps than basil.
Cilantro (choose slow-bolt genetics)
- ‘Slow Bolt’ cilantro: bred to delay flowering.
- ‘Calypso’ cilantro: uniform, widely used for leaf production.
Why it works: Cilantro’s biggest indoor challenge is bolting from heat and stress. A tent helps you stabilize conditions. Sow in batches every 2–3 weeks for continuity.
Thyme and oregano (the front-row workhorses)
- ‘German Winter’ thyme: classic culinary thyme, sturdy stems.
- ‘Greek’ oregano: strong flavor, compact habit.
Why they work: These Mediterranean herbs prefer drying slightly between waterings. Put them along the tent’s front edge where you’ll remember not to drown them.
Chives and green onions (vertical accents)
- Garlic chives: wider leaves, great for dumplings and stir-fries.
- Common chives: tender, classic.
Why they work: They grow upright without shading neighbors. Give them a 6-inch pot and consistent moisture.
Mint (powerful, but needs boundaries)
- Spearmint: versatile in teas and salads.
- Peppermint: strong oils; a little goes far.
Why it works: Mint tolerates moderate light and rebounds after heavy harvests. Keep it in its own pot—always. In a tent, mint can become the loud roommate.
Step-by-step setup (a practical build sequence)
Set it up like you would a room renovation: build the shell, hang the ceiling fixture, then add the “furniture.”
- Choose your tent footprint and confirm you can open the zipper fully in the chosen spot. Measure clearance: aim for 24 inches in front for comfortable access.
- Assemble the tent frame and ensure the fabric sits taut (wrinkles steal reflective efficiency).
- Install the inline fan and filter near the top of the tent where warm, humid air collects. Use straps to reduce vibration.
- Hang the LED light centered. Start with the light about 18–24 inches above seedlings, then lower gradually as plants mature (follow your light’s manual).
- Add a small clip fan at mid-canopy height, angled to create gentle movement across leaves, not a constant blast.
- Place a waterproof tray on the tent floor and elevate pots slightly on a rack so they never sit in runoff.
- Set up monitoring: a basic hygrometer/thermometer at canopy height. Target roughly 40–60% humidity for most herbs and comfortable room temperatures.
- Pot up your herbs in a light, well-draining mix. Label varieties—indoor herbs look similar when young.
- Dial in the schedule: run lights 14–16 hours, keep airflow on low continuously, and adjust watering until pots dry slightly between cycles.
Real-world scenarios (how this design adapts to actual homes)
Scenario 1: The studio apartment “quiet corner” (2' x 2' tent)
You have one main room and the tent can’t dominate it. Use a 2' x 2' x 4' tent with a 100W LED and a quiet 4-inch inline fan on a low setting. Grow 1 basil (Greek Columnar), 1 parsley (Giant of Italy), 1 thyme, 1 oregano, and 1 chive pot. Keep mint outside the tent on a windowsill if you’re sensitive to aroma. Expect to spend about $200–$350 depending on light and fan quality.
Layout tip: keep the front row strictly “dry-ish” herbs (thyme, oregano). This prevents the common mistake of watering everything like basil and ending up with soggy thyme.
Scenario 2: The busy family kitchen supply (2' x 4' tent)
You cook most nights and want dependable harvests. A 2' x 4' x 5' tent with a 200W LED supports a rhythm: basil on the back row, parsley and cilantro mid-row, thyme/oregano/chives front. Add succession sowing for cilantro every 2–3 weeks so you aren’t left with a bolted batch.
Budget range: $350–$650 including a better fan controller and more pots. The payoff is consistency—one tent replaces the sad cycle of buying clamshell herbs that wilt in the fridge.
Scenario 3: The low-light home office (shelf layout)
Your window light is basically decorative, but you want a calming green presence while you work. Use the “one shelf, two stories” plan: basil and dill above, mint and chives below. Add a small supplemental LED bar under the shelf for the lower tier. This keeps the tent from feeling overgrown and makes pruning easier during short breaks.
Time-saving trick: keep a small pair of scissors and a bowl inside the tent. You’ll harvest more often if the tools live where the work happens.
Spacing, sowing, and pruning: keep it shaped like a garden, not a thicket
Indoor herb success is mostly editing. You’re not just growing—you’re composing. Use pruning to maintain a level canopy and prevent basil from shading out everything else.
- Basil spacing: 1 plant per 1–2 gallon pot; top above the second or third node once it’s 6–8 inches tall.
- Parsley spacing: 1–3 plants in a 6–8 inch pot; harvest outer stems at the base.
- Cilantro spacing: sow thickly in a wide pot; thin to about 2 inches between plants for leaf production.
- Thyme/oregano: small starts in 4–6 inch pots; pinch tips to encourage branching.
If your tent feels crowded, it’s not a failure—it’s a design cue. Remove one pot, increase spacing, and your airflow and leaf quality will improve immediately.
Light and energy expectations (and why herbs don’t need stadium lighting)
Most culinary herbs are happy with steady, moderate intensity. Basil is the exception—it’s a sun-lover and gets more flavorful when light is strong and consistent.
For scheduling, start at 16 hours on / 8 hours off for leafy growth. If heat builds up, reduce to 14 hours and rely on good pruning. According to NASA’s research on plants and indoor air quality, plants interact with indoor environments in measurable ways, but they still need proper light and airflow to thrive; the famous interior plant studies highlight the importance of controlled conditions rather than window roulette (Wolverton et al., 1989).
For practical home use, expect a modest bump in electricity use. A 200W light running 16 hours/day uses about 3.2 kWh/day. Multiply by your local rate to estimate monthly cost.
Maintenance rhythm: what you’re signing up for
This is not a high-maintenance hobby if the layout is clean. Most weeks, the tent asks for small, regular attention rather than big rescue sessions.
- Weekly time: plan for 30–60 minutes total (watering, pruning, quick inspection).
- Daily (2 minutes): glance at leaf posture and check the hygrometer. If leaves are canoeing upward, light may be too intense or too close.
- Every 2–4 weeks: wipe down the tent floor tray, clean up fallen leaves, and check fan intakes for dust.
- Seasonal task (every 3–4 months): refresh soil for heavy feeders like basil, or pot up if roots are circling.
Watch for fungus gnats (tiny flies near soil). The design fix is usually to let the top inch of soil dry and improve airflow. A practical add-on is a layer of coarse sand or sticky traps, but the real win is dialing back watering frequency.
Budget and DIY alternatives (for renters and careful spenders)
You don’t need the fanciest kit to grow excellent herbs. You need a light that’s strong enough, a way to exchange air, and a layout you can actually maintain.
- DIY reflective zone: If a full tent feels like too much, build a “light nook” using a wire shelf and reflective insulation board. It won’t seal as tightly, but it can work for basil and parsley if your room is stable.
- Skip the carbon filter: If odor isn’t an issue and you can vent into the room, you can omit it and save $40–$120. Keep the fan, though—air exchange is not optional.
- Use nursery pots first: Start seedlings in 3–4 inch pots, then upgrade only the winners to larger containers. This saves soil and space.
- Bottom watering tray: A simple boot tray can replace specialty flood trays for $10–$20, keeping spills contained.
For plant health guidance grounded in research-based extension work, University of Maryland Extension notes that most herbs require strong light and benefit from being grown in well-drained media indoors (University of Maryland Extension, 2021). That’s exactly what a tent helps you deliver: not magic, just consistency.
The best grow tent herb gardens feel like a small, well-edited border planting. You can see the soil surface, reach every pot, and harvest without knocking over a fan. When you zip it open, the scent should be fresh and green—not musty. Once your layout is tuned, you’ll stop “hoping the windowsill works” and start cooking with herbs that taste like they were picked outdoors five minutes ago—because, in a way, they were.