Community Plot Crop Rotation Schedule
The signup sheet is taped to a weathered shed door, the hoses are already snaking across the path, and someone’s tomatoes—again—are planted in the same corner as last year. You can almost predict the season: lush growth early, then a slow fade into spotty leaves, stunted plants, and soil that seems tired by July. In community plots, the challenge isn’t enthusiasm; it’s continuity. When many hands share a space (or when renters inherit a plot midstream), crop rotation becomes the quiet design move that keeps the whole garden looking—and producing—like it was planned.
Think of this as a layout project first and a planting plan second. We’re going to map a rotation that fits real plot sizes, respects sunlight and access, and still feels flexible enough for the “I got free seedlings” moments. By the end, you’ll have a rotation schedule you can post on the shed door—one that makes your soil richer each season, not poorer.
Start with the site: sun, beds, and human traffic
Sunlight hours: the rotation only works if the light works
Before you shuffle crops around, confirm your sun pattern. Most fruiting crops (tomatoes, peppers, squash) need 6–8+ hours of direct sun to perform well. Leafy greens can manage in 4–6 hours, especially in hot summers when afternoon shade prevents bolting. In community gardens, shadows shift as neighbors add trellises and sunflowers, so do a quick check twice: once in late spring and again around midsummer.
If you’re short on sun, rotate crop types anyway—but place the highest-light group in the brightest bed each year and keep your shade-tolerant groups in the dimmer corners. Rotation is a nutrition and pest strategy; light is a yield strategy. Both matter.
Bed dimensions that make rotation easy
The simplest rotation is built on a grid you can actually remember. If you’re designing from scratch, aim for beds that are easy to reach from both sides: 4 ft wide is the classic. Length can flex; in many community plots, a realistic module is a 4 ft × 8 ft bed. That size is large enough to matter and small enough to rotate without headaches.
Paths should be generous because shared gardens get busy. Plan on 18–24 inches wide for mulch paths and 30 inches if wheelbarrows regularly pass. These numbers are not fussy—they’re the difference between “pleasant to maintain” and “we trample seedlings every Saturday.”
Rotation as a layout strategy (not just a rule)
The four-bed “neighborhood” model
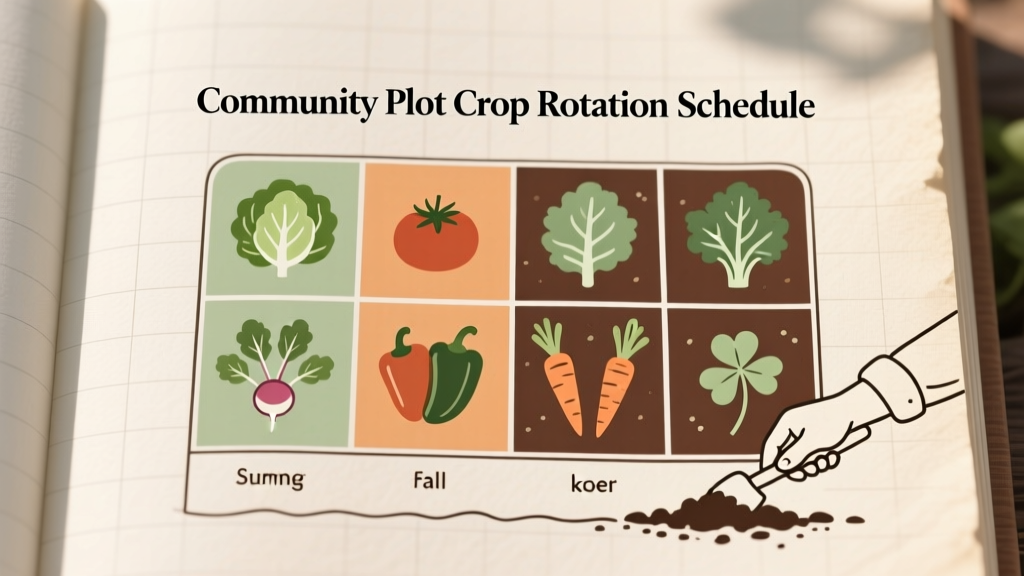
Classic crop rotation groups plants by family because pests and diseases often persist in soil and residue. Rotating families helps interrupt those cycles. A practical community schedule is a 4-year rotation across four equally sized beds (or four quadrants of a larger bed). Here’s the designer trick: label beds A, B, C, D on a sign and rotate the plan clockwise each year. Simple, visible, and easy for new gardeners to follow.
Many extension services recommend avoiding planting the same crop family in the same spot for multiple years to reduce disease and pest pressure; for example, Purdue Extension emphasizes crop rotation as a key step in managing soilborne diseases and insects (Purdue Extension, 2020).
“Rotation is one of the most effective cultural practices for reducing disease and insect problems in vegetable gardens.” — Purdue Extension, Vegetable Garden Soilborne Disease Management (2020)
Group crops by what they take, not just what they are
For community plots, I like a rotation that alternates heavy feeders with builders. Legumes (peas, beans) support soil nitrogen cycles and pair nicely before leafy crops. Meanwhile, fruiting crops tend to be nutrient-hungry and benefit from compost-heavy beds.
A clean, practical set of groups:
- Group 1: Fruiting (heavy feeders) — tomatoes, peppers, eggplant, cucumbers, squash
- Group 2: Roots & alliums — carrots, beets, onions, garlic
- Group 3: Leafy & brassicas — lettuce, spinach, kale, cabbage, broccoli
- Group 4: Legumes & soil builders — peas, beans, cover crops (clover, oats)
Note: botanically, cucurbits (squash/cucumbers) and solanaceae (tomatoes/peppers) are different families, but from a community-plot management view, they often share similar fertility and trellis needs. If your group wants stricter family-based rotation, split fruiting into two beds (solanaceae vs. cucurbits). The schedule below still works—just expand to a 5-bed system.
A rotation schedule you can post on the shed
Base schedule for four beds (A–D)
This schedule assumes each bed is roughly 32 sq ft (4×8). Scale up by repeating the pattern across more beds. Scale down by dividing a single bed into four quadrants (each 2 ft × 4 ft) and rotating within that bed.
| Year | Bed A | Bed B | Bed C | Bed D |
|---|---|---|---|---|
| Year 1 | Fruiting (tomatoes/peppers) | Roots & alliums | Leafy & brassicas | Legumes & soil builders |
| Year 2 | Roots & alliums | Leafy & brassicas | Legumes & soil builders | Fruiting |
| Year 3 | Leafy & brassicas | Legumes & soil builders | Fruiting | Roots & alliums |
| Year 4 | Legumes & soil builders | Fruiting | Roots & alliums | Leafy & brassicas |
Spacing rules that keep the plan realistic
Crop rotation fails when beds get overcrowded, because airflow and plant stress invite disease. Use spacing that matches the crop’s mature size, not its seedling size:
- Tomatoes: 18–24 inches apart (staked); 30–36 inches apart (caged)
- Peppers: 12–18 inches apart
- Bush beans: 4–6 inches apart in rows 18 inches apart
- Carrots: thin to 2 inches apart
- Lettuce (head): 10–12 inches apart; (leaf) 6–8 inches
For raised beds, you can treat spacing as a grid (intensive planting) but keep the same final distances. That’s how you get high yields without turning the bed into a mildew incubator.
Design principles that make community rotation stick
Make the rotation visible: labels, maps, and shared language
Community plots change hands. Visual systems keep the garden from reverting to “tomatoes everywhere.” Add a weatherproof sign: “Beds A–D” and a simple four-year chart. If you can manage one upgrade, laminate a 1-page bed map and zip-tie it to the fence.
If your community garden uses individual plots, adapt the same approach: label your own plot’s quadrants A–D. When someone asks what you’re doing, you’ll have a clear answer—and you’ll make rotation feel normal instead of optional.
Keep trellises on the north side to reduce shading conflicts
Vertical crops—tomatoes, pole beans, cucumbers—cast real shadows. Put trellises on the north edge of each bed (in the Northern Hemisphere). This keeps the bed behind it from losing sun and avoids neighbor disputes. It also makes the garden look intentional: tall at the back, low at the front, like a well-composed border.
Build fertility rhythm into the schedule
The rotation is your fertility rhythm: compost before heavy feeders, lighter amendments before roots, nitrogen support before leafy beds. A soil test every 2–3 years is worth it. Many U.S. extension offices recommend soil testing to guide fertilizer and lime needs; for example, the University of Minnesota Extension emphasizes soil testing as the basis for proper fertilizer use and plant health (University of Minnesota Extension, 2023).
As a baseline, plan for:
- 1–2 inches of finished compost worked into beds before fruiting crops
- 1 inch compost before leafy crops
- Minimal fresh compost for root crops (too much nitrogen can fork carrots)
Plant selection that behaves well in rotating beds
Fruiting bed: reliable performers that justify the space
In community plots, consistency matters. Choose varieties that produce well even when watering isn’t perfect.
- Tomato ‘Celebrity’ (hybrid): dependable yields, good disease resistance for mixed-skill gardens. Stake it at 6 ft with a single leader for airflow.
- Tomato ‘Sungold’ (cherry): high productivity; great for renters who want steady snacking harvests. Trellis strong—this one grows.
- Pepper ‘California Wonder’: classic bell with steady performance; works at 12–18 inch spacing.
- Cucumber ‘Marketmore 76’: productive and widely adapted; train onto a simple 5–6 ft trellis to save bed space.
- Zucchini ‘Dunja’: compact-ish habit and early production; give it a full 3 ft circle if possible.
Roots & alliums bed: tidy crops that keep the soil structured
- Carrot ‘Nelson’ (Nantes type): uniform roots and reliable germination; great for a 12-inch wide band sowing.
- Beet ‘Detroit Dark Red’: forgiving and productive; thin to 3–4 inches.
- Onion ‘Candy’ (sweet intermediate-day): excellent for many regions; plant starts 4–6 inches apart.
- Garlic ‘Music’ (hardneck): plant cloves 6 inches apart in fall for summer harvest.
Leafy & brassicas bed: choose bolt-resistant greens and compact brassicas
- Lettuce ‘Buttercrunch’: heat-tolerant for a lettuce, good texture; succession sow every 2–3 weeks.
- Spinach ‘Bloomsdale Long Standing’: slower to bolt; best in spring/fall.
- Kale ‘Lacinato’: upright, resilient, harvestable for months; space 12–18 inches.
- Broccoli ‘Belstar’: reliable central heads and good side shoots; space 18 inches.
Legumes & soil builders: edible + restorative
- Snap pea ‘Sugar Ann’: early, compact, great for spring; trellis at 4 ft.
- Bush bean ‘Provider’: dependable in varied weather; quick turnaround for summer succession.
- Crimson clover (cover crop): excellent fall soil builder where allowed; also looks intentionally “designed,” which matters in shared spaces.
Step-by-step: set up a rotation-ready community plot
- Measure and sketch: note plot size (example: 10 ft × 20 ft), existing beds, and sun hours. Mark the north side.
- Choose a bed system: four 4×8 beds with 18–24 inch paths, or one large bed divided into four equal quadrants.
- Assign bed letters (A–D): use stakes, paint pens on bed frames, or a small sign.
- Pick Year 1 crops using the table above and your household’s eating habits (no point rotating into a bed of beets no one eats).
- Plan trellises on north edges: budget a basic 6 ft T-post and netting system or a DIY bamboo frame.
- Amend by bed: compost-heavy for fruiting; lighter for roots; moderate for leafy; minimal plus inoculation/cover crop for legumes.
- Create a shared note: tape a copy of the rotation plan inside your shed or toolbox lid so it survives the season.
- Schedule succession slots: reserve 25% of each bed for quick follow-on crops (radishes after peas, lettuce after garlic, beans after spring greens).
Budget and DIY alternatives (with real numbers)
A rotation schedule costs almost nothing; the layout infrastructure does. Here’s a realistic range for a four-bed setup in a community plot:
- Lumber raised beds (4×8, 11" tall): typically $60–$120 per bed depending on wood type and region.
- Bulk compost: often $35–$60 per cubic yard; a 4×8 bed at 2" compost uses about 0.2 cubic yards (rough estimate), so budgeting $10–$20 per bed per year is reasonable if you’re buying in bulk.
- Soil test: commonly $15–$30 through extension labs.
- Trellis supplies: $25–$60 per bed for T-posts + netting; DIY bamboo and twine can drop this to $10–$20.
- Mulch for paths: $6–$8 per bale of straw; expect 2–4 bales for a modest plot.
DIY swaps that still look tidy:
- Use cardboard + 2–3 inches of wood chips for paths instead of landscape fabric.
- Use salvaged bricks or pavers at bed corners to anchor labels and keep edges crisp.
- Make a trellis from pruned branches lashed with jute twine—surprisingly elegant when repeated.
Maintenance expectations: what this really asks of you
A rotation plan reduces crisis management, but it doesn’t eliminate maintenance. For a typical community plot with ~200 sq ft of growing area, expect:
- 30–60 minutes per week in spring (planting, thinning, weeding)
- 60–90 minutes per week in summer (harvesting, tying, watering checks)
- 30–60 minutes per week in fall (cleanup, cover crops, garlic planting)
Seasonal tasks that keep the rotation healthy:
- Spring: label beds, refresh compost, set trellises before planting.
- Midseason: remove diseased leaves promptly; replant empty spaces with a planned successor crop.
- Fall: pull crop debris (especially tomatoes/brassicas), top-dress with compost, sow cover crops where allowed.
- Winter: review what went well; adjust the Year 2 plan while it’s still fresh.
Real-world scenarios: how rotation adapts when life happens
Scenario 1: A renter inherits a plot midseason
You arrive in June. Bed A is tomatoes, Bed B is also tomatoes, and Bed C is half-empty. Don’t fight the whole season—stabilize it and set up next year. Start by mapping what’s already planted. If two beds are already solanaceous (tomatoes/peppers), designate one as “Fruiting” officially and the other as “Fruiting overflow” for Year 1. In the empty space, plant bush beans or a quick green like leaf lettuce to keep the soil active. Then commit: next year, those two beds must rotate away from fruiting into roots and leafy.
Design move: add labels now, even if the current layout is messy. The labels are a promise to your future self.
Scenario 2: A shared family plot with limited time (weekend-only visits)
When you can only visit once a week, choose varieties that don’t punish you for missing a watering day. In the fruiting bed, prioritize cherry tomatoes and peppers over melons. Use 2–3 inches of mulch around plants to reduce evaporation. In the leafy bed, grow kale and Swiss chard (if you include it) rather than finicky spring spinach in midsummer.
Rotation still matters, but your layout should reduce labor: fewer crop types per bed, clear trellis lines, and wide enough paths that harvesting is quick. A neat layout is a time-saving tool.
Scenario 3: A community garden with recurring pest issues (clubroot, blight, or borers)
If the garden has a known problem—say, brassica diseases or tomato blight—tighten the rotation. Extend the gap: avoid returning the same family to a bed for 3–4 years where possible, remove infected debris, and don’t compost diseased plants on-site unless the pile is managed hot. For cucurbit borers, rotate squash out of the problem bed and use trellised cucumbers (easier to scout) in the fruiting group, keeping squash limited and monitored.
Design move: place the most disease-sensitive crops in the bed with best airflow (often the one least crowded by fences/hedges). Air movement is as valuable as sun in disease-prone plots.
Scenario 4: A small single-bed plot (one 4×8) with big ambitions
If you only have one bed, rotation can still happen at a micro-scale. Divide the bed into four 2×4 quadrants (A–D). Each year, rotate clockwise. Keep trellised crops on the north edge of their quadrant. Use fast successions to maximize yield: peas in spring, then beans in summer, then cover crop in fall—all within the “legume” quadrant.
This method is also ideal for renters: you can take your plan with you and repeat it anywhere.
Small details that make the whole garden feel designed
Rotation doesn’t have to look like a spreadsheet. Repeat a few visual cues across beds: the same trellis material, the same bed labels, the same path mulch. Plant a low border of sweet alyssum or nasturtium at bed corners to mark the grid and support beneficial insects—just keep them consistent so they read as part of the design, not a random afterthought.
And when the inevitable happens—someone gifts you three extra tomato seedlings—treat them like a design constraint. Put them in the official fruiting bed, even if it means pulling a less-loved plant. Rotation works best when the garden’s “rules” are easy to follow in the moment.
Post the schedule, label the beds, and let the plan do the heavy lifting. Next summer, when your tomatoes are thriving in a new spot and your roots are clean and straight where last year’s leafy greens fed the soil, the garden will feel calmer. Not just more productive—more intentional. That’s the real payoff in a community plot: a space that can handle many hands and still grow like one thoughtful design.
Sources: Purdue Extension (2020); University of Minnesota Extension (2023).