Indoor Carnivorous Plant Setup Guide
You bought a Venus flytrap on impulse, set it on the kitchen windowsill, and two weeks later it’s sulking—leaves blackened, soil crusty, and a tiny fruit fly still buzzing like it owns the place. If this sounds familiar, don’t blame your “brown thumb.” Carnivorous plants aren’t difficult; they’re just picky about the same three things every good design needs: the right site, the right materials, and a layout that supports how the space actually gets used.
Think of this as a small interior landscape project. We’ll design a clean, functional setup that fits a rental, a sunny apartment, or a home office—without turning your living room into a swamp. You’ll get plant pairings that look intentional, numbers you can measure with a tape, and a maintenance rhythm you can keep up with.
Start with the space you actually have (and how you live in it)
Indoor carnivorous gardens succeed when the “garden bed” is defined. That bed can be a windowsill tray, a wire rack with lights, or a terrarium-like display (open-top for most species). Your goal is to create a controlled micro-zone: bright, wet, and low-mineral—while keeping your floors dry and your routine simple.
Choose a footprint: three layouts that work in real homes
Layout A: The windowsill tray — Best if you have a bright south- or west-facing window and want a setup that disappears into the architecture. A tray that’s 24 in x 8 in can hold 3–5 small pots and still leave room for blinds to move.
Layout B: The shelf light station — Best for renters with limited sun or anyone who wants consistent growth year-round. A 36 in wide wire rack shelf can hold two zones: temperate plants on top and tropicals below, each with its own water tray.
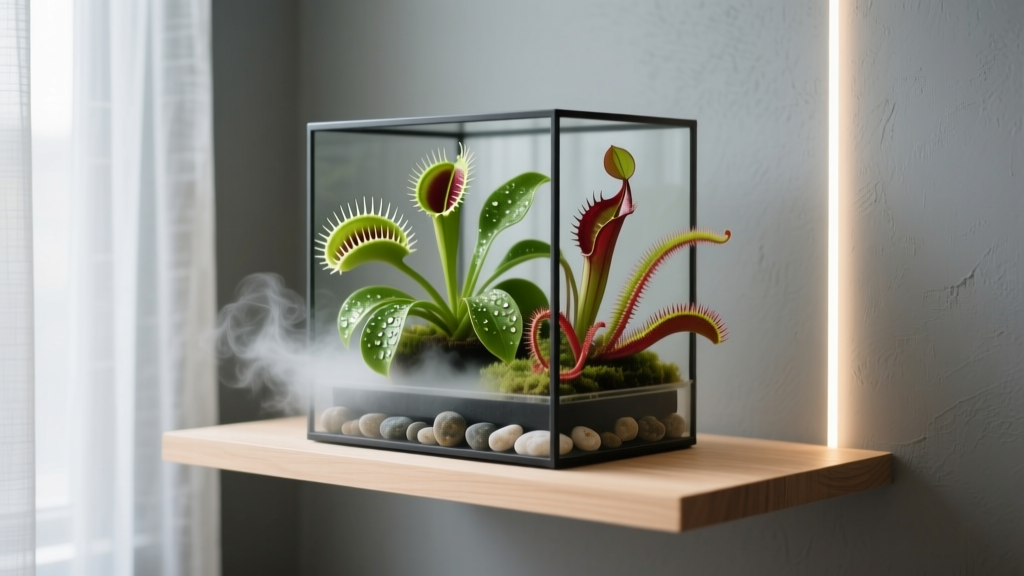
Layout C: The tabletop “bog bowl” display — Best as a living centerpiece (and a conversation starter). Use a wide, shallow container 12–16 in across and keep it open-top for airflow. This is a design-forward option that still respects plant needs.
Design principles that keep carnivorous plants alive (and your home tidy)
Principle 1: Separate “wet zone” from “living zone”
Carnivorous plants like consistently wet media, but your furniture does not. Treat water like you would in a landscape: contain it, control it, and plan overflow paths.
- Use a waterproof tray with a raised lip at least 1 in high.
- Place the tray on a thin cork mat or silicone pad to prevent condensation rings.
- Keep a dedicated squeeze bottle for filling trays so you’re not sloshing water over the edge.
Principle 2: Light is the “hardscape” of indoor carnivorous design
When light is adequate, everything else becomes easier—stronger traps, better color, fewer fungus issues. Indoors, aim for 12–14 hours of bright light daily for most setups. If you’re using a window, you’ll be working with seasonal swings; if you’re using LEDs, you’re the weather.
“The single most common cause of failure with indoor carnivorous plants is insufficient light; without it, plants may survive but will not thrive.” — Royal Horticultural Society (RHS), indoor plant care guidance (2023)
That doesn’t mean you need a laboratory fixture. It means you need a repeatable light plan: a timer, a fixed distance, and a shelf height that doesn’t force you to improvise every week.
Principle 3: Build the substrate like a bog, not a potting mix
Carnivorous plants evolved for nutrient-poor environments. Standard potting soil is the equivalent of dumping fertilizer into a salt-sensitive landscape bed. Most common indoor carnivores thrive in a mix of 50% sphagnum peat moss + 50% perlite (by volume), or long-fiber sphagnum for some species.
Use only low-mineral water. The International Carnivorous Plant Society recommends rainwater, distilled, or reverse-osmosis water and warns against mineral buildup from tap water for many species (ICPS, 2022).
Layout strategies: design your indoor “bog station” like a pro
Create zones by climate: temperate vs. tropical
A clean indoor design comes from grouping plants with the same needs—like placing shade perennials together outdoors. Indoors, the biggest divider is dormancy.
- Temperate zone: Venus flytraps (Dionaea) and many Sarracenia want a winter dormancy (cooler temps and shorter days). They can still be grown indoors, but they’re often easier on a bright porch, unheated room, or near a cold window in winter.
- Tropical zone: Nepenthes and many sundews (Drosera) can grow actively year-round under lights.
If you’re limited to one shelf, choose one climate path and commit. A mixed “one of everything” collection is where indoor growers get stuck.
Use negative space so the plants read as a composition
Design-wise, carnivorous plants already look busy—spikes, traps, pitchers. Give them breathing room. As a rule of thumb:
- Small rosettes (Drosera, Pinguicula): space pots 3–4 in apart.
- Venus flytraps: give each plant a 5–6 in diameter zone (one plant per 4-inch pot is comfortable).
- Nepenthes: plan for vertical growth; allow 12–18 in of height above the pot for vines and hanging pitchers.
Plan the water system before you place the plants
Most indoor setups work best with the tray method: pots sit in a tray with a shallow reservoir. You fill the tray, not the pot, so the media wicks water up evenly.
- Choose a tray sized to your footprint (example: 24 in x 8 in tray for a windowsill lineup).
- Add a water depth of 0.5–1 in for bog-type plants (flytraps, many sundews).
- For Nepenthes, use a humidity tray nearby (not constantly soaking the pot) and water from the top when the surface begins to lighten.
- Label a water jug “DISTILLED/RO ONLY” to avoid accidental tap-water fills.
Plant selection: varieties that behave well indoors (and look designed)
Good indoor plant palettes balance form, scale, and reliability. Below are choices that perform under lights or bright windows and won’t punish you for missing one day.
Reliable “bog tray” plants (bright light, wet feet)
Venus flytrap (Dionaea muscipula) ‘B52’ — Large traps, strong growth, dramatic color under bright light. It’s a statement plant for a tray, but plan for dormancy; in a home, that can mean a cooler window area for 3–4 months.
Cape sundew (Drosera capensis) — The workhorse. Fast-growing, forgiving, and constantly in motion (dewy tentacles catching gnats). Great for renters because it tolerates indoor conditions better than many temperate sundews.
Tropical butterwort (Pinguicula ‘Weser’) — Compact rosette, pastel tones, and excellent fungus gnat control. It reads like a succulent in a minimalist design, but it prefers a slightly less waterlogged approach than a flytrap—keep it moist, not submerged.
Best “vertical accent” plant (a living chandelier effect)
Nepenthes ventricosa — One of the most forgiving pitcher plants indoors. It tolerates typical home humidity better than fussier species, especially if it gets steady light and consistent watering. Train it up a small trellis or let it trail from a shelf for a layered look.
Nepenthes ‘Bloody Mary’ (common hybrid in cultivation) — Strong color potential and reliable pitchers under good light. It’s an easy way to get that dramatic red without requiring a greenhouse.
Quick comparison: match plants to your space
| Plant | Light Target (Indoors) | Water Style | Space/Spacing | Good For |
|---|---|---|---|---|
| Drosera capensis | 12–14 hrs under LED or very bright window | Tray method, 0.5–1 in water | 3–4 in between pots | Beginners, gnat control, fast results |
| Dionaea ‘B52’ | Very high light; strong LED recommended | Tray method, consistently moist | One plant per 4 in pot | Statement plant, dramatic traps |
| Pinguicula ‘Weser’ | Bright light; avoid scorching heat | Moist media; not constantly flooded | 3–4 in between pots | Small spaces, clean modern look |
| Nepenthes ventricosa | 12–14 hrs LED or bright filtered window | Water when top begins to lighten; humidity tray nearby | 12–18 in vertical clearance | Shelves, hanging displays, “wow” pitchers |
Step-by-step: build a clean indoor setup you can maintain
This is the practical build sequence I use when designing small interior plant stations: start with infrastructure, then add plants. It prevents the classic mistake of buying plants first and improvising everything around them.
- Pick the location: a window with at least 4–6 hours of direct sun, or a shelf where you can run lights 12–14 hours daily on a timer.
- Set the footprint: choose a tray or shelf area (example: a 24 in x 8 in tray or a 36 in shelf segment).
- Buy water first: start with 1 gallon of distilled water so you’re never tempted by the tap. If you scale up, consider an RO countertop unit later.
- Potting mix: combine 50/50 peat and perlite. Pre-moisten with distilled water until evenly damp (no dry pockets).
- Choose pots: plastic pots are best (terra cotta leaches minerals). For most starters, use 4 in pots; for Nepenthes, consider 5–6 in as it matures.
- Place plants by height: taller or vining plants in back/center, low rosettes at the front edge. Leave a small open strip of tray visible; it makes the setup look intentional.
- Set lights and distance: mount LEDs so the light is 8–12 in above the plant tops (adjust based on plant response). Put the lights on a timer to remove guesswork.
- Add a humidity assist (optional): a shallow pebble tray for Nepenthes nearby, not a sealed terrarium. Airflow matters indoors.
- Label and standardize: label the water jug, the timer setting, and each plant. Your future self will thank you.
Budget and DIY alternatives (without compromising plant health)
You can build an attractive carnivorous station without boutique terrariums. Here are realistic cost ranges to plan around:
- Entry tray setup: tray ($8–$15), 3 plastic pots ($6–$12), peat/perlite ($12–$20), distilled water ($1–$2 per gallon). Expect $30–$60 before plants.
- LED shelf setup: wire rack shelf ($40–$90), LED grow light ($25–$80), timer ($8–$15), trays ($10–$25). Expect $90–$210 before plants.
- Plant costs: Drosera capensis often $10–$20, Venus flytraps $12–$30, beginner Nepenthes $25–$60, Pinguicula hybrids $12–$25 (pricing varies by region and cultivar).
DIY swaps that still look polished:
- Use a thrifted serving tray lined with a waterproof boot tray insert.
- Convert a bookshelf into a grow station with adhesive cable clips and a single power strip (clean lines, no dangling cords).
- Use clear nursery saucers under individual pots if you can’t commit to one big tray.
Three real-world setups (with layout choices and tradeoffs)
Scenario 1: The rental windowsill that gets cooked in summer
Space: a south-facing sill, 48 in long, radiator below. Problem: heat spikes and drying air.
Design move: use a narrow tray (24 in x 8 in) placed slightly off-center so the hottest corner stays clear. Choose Drosera capensis and Pinguicula ‘Weser’ rather than forcing a flytrap to endure temperature swings indoors. Add a sheer curtain to diffuse midday scorch while keeping brightness.
Maintenance reality: you’ll top off tray water more often during heat waves—about every 2–3 days—but the layout stays stable.
Scenario 2: The office shelf with no real sun (but you want pitchers)
Space: a bookcase shelf, 36 in wide. Problem: low ambient light and dry HVAC air.
Design move: build a two-level composition: a Nepenthes ventricosa as the vertical anchor on one side with a small trellis, and a shallow tray of sundews on the other side under the same LED bar. Run lights 13 hours daily on a timer to mimic long growing days.
Budget note: spend on the light (that’s your sun). A midrange fixture in the $40–$60 range often outperforms cheap strips that lead to limp growth.
Scenario 3: The small-apartment “coffee table bog bowl” display
Space: a table centerpiece, visible from the couch. Problem: you want design appeal without mess.
Design move: choose an open-top bowl 14 in wide with an inner planting container (a pot-in-a-pot approach). Plant a simple trio: Drosera capensis for movement, Pinguicula ‘Weser’ for color, and a compact flytrap cultivar only if you can provide proper light and dormancy planning. Keep the bowl on a discreet waterproof mat.
Tradeoff: bowls can hide water levels. Mark the inside with a small line indicating 0.75 in water depth so you can top off without guessing.
Maintenance expectations: what you’re signing up for
A well-designed indoor setup should feel like caring for a tidy aquarium: quick daily glances, one deeper check-in a week. For most home stations, plan on 20–40 minutes per week.
Weekly rhythm (10–15 minutes, twice a week)
- Top off trays with distilled/RO water (don’t let bog pots dry out).
- Remove dead leaves and spent traps to reduce mold.
- Check for pests (especially aphids on new growth).
- Wipe any mineral residue on trays—if you see crust, reassess your water source.
Monthly tasks (20–30 minutes)
- Rotate pots for even growth if you’re using window light.
- Flush the pot gently from the top with distilled water (especially if you suspect mineral buildup).
- Trim Nepenthes vines and re-trellis to keep the silhouette intentional.
Seasonal planning (the part people skip)
Temperate dormancy (Venus flytraps and many Sarracenia): plan a cooler spot for roughly 3–4 months with shorter day length. Indoors, that can be near a cold window, enclosed porch, or another cool area. This is one reason many indoor designers keep flytraps as a “seasonal feature” rather than the core of an all-indoor collection.
Repotting: most carnivorous plants appreciate fresh media every 12–24 months. Media compacts over time, reducing oxygen around roots.
Common design mistakes (and the simple fixes)
Mistake: Sealing plants in a closed terrarium for “humidity.”
Fix: Use open-top setups and focus on consistent watering and adequate light. Stagnant air invites fungus.
Mistake: Mixing water needs in one tray (Nepenthes sitting in constant water).
Fix: Create two micro-zones: a wet tray for bog plants and a separate saucer or raised platform for Nepenthes.
Mistake: Treating traps like toys—triggering them for fun.
Fix: Let the plant do the work. Repeated triggering wastes energy and can shorten trap life.
Source-backed guardrails (so you don’t have to learn the hard way)
Two science-and-horticulture truths keep showing up across reputable carnivorous plant guidance:
- Use low-mineral water. The International Carnivorous Plant Society explicitly recommends rain, distilled, or reverse-osmosis water for many carnivores and cautions against dissolved minerals that accumulate in pots (ICPS, 2022).
- Prioritize light intensity. The Royal Horticultural Society emphasizes that insufficient light is a frequent cause of weak indoor plant performance and advises bright conditions for light-demanding plants (RHS, 2023).
If you design your setup around those two guardrails—clean water and real light—everything else becomes a tweak, not a rescue mission.
Once your first tray is stable, you’ll notice something satisfying: the setup starts to look less like “plants on a sill” and more like a miniature habitat. Traps color up, pitchers inflate, dew returns. That’s the moment the design clicks—because you didn’t just place plants indoors. You built them a site that makes sense.