Hillside Garden Solutions for Erosion Control
The first sign is always subtle: a thin fan of soil at the bottom of the slope after a hard rain. Then a small rut forms where water prefers to run. A month later, your mulch has migrated downhill, the path feels slick underfoot, and the plants at the top look strangely thirsty even though it “rained plenty.” Hillsides do that—gravity and water team up, and if you don’t give them a better plan, they’ll design the garden for you.
Today, I’m going to walk you through hillside erosion control the way I would on a real site visit: we’ll read the slope, choose a layout that slows water down, lock the soil in place with roots and structure, and finish with planting that looks intentional (not like emergency sandbags). You can do this as a homeowner investing in a long-term landscape—or as a renter making smart, reversible moves.
Read the Hillside Before You Touch It
Good hillside design starts with three measurements and one observation. You don’t need fancy tools—just a tape measure, a level (or a straight board with a level), and a notebook.
Measure slope steepness (so you pick the right solution)
Here’s a simple way: measure a 10 ft horizontal run, then measure the vertical drop over that distance. Slope (%) = (rise ÷ run) × 100. A drop of 2 ft over 10 ft is a 20% slope.
- 0–10% slope: usually manageable with deep-rooted plants, mulch, and light grading.
- 10–33% slope: ideal territory for terraces, step-paths, and swales.
- 33%+ slope: plan on retaining walls or engineered stabilization, plus dense planting.
Watch water during a real storm
Don’t guess where runoff goes—watch it. Note where water concentrates, where it sheets evenly, and where it puddles. That single observation tells you where to place a swale, a small berm, or a rock-lined “armor” strip.
As the USDA Natural Resources Conservation Service puts it, erosion is driven by rainfall impact, runoff, and soil susceptibility—meaning the goal is to slow water, spread it, and protect soil (USDA NRCS, 2022).
Core Layout Strategies That Stop Soil From Moving
When I design a hillside, I’m thinking in layers: first shape the water’s path, then add structure, then plant to stitch everything together. The best results combine at least two tactics.
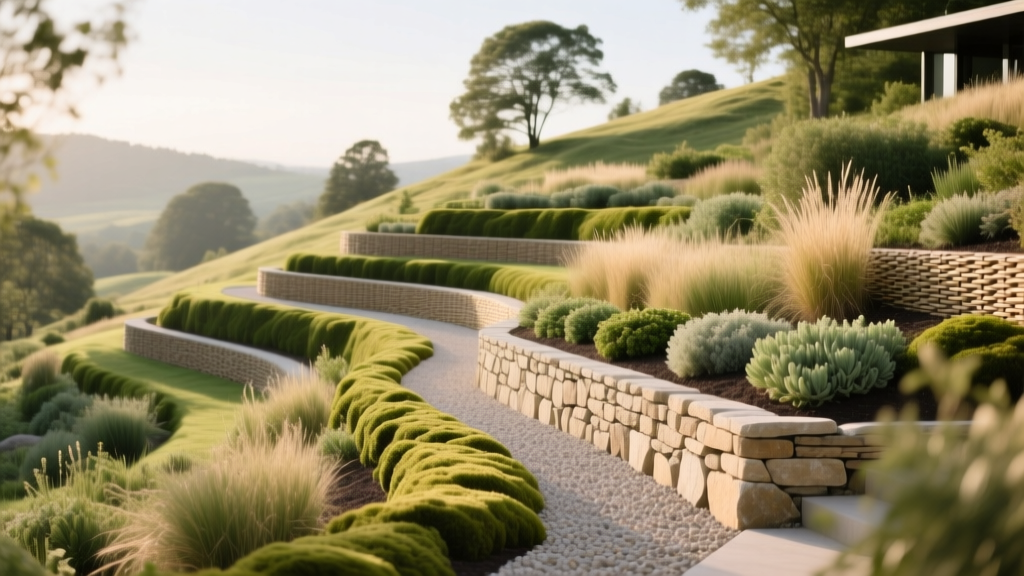
1) Work on contour: terraces, benches, and “speed bumps” for water
Anything that runs straight downhill becomes a chute. We want gentle, level lines across the slope—called contours—so water slows down and soaks in.
Terrace rule of thumb: On a moderate slope (around 20–30%), terraces are often spaced about 6–10 ft apart vertically, depending on your usable space and wall type. Each terrace becomes a planting bed that holds moisture and resists runoff.
2) Add a swale + overflow path (so water has a safe exit)
A swale is a shallow, level-bottomed trench on contour that catches runoff and lets it infiltrate. On small residential slopes, I often sketch a swale about 12–18 in wide and 6–8 in deep, then direct overflow to a stable outlet (like a gravel pad or a rain garden).
“Terracing and contour cultivation reduce slope length, slow runoff, and can significantly reduce erosion when paired with protective cover.” — Food and Agriculture Organization of the United Nations (FAO), 2015
3) Choose retaining solutions that match your budget and permanence
Retaining walls are not always required, but they’re invaluable where you need flat space, safe steps, or the slope is too steep to hold mulch and plants.
Practical safety note: Many municipalities require engineering for retaining walls around 4 ft tall and above. Check local codes before you build.
4) Cover the soil like it matters (because it does)
Bare soil is erosion’s favorite surface. Your hillside should rarely be naked. Use a combination of:
- Shredded bark mulch applied 2–3 in deep (shredded holds better than bark nuggets).
- Jute netting or biodegradable erosion blankets on newly graded areas.
- Dense planting so roots take over the holding job long-term.
Step-by-Step Setup: A Practical Build Sequence
This is the order I use to keep the work efficient and to avoid undoing myself later.
- Mark contour lines using stakes and string (or a laser level). Aim for level lines across the slope.
- Define access first: lay out steps or a zigzag path so you can plant and maintain without sliding. A comfortable garden path is typically 36 in wide; steps often land best at 48–60 in wide if you’ll carry pots or tools.
- Install hardscape (walls, edging, terraces, steps). Compact base material in lifts; don’t skip this on a hillside.
- Shape water controls (swales, small berms, rock-lined channels). Make sure there’s an overflow route that won’t scour.
- Amend planting pockets rather than the entire slope: mix compost into individual planting zones to avoid loosening the whole hillside.
- Plant from the bottom up so you’re not stepping on finished areas. Use tight spacing for faster soil coverage.
- Mulch and secure: apply 2–3 in shredded mulch; on steep spots, pin jute netting over mulch to keep it from sliding.
- Water deeply for establishment: slow soakings are better than quick sprays that run off.
Plant Choices That Actually Hold a Hillside
For erosion control, plants are not decoration—they’re living rebar. You’re looking for fibrous roots, ground-hugging growth, and plants that tolerate your slope’s sun and moisture reality.
Sun-loving slope plants (6–8+ hours of sun)
These handle heat and runoff and knit soil together quickly:
- Creeping juniper (Juniperus horizontalis ‘Blue Rug’ or ‘Wiltonii’): evergreen groundcover with dense habit. Space 4–6 ft apart; great for poor soils and drought once established.
- Switchgrass (Panicum virgatum ‘Northwind’): upright native grass with deep roots. Space 24–30 in apart; excellent for stabilizing while looking architectural.
- Blue grama (Bouteloua gracilis ‘Blonde Ambition’): low-water, tough grass that handles lean soil. Space 18–24 in apart.
- Lavender (Lavandula ‘Hidcote’): woody roots and drought tolerance; best on well-drained slopes. Space 24–30 in.
- Yarrow (Achillea millefolium ‘Moonshine’): spreads to cover soil and supports pollinators. Space 18 in.
Part-shade slope plants (3–6 hours of sun)
- Oregon grape (Mahonia aquifolium): evergreen, tough, and good on slopes. Space 3–4 ft.
- Fragrant sumac (Rhus aromatica ‘Gro-Low’): a designer favorite for banks—dense, soil-holding, and adaptable. Space 4–6 ft.
- Coral bells (Heuchera ‘Caramel’ or ‘Palace Purple’): great for stitching between shrubs; fibrous roots. Space 12–18 in.
Shade slope plants (2–4 hours or dappled light)
- Allegheny spurge (Pachysandra procumbens): native groundcover for shade with steady spread. Space 12 in.
- Christmas fern (Polystichum acrostichoides): reliable fern with strong clumps that hold soil. Space 18–24 in.
- Sedge (Carex pensylvanica): soft, lawn-like texture without mowing; excellent on wooded slopes. Space 12–18 in.
Planting density: the erosion-control shortcut
If you want the slope to stop shedding soil quickly, plant tighter than you would on flat ground. For many perennials and groundcovers, aim for coverage within one growing season by spacing at 12–18 in instead of 24 in. The upfront plant cost is higher, but you save on replacing washed-out mulch and replanting later.
Comparison Table: Which Erosion-Control Approach Fits Your Slope?
| Solution | Best for slope | Typical DIY cost range | Strengths | Trade-offs |
|---|---|---|---|---|
| Dense planting + shredded mulch | 0–20% | $150–$600 (plants + mulch) | Fast, natural look, renter-friendly in many cases | Needs watering during establishment; mulch can drift on steeper slopes |
| Jute netting + hydroseed/seed mix | 10–33% | $100–$450 | Quick soil protection; good for large areas | Can look rough until filled in; requires careful pinning |
| Terraces with timber or block | 15–40% | $800–$4,000+ | Creates usable flat beds; excellent erosion control | Labor-intensive; walls may require permits if tall |
| Riprap/rock armor + planting pockets | 25–50% (or concentrated flow paths) | $500–$2,500 | Handles heavy runoff; very durable | More industrial look; can be hot/dry for plants without pockets |
Three Real-World Scenarios (and How I’d Design Each)
Let’s make this concrete. Here are three common hillside situations and what actually works, with layouts you can picture.
Scenario 1: The narrow side-yard slope that eats mulch
Site: A 6 ft wide strip between house and fence, dropping about 2.5 ft over 12 ft (roughly 20% slope). Sun hits for 5–6 hours.
Design move: I’d skip a big wall and build a “stitched” layout:
- A 36 in zigzag maintenance path using compacted gravel and metal edging.
- Two short timber terrace bands, each 8–10 in tall, creating planting shelves.
- A mini swale at the top that runs on contour and spills into a gravel splash pad.
Planting: ‘Gro-Low’ fragrant sumac (structure) at 5 ft spacing, then drifts of coral bells at 15 in spacing to cover soil fast. Finish with shredded bark mulch pinned under jute in the steepest 3–4 ft section.
Budget idea: DIY timber terraces and plants typically land around $900–$1,800 depending on plant size. Renting a plate compactor for the path base might cost about $70–$100/day in many areas.
Scenario 2: The sunny front bank that’s too steep to mow
Site: A front slope about 25 ft long and 10 ft deep, south-facing, with 8+ hours of sun. Grass is thinning; runoff leaves rills.
Design move: Treat it like a living tapestry—no, scratch that—treat it like a plant-powered retaining fabric with two stabilizers: contour breaks and deep roots.
- Create three gentle contour “speed bumps” using low berms (soil + compost) about 8 in high.
- Add a rock-lined channel only where runoff concentrates (often near the driveway edge).
Planting: A matrix planting that covers ground quickly and survives heat:
- Switchgrass ‘Northwind’ at 30 in spacing for vertical anchors.
- Creeping juniper ‘Blue Rug’ at 5 ft spacing to lock surface soil.
- Yarrow ‘Moonshine’ at 18 in spacing to fill gaps and bloom.
- Add 2–3 lavender ‘Hidcote’ groups where you want fragrance near the sidewalk.
Cost check: For roughly 250 sq ft, expect $300–$900 in plants (depending on pot size) plus $120–$250 in mulch. If you add 1 ton of small rock for the channel, that might run $80–$200 plus delivery.
For plant-based erosion control to work, ground cover matters. Penn State Extension notes that vegetative cover and mulches reduce erosion by protecting soil from raindrop impact and slowing runoff (Penn State Extension, 2023).
Scenario 3: The shaded backyard ravine edge with occasional washouts
Site: A wooded slope behind a patio with a small drainage line that flows during storms. Light is dappled—2–4 hours equivalent sun.
Design move: This is where I blend “soft” and “hard” stabilization:
- Stabilize the flow line with a narrow dry creek bed: 18–24 in wide, lined with geotextile and river rock.
- Plant the banks densely with shade-rooters.
Planting:
- Christmas fern at 24 in spacing for clumping roots.
- Carex pensylvanica at 15 in spacing to knit the soil like a living mat.
- Allegheny spurge at 12 in spacing for quick coverage in pockets.
DIY alternative: If rock and fabric feel too permanent for a rental, you can use pinned coir logs (biodegradable) to slow water and trap sediment, then plant sedges and ferns through and around them.
Budget Planning: Spend Where It Stops Rework
On slopes, cheap fixes can become annual rituals. The best value is often in access (safe steps/path) and establishment (dense planting + reliable watering for the first season).
Smart places to invest
- Edging and pinning systems to keep mulch in place.
- A soaker hose or drip line to avoid runoff. A basic drip kit often costs $30–$80.
- One or two anchor shrubs with strong root systems (sumac, mahonia) rather than many flimsy accent plants.
DIY and renter-friendly erosion control options
- Biodegradable erosion blankets (jute/coir) pinned with landscape staples: effective and removable over time.
- Container “terracing”: large pots placed on contour, backed with mulch and planted with trailing groundcovers; helpful where digging is restricted.
- Brush layering: using pruned branches laid in shallow trenches on contour to slow runoff and trap soil (best in informal wooded areas).
Maintenance Expectations (So the Slope Stays Put)
Most hillside gardens are front-loaded: the first year takes attention, then the garden settles into a routine.
Weekly time
Plan on about 30–60 minutes per week during the first growing season for watering checks, pinning displaced mulch, and pulling small weeds before they root deeply. After establishment, many slopes drop to 15–30 minutes per week in the growing season.
Seasonal tasks
- Spring: Inspect after heavy rains; re-pin jute where needed; top up mulch back to 2–3 in.
- Summer: Deep water 1–2 times weekly during dry periods (slow soak to prevent runoff). Deadhead yarrow/lavender lightly; avoid heavy fertilizing that causes weak, floppy growth.
- Fall: Add leaf mulch in shade gardens; cut back grasses in late winter or early spring (leave standing for winter interest and root strength).
- Winter: Check that downspouts and splash blocks aren’t dumping directly onto bare slope areas.
Small Design Details That Make a Big Difference
Keep downspouts honest. A single roof downspout can undermine a hillside bed. If possible, extend downspouts to a stable outlet (gravel pad, rain garden, or a pipe to daylight) so concentrated water doesn’t carve a channel.
Build “pause points.” Even one 4 ft x 4 ft landing tucked into a terrace changes how you use the garden. It also keeps you from stepping on planting zones, which compacts soil and encourages runoff.
Mix root types. Combine fibrous-root grasses, spreading groundcovers, and a few woody shrubs. That diversity holds soil at multiple depths and tolerates weather swings better than a single plant layer.
What a Finished Hillside Should Feel Like
When the layout is working, you’ll notice it in the next storm: water slows down, sinks in, and exits calmly instead of tearing a path. Your mulch stays where you put it. Plants at the top stop drying out, because moisture isn’t racing away. And the slope becomes a garden you can actually enter—steps that feel secure, small beds that are reachable, and planting that looks like it belongs on a hillside.
If you’re standing at the bottom of your slope right now, watching soil collect where it shouldn’t, start with one controllable strip: a single contour bed with a swale above it, dense plants below it, and a way to walk it safely. Hillside gardens don’t have to be conquered all at once. They just need a design that respects gravity—and uses it to your advantage.
Sources: USDA Natural Resources Conservation Service (NRCS), 2022; Penn State Extension, 2023; Food and Agriculture Organization of the United Nations (FAO), 2015.