Greenhouse Gardening for Beginners
The first cold snap always feels personal. One week you’re slicing basil into pasta and admiring tomatoes ripening on the vine; the next, the forecast whispers “frost,” and your tender plants start looking like they’ve heard it too. If you’ve ever carried pots indoors like a frantic hotel porter, or watched seedlings stall on a dim windowsill, a small greenhouse isn’t a luxury—it’s a design solution. Think of it as an outdoor room with better light, where you control the season and the layout instead of letting the weather dictate your harvest.
As a designer, I like greenhouses because they reward good planning. A few inches of bed width, a smart path, and the right vent placement can turn a tight corner of a yard—or a rented patio—into a steady supply of greens, herbs, and warm-season fruit. Let’s walk through how to plan a beginner-friendly greenhouse that fits your space, budget, and weekly schedule.
Start With the Site: Light, Access, and “Daily Convenience”
Before choosing a structure, stand in your proposed spot at three times: morning, midday, and late afternoon. Your greenhouse should be where you’ll actually use it—close enough to grab a handful of salad greens without it becoming an expedition.
Sunlight targets (and what they really mean)
Most fruiting crops (tomatoes, peppers, cucumbers) perform best with 6–8 hours of direct sun. Leafy greens can manage with 4–6 hours, especially in summer. If you’re placing a greenhouse near a fence, the “shadow line” matters more than the square footage.
- Best orientation: In many home gardens, a ridge running east–west helps maximize winter sun in the northern hemisphere, while north–south can distribute light more evenly across beds in summer. Choose based on your priority season.
- Realistic beginner goal: Place the greenhouse where it receives at least 6 hours of sun from March through October.
Water and power: design for two hoses and a timer
Plan a water source within 25–50 ft if possible. Dragging a hose across the yard sounds fine until the third week of July. If you’ll add a small heater or seedling lights, map a weather-safe power route. For renters, prioritize structures that can run on a simple hose connection and avoid trenching or permanent wiring.
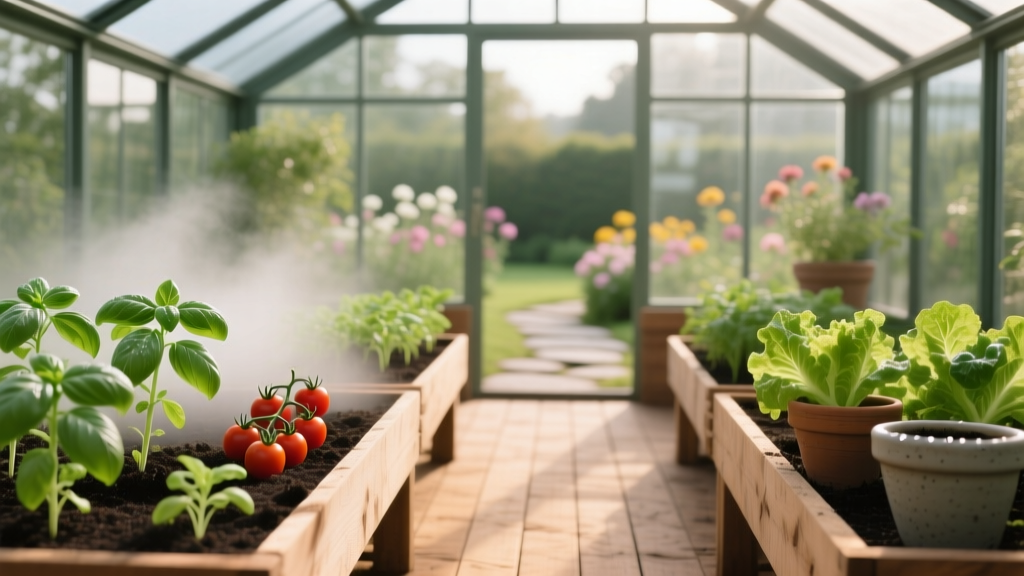
Layout Principles That Make a Beginner Greenhouse Feel Easy
Greenhouse gardening is less about stuffing plants into a warm box and more about creating a calm workflow: potting, watering, harvesting, and venting—often in under ten minutes a day.
Use a “center path + two zones” plan
A classic layout works because it prevents chaos: a straight path for access, productive planting zones on both sides, and a work surface at the front.
- Minimum comfortable path width: 24 inches (you can turn with a watering can; a wheelbarrow is tight).
- Ideal path width: 30–36 inches if you’ll roll in pots or use a small cart.
- Bed/shelf depth: Keep planting surfaces to 18–24 inches deep if accessed from one side; 36–48 inches if accessed from both sides.
Design for airflow first (your plants will thank you)
Heat is easy to trap; fresh air is harder. Poor airflow is the fast lane to mildew and fungal issues—especially for cucumbers and tomatoes. The U.S. National Renewable Energy Laboratory notes that ventilation is a key strategy to reduce greenhouse overheating (NREL, 2022). Even a small greenhouse should have at least two venting points (e.g., a roof vent plus a door or side vent) to create cross-ventilation.
“Ventilation is the primary method for controlling temperature and humidity in greenhouses; without it, overheating and disease pressure rise quickly.” — University of Massachusetts Extension, Greenhouse Crops & Floriculture Program (UMass Extension, 2020)
If your budget allows, add an automatic vent opener. It’s a small upgrade that saves plants when you’re stuck at work on a sunny day.
Make room for a “dirty corner”
Every greenhouse needs a small zone where mess is allowed: potting mix, empty trays, a bucket, labels, and hand tools. Allocate 18–24 inches of counter space. A simple fold-down shelf mounted to the frame is a renter-friendly option.
Choosing a Greenhouse Form That Matches Your Space
Your structure is a container for light and air—not a status symbol. The right choice depends on permanence, available floor area, and how much you want to grow.
| Option | Best for | Typical footprint | Approx. cost (USD) | Design notes |
|---|---|---|---|---|
| Mini walk-in greenhouse (polycarbonate) | Homeowners with small yards | 6' x 8' (48 sq ft) | $450–$1,200 | Stable, good insulation; add roof vent + 30" path. |
| Lean-to greenhouse against a wall | Maximizing tight spaces | 3' x 8' to 6' x 12' | $300–$2,000 | Wall adds warmth; watch for shade and dripping eaves. |
| Portable zip-up greenhouse (shelf unit) | Renters, patios, seasonal use | 2.5' x 5' (12.5 sq ft) | $40–$120 | Great for seedlings; wind anchoring is essential. |
| Hoop house / tunnel | Big seasonal production on a budget | 10' x 20' (200 sq ft) | $200–$1,500 | Best ventilation; less insulating than rigid panels. |
For beginners, a 6' x 8' walk-in is a sweet spot: enough room for a real path and two productive sides without becoming a second job.
Step-by-Step Setup: A Beginner-Friendly Build-Out
These steps assume a small walk-in greenhouse or lean-to. Adjust the measurements to your footprint, but keep the workflow intact.
- Mark the footprint and path. Use string lines to mark a 30-inch center path. Confirm you can open the door fully without hitting beds or shelves.
- Level the base. Aim for less than 1 inch of slope across the footprint. Use compacted gravel (about 2–3 inches deep) for drainage if the site is damp.
- Install floor and path materials. Budget-friendly: landscape fabric + gravel. Cleaner option: 12" x 12" pavers down the center with gravel around them.
- Set up two growing zones. One side for taller crops (trellis line), one side for low crops and seedling benches. Keep beds/shelves 18–24 inches deep for comfortable reach.
- Add ventilation hardware. At minimum: a roof vent and a thermometer/hygrometer. Ideal: automatic vent opener + small oscillating fan.
- Install watering. Simple setup: a hose with a shutoff valve at the greenhouse entrance. Upgrade: a $25–$60 timer and a basic drip line.
- Plan for shade. Keep shade cloth on hand (often 30–50% shade) for hot spells; it can prevent flower drop on tomatoes and stress on greens.
Plant Selection: Beginner Crops That Behave Well Under Cover
A greenhouse amplifies both success and mistakes. Start with crops that tolerate temperature swings and don’t require perfect pollination or pruning on day one. Then add a few “showpiece” plants once you’ve learned the rhythm of venting and watering.
Reliable greens (fast, forgiving, high payoff)
- Lettuce ‘Salanova’ (multi-leaf butter types): compact heads, quick harvest, great for cut-and-come-again. Space 8–10 inches apart.
- Spinach ‘Tyee’: slow to bolt, strong growth in cool weather. Space 4–6 inches for baby leaves, 8 inches for full plants.
- Swiss chard ‘Bright Lights’: handles warmth better than many greens; keeps producing. Space 10–12 inches.
Herbs that make the greenhouse feel like a kitchen extension
- Basil ‘Genovese’: thrives in warm, bright conditions; harvest often to prevent flowering. Space 8–12 inches.
- Parsley ‘Giant of Italy’: tolerant of cool spells; steady production. Space 8–10 inches.
- Chives: perennial clumps in pots; excellent for beginners. One 8–10 inch pot can supply a household.
Beginner-friendly fruiting crops (choose compact varieties)
- Tomato ‘Sungold’ (cherry): prolific, forgiving, high flavor. Train to a single leader on a string trellis. Plant 18–24 inches apart.
- Tomato ‘Celebrity’ (determinate): a steadier, less jungle-like plant for tighter greenhouses. Space 18–24 inches.
- Sweet pepper ‘Lunchbox’: compact plants, sweet mini peppers; great in containers. One plant per 3–5 gallon pot.
- Cucumber ‘Diva’ (parthenocarpic): sets fruit without pollination; a greenhouse favorite because you don’t need bees inside. Space 12–18 inches and trellis vertically.
Why these work: compact growth, strong productivity, and fewer greenhouse-specific headaches. Parthenocarpic cucumbers in particular reduce the frustration of flowers that drop without setting fruit.
3 Real-World Layout Scenarios (Pick the One That Looks Like Your Life)
Good design respects constraints: lease agreements, fences, wind tunnels between buildings, and the reality that you may only have 20 minutes on a weekday.
Scenario 1: The renter with a windy balcony (12 sq ft solution)
You’ve got a balcony that gets 5–6 hours of sun and gusty afternoon wind. A zip-up shelf greenhouse can work—but only if you treat it like a sail.
Layout: Place the unit against the warmest wall (often the building wall), leaving 6 inches behind it for airflow so moisture doesn’t rot the fabric. Anchor it with two 10–20 lb weights (sandbags or pavers) on the bottom shelf.
Planting plan: Seedling trays on the top shelf, herbs in 1–2 gallon pots on the middle shelf, and greens in shallow trays on the bottom. Avoid tall tomatoes here; they’ll stretch and topple.
DIY alternative: Instead of a full cover, use clear storage bins with vent holes as mini cloches on shelves—cheap, modular, and easy to remove on warm days.
Scenario 2: The suburban homeowner with a 6' x 8' backyard greenhouse
This is the classic beginner sweet spot: enough volume to buffer temperature swings, enough space to stand, and enough headroom to trellis.
Layout: A 30-inch center path, a 18-inch deep bench on the north side (seedlings and greens), and a 24-inch deep planting bed on the south side (tomatoes/peppers). Install a trellis wire at 6–7 ft height for string training.
Planting plan (spring to summer): Two tomatoes (‘Sungold’ and ‘Celebrity’) spaced 24 inches apart, two ‘Lunchbox’ peppers in 5-gallon pots, and one ‘Diva’ cucumber trained vertically. Underplant with basil and lettuce early in the season before the canopy fills in.
Budget note: Expect $600–$1,500 all-in for a basic kit + gravel base + a few large containers, depending on materials. You can shave costs by using reclaimed pavers and building your bench from exterior-grade 2x4s.
Scenario 3: The narrow side yard with a lean-to (3' x 10' precision layout)
Side yards are often dismissed as awkward corridors—yet they’re perfect for a slim lean-to if you manage shadows.
Layout: Use a single 24-inch path with a continuous shelf/bed on one side at 18 inches deep. In a narrow structure, prioritize vertical growing: wall-mounted trellis netting, hanging herb pots, and compact peppers.
Planting plan: One trellised cucumber, two peppers in 3–5 gallon pots, and a rotating cast of greens in 10–12 inch wide troughs. Add a pot of chives and a pot of parsley near the door for easy harvest (you’ll use them more).
DIY alternative: If a full lean-to isn’t allowed, build a “season extender wall” using clear corrugated roofing panels mounted to a simple frame, angled to shed rain. Pair with row cover inside for a surprising boost in spring.
Climate Control Without Overcomplicating It
Beginners often assume greenhouses are about heat. More often, they’re about avoiding overheating. A small structure can spike quickly on sunny days even when the outside air feels mild.
- Monitoring: Use a simple max/min thermometer. If the greenhouse regularly exceeds 90°F in spring, you need more venting or shade.
- Vent strategy: Open roof vents first, then the door for cross-flow. Add a small fan if humidity stays high.
- Thermal mass on a budget: A few dark water containers (for example, 2–4 jugs of 5 gallons) can moderate night swings in shoulder seasons. Place them where they don’t block airflow.
For winter growing, heating costs can climb fast. The U.S. Department of Energy notes that greenhouse energy use is highly sensitive to insulation, air leaks, and heating strategy (U.S. DOE, 2023). For many beginners, the most cost-effective approach is using the greenhouse as a season extender (spring starts and fall production) rather than forcing tropical conditions all winter.
Budget Planning and Smart DIY Swaps
A greenhouse can be a $80 experiment or a $2,000 backyard feature. The goal is to spend where it changes outcomes: ventilation, structure stability, and a workable interior layout.
- Spend on: sturdy frame, UV-stable covering (polycarbonate panels often last longer than thin plastic), roof vent(s), and a reliable door latch.
- Save on: benches (DIY), pots (repurpose food-safe buckets with drainage), and paths (reclaimed brick/pavers).
Concrete starter budget example (6' x 8'): greenhouse kit $800, gravel base $120, DIY bench lumber $60, drip timer + fittings $45, thermometer/hygrometer $18. Total: about $1,043—and each line item pulls its weight.
Maintenance Expectations: The Weekly Rhythm (and Seasonal Jobs)
A well-designed greenhouse shouldn’t consume your weekends. Plan for small, frequent check-ins rather than occasional marathons.
Time per week: In peak growing season, expect 1–3 hours/week total for watering, training vines, harvesting, and quick cleanups. In shoulder seasons, you may spend 30–60 minutes/week.
Weekly tasks (10-minute habits that prevent problems)
- Vent check: open/close vents as temperatures swing; confirm auto openers are working.
- Watering: check containers daily in hot weather; greenhouse pots dry faster than outdoor beds.
- Pruning/training: tie tomatoes and cucumbers to their supports; remove yellowing leaves to improve airflow.
- Pest scan: look under leaves for aphids and whiteflies; early detection is everything.
Seasonal tasks (put them on a calendar)
- Spring: wash glazing, refresh paths, start seeds 6–8 weeks before last frost, set up shade cloth before heat spikes.
- Summer: manage heat with vents + shade; deep water containers; pollinate tomatoes by gently tapping flower trusses if airflow is low.
- Fall: transition to greens, remove spent vines, disinfect pots and tools, check door seals and vent hinges.
- Winter (if used): reduce watering, maximize light, protect plumbing from freezing, and avoid overcrowding to reduce humidity.
Design Details That Quietly Upgrade Results
These are the small moves I reach for when a greenhouse feels “fussy” instead of friendly.
- Stagger plant heights: tall crops on the north side (or far side) to avoid shading shorter greens.
- Use containers strategically: containers let you rotate crops to chase light and manage spacing precisely. A tomato in a 10-gallon pot can be moved a few inches to open up airflow—often the difference between healthy leaves and mildew.
- Label everything: especially seed-starting trays. It’s not just organization; it’s how you learn what thrives in your microclimate.
- Keep an empty spot: reserve one “parking space” for a plant you need to isolate, harden off, or rescue.
The best beginner greenhouse is the one that feels like it was designed for your daily life: the door opens cleanly, the path is wide enough to turn, the vents are easy to reach, and the plants are chosen for your light and your schedule. Once you’ve harvested your first winter salad mix or trained a cucumber up a tidy trellis line, you’ll stop thinking of it as a structure and start thinking of it as your most productive room outdoors.
Sources: National Renewable Energy Laboratory (NREL), 2022; University of Massachusetts Extension, Greenhouse Crops & Floriculture Program, 2020; U.S. Department of Energy (DOE), 2023.