Greenhouse Microclimate Zones Guide
You step into your greenhouse on a bright morning and feel it immediately: the air is warm and still near the roof, cool and damp by the door, and oddly “just right” along the south wall. You water the whole house the same, yet basil wilts in one corner while lettuce bolts in another. That’s not bad luck—it’s microclimate zoning, and once you design for it, the greenhouse starts working like a well-planned home: each room suits its purpose.
Think of this as a layout project. We’ll map the greenhouse into distinct zones, then match plants and routines to each zone so you stop fighting temperature swings, drafts, and hot spots. I’ll walk you through strategies that work in real backyards and rentals, with numbers you can measure and decisions you can make in a weekend.
Read the room: what creates greenhouse microclimates?
Even a small 6 ft x 8 ft greenhouse behaves like a tiny landscape. Heat rises. Sunlight concentrates on one side. Moisture collects where air is still. Your job is to turn those patterns into intentional “beds” and “borders.”
The main microclimate drivers
These are the forces that carve up your interior climate:
- Sun path and glazing: South-facing glazing (in the Northern Hemisphere) gets the strongest light; shade cloth and nearby fences change it drastically.
- Ventilation patterns: Roof vents, side vents, and doors create “wind lanes” and cooler pockets. A single open vent can drop temperatures near it by several degrees.
- Thermal mass: Water barrels, stone, and dense pavers absorb heat by day and release it at night, smoothing swings.
- Height: The top shelf can run much hotter than the floor because warm air stratifies. The U.S. Department of Energy notes that hot air rises and can be captured and redistributed with circulation strategies (U.S. DOE, 2023).
- Humidity and leaf density: A packed tomato corner transpires moisture and reduces airflow, increasing humidity and disease risk if not managed.
“Temperature uniformity is one of the most important factors in greenhouse crop performance; poor air circulation can create large temperature differences within the same house.” — University of Massachusetts Extension, Greenhouse Heating & Energy Conservation guidance (UMass Extension, 2020)
Zone planning: design a greenhouse like a small garden
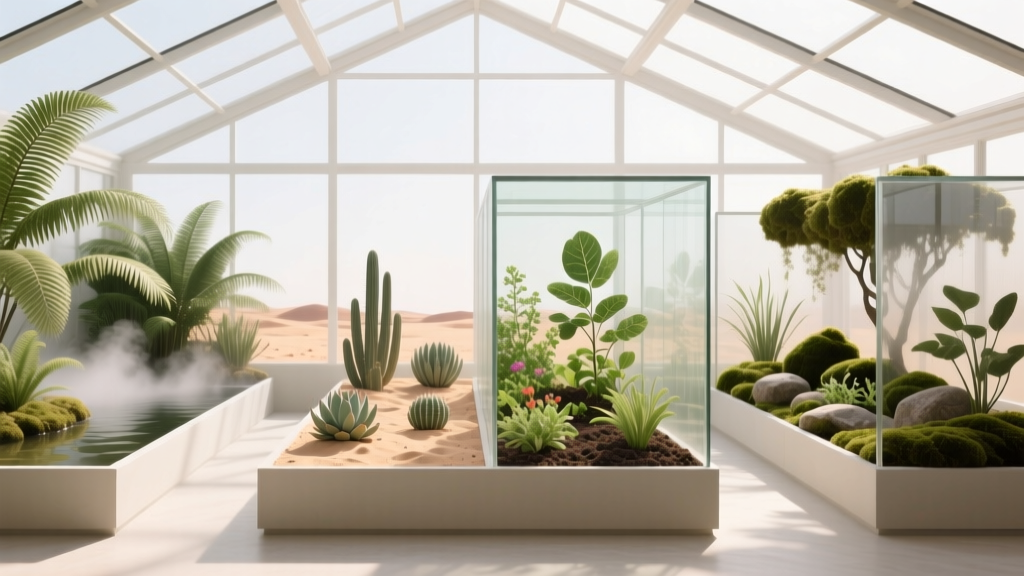
Before buying another heater or fan, sketch the footprint and assign zones. In most hobby greenhouses, I design around four dependable microclimates: Hot & Bright, Bright & Moderate, Cool & Drafty, and Warm & Humid. They exist in nearly every structure—you’re just naming and using them.
Step-by-step: map your microclimate zones in 45 minutes
- Measure the shell. Note length/width and bench depth. Example: a 6 ft x 10 ft greenhouse with two 18 in deep side benches leaves a 24–30 in center aisle.
- Mark openings. Door location, roof vent(s), side vents, and any gaps. Drafts usually dominate the first 2–3 ft inside a door.
- Track sun for one day. Write down where direct sun hits at 9 a.m., noon, and 3 p.m. Most greenhouses receive 6–10 hours of sun in spring/summer depending on obstructions.
- Take three temperature readings. Use a basic thermometer ($12–$25) at (a) near roof height, (b) bench height, (c) floor level. Repeat once midday and once after sunset. A 5–15°F difference between high and low points is common in small structures.
- Label zones on your sketch. You’re looking for the “hot shelf,” the “sun wall,” the “door pocket,” and the “still corner.”
- Assign crops by tolerance. Heat lovers go high and sunny; cool crops go low and near airflow; humidity lovers go grouped where you can manage moisture.
Layout strategies that make zones work for you
Microclimates are not a flaw—they’re a design resource. Here are the practical layout moves that turn them into predictable planting areas.
Strategy 1: Build a “sun spine” and “cool edge”
On the brightest wall (typically south), run your highest-light plants in a continuous strip. Then create a cool edge on the opposite side for greens and starts that prefer gentler conditions.
- Sun spine bench depth: 18–24 in is ideal; deeper benches turn into clutter traps.
- Plant spacing (sun spine): Indeterminate tomatoes 18–24 in apart; peppers 14–18 in; basil 10–12 in.
- Cool edge: Use lower shelves (12–18 in high) so greens benefit from cooler floor air.
Strategy 2: Use height as a climate dial
If you only change one thing, change your shelving. Warm air pools near the roof; that top tier is prime real estate for heat-tolerant plants and hardening-off trays when nights are mild.
- Top shelf use: Seedlings that need warmth (tomato, pepper, basil), or drying harvested herbs.
- Bottom shelf use: Lettuce flats, spinach, cilantro—plants that bolt quickly when warm.
Strategy 3: Create a humidity “room” without building walls
Group humidity-loving crops together and manage them as a unit. Use a shallow gravel tray under pots to raise local humidity without dampening the whole greenhouse.
- DIY humidity tray: A 10 in x 20 in nursery tray + pea gravel costs about $8–$15 total, and it’s renter-friendly.
- Avoid disease: Keep at least 6 in between leafy plants for airflow, and run a small circulation fan.
Strategy 4: Add thermal mass where it matters most
Thermal mass is the quiet hero for smoothing temperature swings. Even one or two water containers can reduce overnight dips near tender plants.
- Simple option: Two 55-gallon black barrels placed along the north wall. They’re often $25–$60 each used, and they double as a potting “backstop.”
- Small greenhouse alternative: Four 5-gallon water jugs ($8–$12 each) tucked under a bench.
Strategy 5: Ventilation as zoning tool (not just cooling)
Ventilation doesn’t have to “fix” the whole greenhouse. Aim airflow where you need a cooler, drier zone—typically near tomatoes to reduce fungal issues.
- Fan size: A 6–9 in clip fan ($20–$35) can keep air moving across a 6x8 structure if placed to circulate, not blast.
- Target: Gentle leaf movement, not windburn.
Comparison: common greenhouse zones and what to grow there
| Microclimate zone | Where it shows up | Typical conditions | Best plant matches | Design move |
|---|---|---|---|---|
| Hot & Bright | Upper shelves; south wall | Highest light; warmest air | Tomatoes, peppers, basil, eggplant | Train vertically; shade cloth in peak summer |
| Bright & Moderate | Main benches at mid-height | Strong light; steadier temps | Cucumbers, dwarf citrus (in containers), geraniums | Use trellis; keep aisle clear for airflow |
| Cool & Drafty | Near door/vents; floor level | Cooler; more air exchange | Lettuce, spinach, cilantro, brassica starts | Add door sweep; keep tender plants back 2–3 ft |
| Warm & Humid | Still corners; dense foliage areas | Moist; limited airflow | Ginger, turmeric, mint (contained), propagation trays | Gravel trays; small fan to prevent stagnation |
Plant selection: specific varieties that thrive by zone
Variety choice matters as much as placement. A greenhouse magnifies strengths (fast growth, high yield) and weaknesses (disease susceptibility, bolting). These picks are reliable for home setups and respond well to zoning.
Hot & Bright zone: fruiting crops that want intensity
Tomato: ‘Sungold’ (cherry) — Sets fruit well in warm conditions and rewards vertical training. Space 18–24 in, prune to 1–2 leaders for better airflow.
Tomato: ‘San Marzano’ — Great for sauce; prefers consistent warmth. Keep foliage off the ground and maintain steady moisture to reduce blossom-end rot.
Pepper: ‘California Wonder’ — A steady producer that tolerates greenhouse heat better than many sweet peppers. Space 14–18 in; stake early.
Basil: ‘Genovese’ — Loves warm benches and bright light; pinch weekly to prevent flowering. Plant 10–12 in apart for airflow.
Bright & Moderate zone: climbers and container “centerpieces”
Cucumber: ‘Diva’ — Parthenocarpic (sets fruit without pollination), a greenhouse advantage. Train up a trellis; plant 12–18 in apart and keep leaves thinned near the base.
Strawberry: ‘Albion’ — Day-neutral variety that performs well in containers; place where light is strong but temps aren’t extreme. Use 8–10 in pots, one plant per pot.
Pelargonium (scented geranium): A practical ornamental—handles warm days and gives you cuttings to propagate.
Cool & Drafty zone: crops that punish heat with bolting
Lettuce: ‘Buttercrunch’ — More forgiving in variable conditions; harvest outer leaves to extend production. Space 8–10 in.
Spinach: ‘Bloomsdale Long Standing’ — Handles cooler pockets; sow densely, then thin to 3–4 in for baby leaves.
Cilantro: ‘Slow Bolt’ — Name says it all; place it near the door zone where it stays cooler.
Warm & Humid zone: propagation and tropical edibles
Ginger (Zingiber officinale) — Thrives with steady warmth and higher humidity; grow in a wide container (at least 14–18 in diameter) and keep evenly moist.
Turmeric — Similar needs to ginger; benefits from a humidity-managed corner.
Seed starting trays — Germination is faster and more uniform in a slightly warmer, humid pocket, but add a fan to reduce damping-off risk.
Three real-world greenhouse zoning scenarios
Let’s make this concrete. Here are three layouts I’ve used (or adapted) for real spaces—small, awkward, and renter-limited.
Scenario 1: The 6 ft x 8 ft kit greenhouse with a single door (tight but workable)
Problem: Everything feels crowded by June, and the door corner stays cold in spring.
Layout move: Two 18 in benches on the long sides, leaving a 24 in aisle. Put the “sun spine” on the brightest bench, and reserve the first 2–3 ft inside the door for cool crops and hardier starts.
Planting plan: Two indeterminate tomatoes (‘Sungold’ and ‘San Marzano’) trained up strings on the sun side; three peppers (‘California Wonder’) on the same bench. On the opposite bench: lettuce succession sowings every 14 days (small trays rotated in). Cilantro and spinach live nearest the door.
Budget notes: DIY trellis with polypropylene twine and eye hooks costs about $10–$18. A clip fan adds $20–$35, and it’s the difference between “lush” and “powdery mildew season.”
Scenario 2: A renter’s balcony greenhouse cabinet (mini greenhouse, big payoff)
Problem: Limited footprint and strict “no permanent fixtures” rules. Temperature swings are sharp—hot midday, cold nights.
Layout move: Use microclimates vertically: top shelf for basil and pepper starts, middle shelf for strawberries and herbs, bottom shelf for greens. Add thermal mass with two 1-gallon water jugs on the bottom.
Planting plan: ‘Genovese’ basil in 6–8 in pots up top; ‘Albion’ strawberries mid-level; ‘Buttercrunch’ lettuce down low in a shallow trough planter. Mint only if it’s in its own container—this is one plant that will take over your whole “cabinet garden” if you let it.
Costs: A basic 3-tier covered shelving greenhouse is often $45–$90. Add $16–$24 for two water jugs and a $12 thermometer so you can see what’s happening instead of guessing.
Scenario 3: The backyard hoop house (10 ft x 20 ft) that overheats in summer
Problem: By July, fruiting plants stall and leaves scorch, even with the doors open.
Layout move: Establish a hot zone and a moderated zone by adding shade cloth and intentional ventilation lanes. A 30% shade cloth is a common starting point for summer protection in many climates (University of Georgia Extension, 2019).
Planting plan: Heat-tolerant peppers and eggplant in the brighter strip; cucumbers on a central trellis where airflow is best; greens only in spring/fall in the cooler edges. Put propagation and ginger in a managed humid corner with a fan.
DIY option: Instead of an expensive automated vent system, install roll-up sides with simple clamps and rope. Materials can run $40–$120 depending on length and hardware.
Sunlight hours, temperature targets, and spacing: the numbers that prevent drama
Greenhouses reward people who measure. You don’t need lab gear—just consistent reference points.
- Sunlight: Aim for 6–8 hours of direct sun for fruiting crops; 4–6 hours is workable for leafy greens if temperatures are controlled.
- Spacing: Tomatoes 18–24 in; cucumbers 12–18 in; lettuce 8–10 in; basil 10–12 in. Crowding is the fastest path to disease.
- Aisle width: Keep at least 24 in so you can carry a tray without brushing foliage (and spreading spores).
- Temperature cues: If your top shelf runs 10°F hotter than bench level at midday, treat it as a different zone and plant accordingly.
- Watering: Water the warmest zone earlier in the day so foliage dries before evening—one of the simplest disease-prevention habits.
Budget-smart zoning upgrades (with DIY alternatives)
You can spend a lot on greenhouse tech, but you don’t have to. Most zoning improvements are layout-first, gear-second.
Low-cost upgrades (usually under $50)
- Thermometer/hygrometer: $12–$25. Put it at bench height where plants live.
- Clip fan: $20–$35. Keeps temperature and humidity from stratifying.
- Weatherstripping for door drafts: $8–$20. Reduces the “cold pocket” zone in early spring.
- Gravel humidity trays: $8–$15 each. Local humidity without soaking everything.
Mid-range upgrades ($50–$200) that change the game
- Shade cloth: $25–$120 depending on size and percentage. A 30% cloth is a practical starting point for many home greenhouses; adjust by climate and crop.
- Automatic vent opener: Often $45–$80 per vent. This is the renter-friendly “automation” I like most because it prevents heat spikes when you’re away.
- Thermal mass barrels: $25–$60 used per 55-gallon barrel; place where they won’t steal prime bench space.
Maintenance expectations: the weekly rhythm and seasonal resets
A zoned greenhouse is easier to maintain because each area has a job—and a routine. Plan on 45–90 minutes per week during peak season, plus short daily check-ins when temperatures swing.
Weekly tasks (15–20 minutes, 3–4 times/week or bundled once)
- Vent check: Adjust vents/doors based on the forecast; confirm fans are running.
- Targeted watering: Hot & Bright zone may need water 2–4x more often than the Cool & Drafty zone.
- Prune and train: Tomatoes and cucumbers need consistent tying and leaf thinning to keep airflow moving through their zone.
- Pest scouting: Check undersides of leaves for aphids and whiteflies—especially in warm, protected corners.
Seasonal tasks that keep zones stable
- Spring: Clean glazing for maximum light; set up your cool-zone seedling area near the door; install trellises before plants sprawl.
- Summer: Add shade cloth; increase airflow; reduce plant density by harvesting aggressively and removing tired greens.
- Fall: Shift greens into the sun spine as fruiting crops finish; add thermal mass near late-season herbs.
- Winter (if growing): Consolidate plants into the most stable zone; insulate with bubble wrap designed for greenhouses if allowed; keep watering light.
Design finishing touches: make the greenhouse pleasant to use
The best greenhouse layout isn’t just productive—it’s comfortable. Leave yourself a clear potting spot (even a 18 in x 24 in shelf) and keep your most-used tools within arm’s reach. If you hate stepping around clutter, you’ll skip the quick checks that prevent problems.
Label your zones with simple tags: “HOT SHELF,” “COOL DOOR,” “HUMID CORNER.” It sounds basic, but it keeps you from treating the space like one uniform room. The whole point is to stop asking every plant to tolerate the same conditions.
Once you’ve lived with your zones for a season, you’ll start designing instinctively: basil migrates upward in May, lettuce retreats to the cool edge by June, and tomatoes get the airflow lane they deserve. That’s the moment a greenhouse stops being a finicky box of plastic and becomes a small, intentional garden—organized, adaptable, and perfectly tuned to your space.
Sources: U.S. Department of Energy (2023), guidance on heat movement and air distribution principles; University of Massachusetts Extension (2020), greenhouse heating/energy conservation notes on circulation and temperature uniformity; University of Georgia Extension (2019), shade cloth percentage recommendations for managing heat and light in protected cultivation.