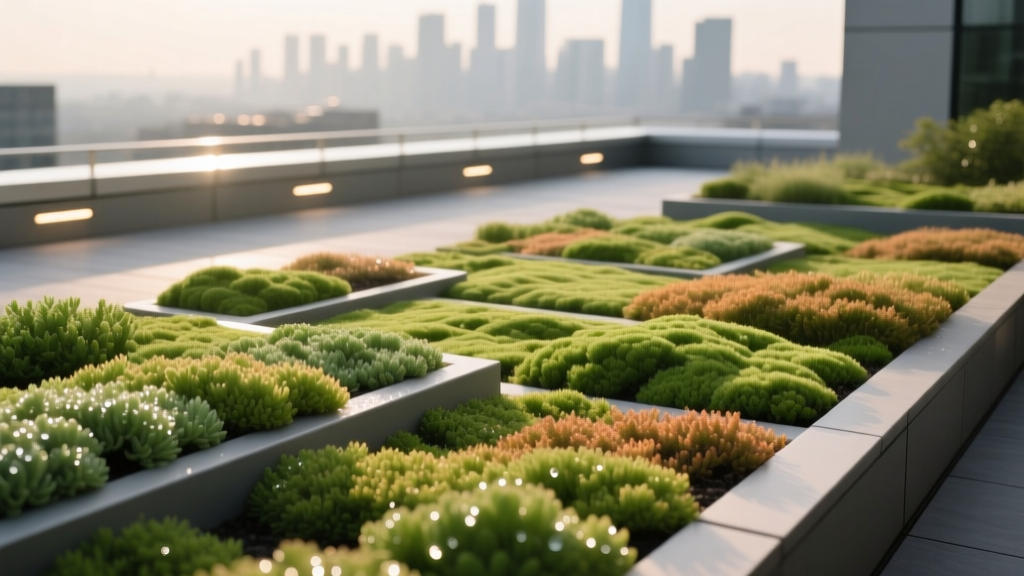
Rooftop Green Roof Sedum Garden
You step onto the roof with a cup of coffee and instantly regret it—heat radiates off the membrane like a skillet, the wind pushes at your shirt, and the view that should feel expansive instead feels bare. Maybe you’ve been told, “You can’t really garden up here,” or you’ve tried a few pots that baked dry by noon. The fix isn’t more containers. It’s a thin, living skin that turns the roof from a harsh surface into a resilient, low-profile garden: a sedum-driven green roof designed like a landscape project, not a science experiment.
This is a practical layout you can scale from a small shed roof to a full garage or apartment terrace. I’ll walk you through how I design sedum roofs: where to place access paths, how to organize planting for wind and drought, what depths matter, and which varieties earn their keep when the roof is hot, exposed, and occasionally forgotten.
Start with the roof you have: constraints that shape the design
Rooftops are honest sites. They tell you quickly what works: too much sun, too much wind, too little water retention. Before you sketch, collect five numbers—these drive every decision.
- Sun exposure: Many roofs get 6–10 hours of direct sun in summer; sedums thrive in that range.
- Wind: Roofs can run 10–20 mph higher wind speeds than ground level (varies by site). Your layout should reduce edge exposure.
- Available area: Example: a common garage roof is 12 ft × 20 ft (240 sq ft). A shed might be 8 ft × 10 ft (80 sq ft).
- Target system depth: Extensive sedum roofs commonly run 3–6 inches of growing medium; this depth is light enough for many structures and deep enough for sedum roots.
- Budget: DIY systems often land around $12–$25 per sq ft depending on layers and plant choice; installed systems can be higher.
Safety and structure note: Confirm the roof can handle added dead load and saturated weight, and follow local code. Guidance from the Green Roofs for Healthy Cities (GRHC) notes that extensive systems are typically designed as lighter-weight assemblies compared to deeper intensive roofs (GRHC, 2023). When in doubt, consult a structural engineer—especially for older garages and decks.
Design principles that make a sedum roof feel intentional
1) Lay out “use zones” first: access, view, and service
Even if you never “walk in” the garden, you need a service route. I like to design a simple loop or a straight path from the hatch/door to anything you must reach: drains, HVAC units, skylights, solar inverters. Plan this before plants.
Rule of thumb: Make a maintenance path at least 18–24 inches wide. On small roofs, 18 inches is enough if you’re careful; for comfortable kneeling and carrying flats, 24 inches is better.
Use wind-stable, non-organic materials for paths: pavers on pedestals, gravel strips, or walkway pads. A clean path does more than protect plants—it makes the roof feel like a designed space, not an afterthought.
2) Design for edges: the roof perimeter is the stress zone
Edges dry faster and take the brunt of wind. Instead of fighting that, treat the perimeter as its own planting band. I often design a 12–18 inch “edge buffer” using the toughest sedums and more mineral top dressing. Keep taller succulents and flowering accents slightly inboard where conditions are less extreme.
If your roof has parapet walls, you get a bonus: reduced wind desiccation. Without a parapet, the edge band becomes even more important.
3) Create legible plant “drifts,” not a scattered mix
Sedums look best when you plant in drifts—repeated patches that read from a window or neighboring building. A drift might be a 3 ft × 6 ft sweep of one variety, then repeated elsewhere. This also simplifies maintenance because each patch has similar water needs and growth speed.
4) Plan for stormwater behavior—where water lingers, where it runs
Even a flat roof has micro-slopes. Observe after rain: where does water sheet off first, and where does it pause? Put the most drought-tolerant plants on the high, fast-drying zones; reserve slightly moisture-tolerant sedums near areas that hold moisture longer (but keep drains clear and accessible).
“Green roofs can reduce stormwater runoff by retaining rainfall in the substrate and vegetation, releasing it later through evapotranspiration.” — U.S. EPA, Green Infrastructure: Green Roofs (2023)
This is not only ecological; it’s practical. When the roof self-regulates moisture, you irrigate less and plants stay steadier through heat waves.
Three layout strategies you can copy (with dimensions)
Scenario A: The small shed roof (80 sq ft) that needs to stay simple
Site: 8 ft × 10 ft shed roof, full sun, no parapet, ladder access only. The design goal is minimal maintenance and low cost.
Layout: Skip a path and design the roof as a single composition with a strong edge band.
- Perimeter buffer: 1 ft wide band around edges (approx. 36 sq ft).
- Interior field: Remaining 44 sq ft planted in 2–3 drifts for color.
- Plant spacing: Plugs at 6–8 inches on center for faster fill, or 10–12 inches for lower upfront cost.
Why it works: No foot traffic means no trampled succulents. The edge is armored with the toughest varieties, and the center becomes the “view” zone.
Scenario B: The garage roof (240 sq ft) visible from the kitchen window
Site: 12 ft × 20 ft detached garage, you see it daily, moderate wind, full sun. You want a pattern that reads from above.
Layout: Add one service strip and design three bold drifts like brushstrokes.
- Service path: 2 ft × 20 ft gravel strip along one long edge (40 sq ft).
- Planting area: 200 sq ft divided into three main drifts (for example: 70/70/60 sq ft).
- Accent nodes: 3–5 small “islands” (each 2 ft × 2 ft) of a standout sedum near corners for rhythm.
Why it works: The path keeps maintenance easy and gives the composition a clean line—like edging on a ground-level bed.
Scenario C: The rental-friendly terrace roof module (no penetrations, easy removal)
Site: Flat rooftop terrace where you cannot alter the membrane. Partial sun (4–6 hours), higher foot traffic, and you may move out in two years.
Layout: Use modular trays or shallow planters arranged like tiles, leaving walking lanes.
- Module size: Common trays are roughly 24 in × 24 in.
- Walking lane: Keep a 30-inch clear corridor from door to seating.
- Pattern: Alternate two sedum mixes for a checkerboard effect; it looks designed even when plants are young.
Why it works: You don’t need roof penetrations, and modules can move with you. If a tray fails, you replace one square, not the entire roof.
Plant selection: sedums that earn their spot up high
Sedums win on roofs because they store water, tolerate shallow media, and recover after drought. That said, not all sedums behave the same. I select for three traits: heat tolerance, tight growth (wind resilience), and seasonal color.
Core sedums for the toughest, sunniest zones
- Sedum acre (‘Aureum’ or species): Fast, tight groundcover; excellent for edges. It can spread aggressively, which is useful when you want quick coverage.
- Sedum album (‘Coral Carpet’, ‘Murale’): Handles heat and cold; good color shifts (green to red) with stress. Great in thin media.
- Sedum rupestre (‘Angelina’): Needle-like foliage that reads as texture from a distance; bright chartreuse in sun. Plant slightly inboard if your roof is extremely windy, as stems can lift if not well-rooted.
Showier sedums for interior drifts and “view zones”
- Hylotelephium (formerly Sedum) ‘Autumn Joy’: Taller and more floral; best in deeper pockets (6+ inches) or protected zones. Use sparingly as punctuation, not the whole roof.
- Sedum spurium (‘Dragon’s Blood’, ‘Tricolor’): Strong color, good mat-forming habit. Ideal for mid-roof drifts where it won’t be shredded by constant edge wind.
- Sedum kamtschaticum (‘Weihenstephaner Gold’): Reliable blooms, a bit more upright; works well near path edges where you want seasonal flowers.
Mixing rule I use to keep roofs stable
For most extensive roofs, aim for 60–70% low, mat-forming sedums (album/acre/spurium) and 30–40% textural or seasonal accents (rupestre, kamtschaticum, small amounts of Hylotelephium in deeper zones). This keeps the roof covered, reduces weed space, and avoids a top-heavy look.
Comparison: plugs, cuttings, mats, or modules?
| Planting Method | Upfront Cost (typical) | Time to Fill In | Best For | Tradeoffs |
|---|---|---|---|---|
| Plugs (small plants) | $1.50–$4 per plug | 1–2 growing seasons | DIY roofs, custom patterns | More watering early; visible gaps at first |
| Cuttings (broadcast) | $0.50–$1.50 per sq ft | 1–2 seasons (variable) | Large areas on a budget | Needs consistent moisture for rooting; uneven results in wind |
| Pre-grown sedum mats | $8–$15 per sq ft | Instant coverage | High visibility roofs, erosion-prone slopes | Higher cost; less design flexibility |
| Modular trays | $15–$30 per sq ft | Fast (often pre-grown) | Rentals, roofs with restrictions | Heavier per unit; seams can dry out |
Step-by-step setup: a practical extensive sedum roof build
The exact layers vary by manufacturer and roof type, but the logic is consistent: protect the roof, hold water, provide drainage, then plant. If you’re using a tested green roof system, follow its specifications—this is the part you don’t freestyle.
- Measure and draw a scaled plan. For example, a 12 ft × 20 ft roof at 1/2 inch = 1 ft gives you a workable sketch. Mark drains, vents, and a 24-inch service path.
- Confirm roof condition and slope. Repair membrane issues first. Identify drain locations and keep a gravel inspection zone around each drain (often 12–18 inches wide).
- Install protection/root barrier layer as required by your roof system. (Some membranes are root-resistant; confirm with documentation.)
- Add drainage layer to prevent waterlogging while storing some water for plants.
- Install filter fabric so fine particles don’t clog drainage.
- Place growing medium. For extensive sedum, aim for 4 inches as a solid baseline; go to 6 inches in selected pockets if you want a few taller accents.
- Set hardscape zones. Lay your 18–24 inch path and the 12–18 inch edge/gravel bands before planting so you’re not stepping on new plants.
- Plant in drifts. Use a consistent spacing: 8 inches on center for faster fill. Water in immediately.
- Top-dress with mineral mulch (like expanded shale or coarse sand) in thin layers to reduce splash, stabilize cuttings, and discourage weeds.
- Establish an irrigation plan for the first 6–8 weeks. Even drought-tough sedums need consistent moisture to root.
Budgeting the roof: three cost bands and DIY alternatives
Costs swing based on system choice and access (carrying bags up ladders adds time). Here are realistic planning numbers you can use before collecting quotes.
- DIY cuttings approach: For a 80 sq ft shed roof, you might spend $1,000–$1,800 total (roughly $12–$22 per sq ft) including layers and media, using sedum cuttings and limited hardscape.
- DIY plugs for a designed pattern: A 240 sq ft garage roof often lands around $3,500–$6,000 depending on how much path material you add and plug density.
- Modular trays for rentals: A 100 sq ft terrace zone can run $1,500–$3,000 (higher per sq ft, but removable and fast).
DIY alternatives that still look professional:
- Use gravel paths instead of pavers to save money and weight; keep it contained with edging strips.
- Use plugs only where you’ll see them (near edges visible from windows), and use cuttings in the back zones.
- Design fewer varieties. Three to five sedums planted in larger drifts look more intentional—and are cheaper—than a mixed “collector” palette.
Maintenance expectations: what it really takes
A sedum roof is low-maintenance, not no-maintenance—especially the first year. Plan for a rhythm, and it stays easy.
Time: During establishment (first 2 months), expect 20–40 minutes per week for checking moisture and spot-watering. After the first season, most homeowners average 10–20 minutes per week in the growing season, mainly for weeding and quick inspections.
Seasonal task list
- Spring (30–60 minutes total): Remove windblown debris, check drain gravel zones, top-dress bare patches, and re-edge paths.
- Summer (10–20 minutes weekly in heat): Inspect for dry corners and roof edges; water only when sedums show sustained stress (wrinkling and thinning beyond normal dormancy).
- Fall (30–60 minutes total): Weed before winter, remove tree leaves (they mat and smother), and check that inspection zones stay clear.
- Winter (occasional checks): After storms, make sure drains aren’t blocked by ice or debris.
Research supports that extensive green roofs can be relatively low-maintenance once established, but they still require periodic inspection. The Federal Highway Administration notes that green roof upkeep includes routine weeding and checking drains and membranes (FHWA, 2017).
Case examples: how the design changes with real constraints
Case 1: The “hot skillet” garage roof with no hose access
A client could only carry water up in a watering can—so we designed for drought first. We used a 4-inch medium depth across most of the roof, increased to 6 inches in two protected pockets near the center for a small amount of Hylotelephium ‘Autumn Joy.’ The perimeter got Sedum acre and Sedum album, planted at 8-inch spacing for quick knit. The trick: a mineral top dressing and a strict establishment schedule for 6 weeks. After that, watering dropped to “only during extreme heat,” and the roof stayed visually full.
Case 2: The shaded-to-sunny apartment roof (half day sun, half day shade)
This roof received about 4–5 hours of direct sun due to adjacent buildings. We shifted plant selection: fewer sun-stressing varieties like ‘Angelina’ in the shadiest zone, more Sedum spurium and Sedum kamtschaticum where light was gentler. The layout used modular trays so the tenant could take it along later. The design move that made it feel upscale: a 30-inch clear walkway and two repeated sedum mixes that formed a simple rhythm rather than a patchwork.
Case 3: The windy roof with a perfect view—but constant edge dieback
On an exposed roof with no parapet, the first attempt (by the homeowner) failed at the perimeter. We rebuilt the edge as a deliberate buffer: a 18-inch band of gravel and the toughest sedums behind it, plus a slightly denser planting rate at the edge (6-inch spacing) tapering to 10-inch spacing toward the center. That extra density cost more up front, but it stopped the recurring replanting cycle and made the whole roof look cleaner from the street.
Small design details that make a sedum roof feel like a garden
Repeat one color cue. If you love red tones, repeat Sedum spurium ‘Dragon’s Blood’ in three separate drifts rather than scattering it everywhere.
Frame a view. If you see the roof from one main window, orient your boldest drift perpendicular to that sightline. A 3 ft-wide band reads clearly from above.
Keep a clean drain zone. A ring of gravel around drains looks intentional and prevents the most common headache: clogged outlets.
Don’t overplant tall accents. A few taller flowering sedums are lovely, but too many can look messy in wind and lodge after storms. Use them like punctuation marks.
When the roof is planted, you’ll notice the change immediately—not just in looks, but in how the space feels. The membrane stops glaring back at you, the surface temperature moderates, and what used to be a dead zone becomes a living plane that shifts color from spring green to summer bloom to autumn reds. The best part is how little it asks of you once it’s rooted: a short weekly check, a seasonal clean-up, and the satisfaction of seeing a roof that finally does more than just sit there.
Citations: U.S. Environmental Protection Agency (EPA), “Green Roofs,” 2023. Green Roofs for Healthy Cities (GRHC), resources on green roof types and standards, 2023. Federal Highway Administration (FHWA), “Vegetated Roof Systems,” 2017.