Indoor Microgreens Rack System
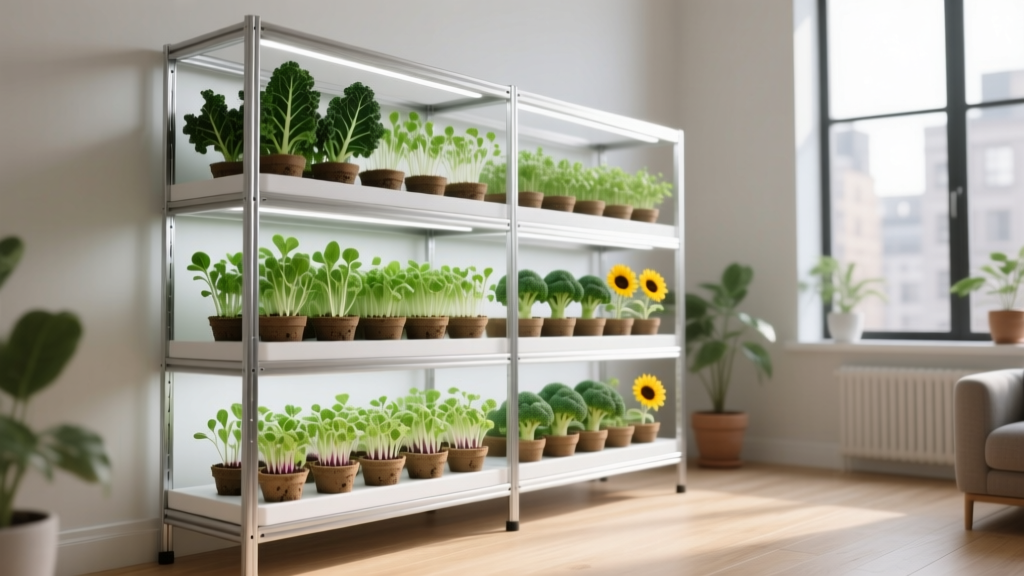
The day your kitchen windowsill turns into a crowded traffic jam of seed trays is the day you realize: you don’t need “more space,” you need a layout. One tray is manageable. Four trays stacked beside a toaster, a cat sniffing the sunflower shoots, and a desk lamp balanced like a circus act? That’s when an indoor microgreens rack system stops being a hobby accessory and becomes a tiny, well-lit piece of architecture.
Think of this project the way a landscape designer thinks about a courtyard: define the footprint, control the light, manage water, and make daily access effortless. Microgreens reward consistency. Your rack should make that consistency easy—so you can harvest crisp radish, pea, and broccoli greens every week without turning your living room into a greenhouse obstacle course.
Design principles: treat your rack like a small garden room
A good rack system is less about buying the “right shelf” and more about composing a reliable growing environment. Indoor microgreens succeed when light, airflow, and moisture are predictable. Your design goal is to create a repeatable rhythm: sow → blackout (optional) → light → harvest → reset.
Start with a footprint you can live with
Most homeowners and renters do best with a rack that fits a single wall segment—something that doesn’t hijack the whole room. A classic starting point is a 48 in wide × 18 in deep (122 cm × 46 cm) shelving unit, which neatly supports standard 10×20 inch trays (also called “1020” trays). Depth matters: 18 inches is enough for a tray plus breathing room for cords and airflow; deeper racks often waste space and shade the back edge.
If you’re in a studio apartment, a narrower footprint—36 in wide × 14–16 in deep—can still run two 1020 trays per shelf if you stagger them, but you’ll have less margin for lights and drip protection.
Vertical spacing: give plants room, not a cathedral
Microgreens don’t need tomato-cage headroom. They need just enough height to avoid touching lights and to allow airflow. Plan for 12–16 inches of vertical clearance between shelf surfaces. In practice:
- 12 in: works for most brassicas (broccoli, kale, mustard) and radish.
- 14–16 in: gives peas and sunflowers better posture and reduces humidity problems.
Mount your lights 6–10 inches above the canopy and adjust as the crop grows. Keeping lights close improves intensity and helps prevent legginess.
Light strategy: consistent intensity beats “bright-ish”
Microgreens are happiest with a steady day length. A simple rule: provide 12–16 hours of light daily on a timer. Many growers land on 14–16 hours for stout growth and reliable color.
For efficiency, use LED shop lights or LED grow bars sized to the shelf width. Aim for even coverage edge to edge; microgreens punish hot spots (drying) and dim corners (stretching). If you’re using a 48-inch shelf, two 2-foot LED bars per shelf often create a more uniform field than one single strip—especially if you can space them front-to-back.
“In general, microgreens can be grown under a wide range of lighting, but higher light intensity typically increases yield and improves quality attributes such as color and stem strength.” — Purdue Extension, 2020
Citation: Purdue Extension (2020), microgreens production guidance.
Water and mess control: design for the drip, not the photo
Indoor growing succeeds when water management is boring. Plan your rack like a wet zone:
- Add a waterproof barrier under each shelf (a cafeteria tray, boot tray, or custom-cut pond liner).
- Use trays with a nested system: one tray with holes for the medium, nested inside a solid “bottom tray” for bottom watering.
- Keep a small towel hook and a spray bottle within arm’s reach.
A practical spacing detail: leave 1–2 inches between trays so you can lift them without scraping knuckles on the shelf posts. That tiny gap also improves airflow and reduces mold risk.
Airflow and humidity: a small fan is your insurance policy
Microgreens are dense plantings. Dense plantings + indoor humidity can invite damping-off and fuzzy mold. Add a clip fan per rack (or per two shelves) on a low setting. You’re not trying to create wind—just gentle movement.
Budget for a 4–6 inch clip fan, and run it during light hours. If your room stays above 60% relative humidity, airflow becomes even more important.
Layout strategies that make harvesting feel effortless
Once the rack is built, the real design work is workflow. The best systems feel like a tiny assembly line—clean, repeatable, and pleasant to use.
Zone each shelf by growth stage
I like to assign shelves like garden beds with a purpose:
- Top shelf: germination/blackout (warmest zone, easy to stack trays with weights).
- Middle shelves: main growing under lights (most accessible for daily checks).
- Bottom shelf: heavier crops or a “service shelf” for mixing medium and storing supplies.
If you routinely blackout crops (like radish or broccoli), you can stack seeded trays for 2–3 days with a second tray on top and a small weight. Designate a spot so you’re not improvising with cookbooks each week.
Plan a harvest lane
Harvesting microgreens is a quick cut-and-rinse job—unless you have nowhere to put the tray while you snip. Leave a 24-inch clear counter segment near the rack, or add a fold-down wall table beside it. This is the layout move that makes the system feel “built-in” instead of cluttered.
Electrical and timer placement: keep cords calm
Use one power strip per rack side, mounted to a vertical post with zip ties. Put your timer where you can see it without crouching. A simple digital timer can run 14–16 hours daily; label it “MICROGREENS” so it doesn’t get repurposed for holiday lights.
Rack system options: choose a structure that matches your space
Here’s a practical comparison of three common rack approaches. Costs vary by region, but these ranges are realistic for a starter-to-serious home setup.
| Rack Option | Typical Size | Tray Capacity | Estimated Cost (USD) | Best For |
|---|---|---|---|---|
| Wire shelving unit + LED bars | 48" W × 18" D × 72" H | 8–12 (1020 trays) | $180–$450 | Most renters/homeowners; adjustable shelves |
| DIY wood rack + shop lights | Custom (often 36–48" wide) | 6–12 (1020 trays) | $90–$250 | Budget builds; custom fit to awkward nooks |
| Countertop mini rack (2–3 tiers) | 24–30" W × 12–16" D | 2–6 (half trays or 1020) | $60–$220 | Small apartments; “micro” production |
Step-by-step: setting up a practical indoor microgreens rack
This setup assumes a 48" × 18" wire shelf with four growing tiers, but the logic scales up or down.
- Assemble the rack and set shelf heights. Start with 14 inches of clearance per growing level. Reserve the bottom shelf for supplies or heavier trays.
- Add waterproof shelf liners. Use boot trays, cafeteria trays, or cut-to-fit plastic. Your goal is to protect floors and keep cleanup to a quick wipe.
- Mount lights under each shelf. Position LEDs so coverage reaches the tray edges. Start lights 8 inches above expected canopy height; you’ll adjust later.
- Install a timer. Set to 16 hours on / 8 hours off for sturdy growth, then tweak to your taste.
- Add airflow. Clip a 4–6 inch fan to the rack post, aimed across the tray tops on low.
- Set up trays for bottom watering. Place a tray with holes inside a solid tray. This helps keep stems dry and reduces algae on the surface.
- Create a sowing kit. Keep a small bin with seed scoop, spray bottle, medium, and labels. If you can sow in 10 minutes, you’ll sow more consistently.
- Do a dry run. Place empty trays on each shelf, close the loop on cords, and simulate lifting/rotating trays. Adjust shelf spacing before you plant.
Plant selection: varieties that thrive on racks (and taste great)
Microgreens are fast, but not all varieties behave the same indoors. Choose crops based on growth speed, stem strength, and how forgiving they are under LEDs.
Fast, reliable brassicas (great for weekly rhythm)
Broccoli (Brassica oleracea) is a cornerstone crop: it germinates evenly, tolerates moderate light, and has a mild flavor that fits smoothies and salads. It also stays upright without fuss.
Kale (Red Russian) brings color and a slightly sweeter bite. Under decent light, it develops strong stems and attractive cotyledons—great for garnishing.
Mustard (Mizuna or Giant Red) grows quickly and adds a spicy note. It can stretch if light is weak, so keep LEDs close (6–8 inches above the canopy).
Citation: University of Maryland Extension (2019) notes microgreens are harvested young—generally at the cotyledon stage—making light and moisture control central to quality.
Bold and crunchy: radish varieties that don’t disappoint
Radish ‘Rambo’ is my go-to for renters because it’s dramatic (purple stems), fast (often harvestable around a week), and resilient. Radish ‘China Rose’ offers a punchy flavor and sturdy growth.
Radish can handle dense sowing, but don’t smother it—aim for an even “seed carpet” with minimal overlap. Good airflow matters here because radish hulls can trap moisture.
High-yield favorites: peas and sunflowers (space them a bit more)
Pea shoots (‘Dwarf Grey Sugar’) are a top value crop: thick stems, sweet flavor, and a generous harvest. They like a little extra vertical clearance—plan 16 inches if peas are a mainstay. Pre-soak seeds for 8–12 hours for even germination.
Sunflower microgreens (black oil sunflower) are substantial and nutty, but they’re heavier feeders and a bit messier (hulls). Give them strong light and keep the surface from staying soggy. If you’re new, start with one tray at a time until your watering rhythm is dialed in.
Specialty flavor growers (use as accents)
Cilantro microgreens are delicious, but slower and more finicky. If your rack is already producing weekly staples, cilantro is a great “fifth tray” crop for variety.
Amaranth offers vivid color, but needs strong light and careful watering. It’s better once your rack system is stable.
Three real-world rack layouts (so you can picture yours)
Scenario 1: The studio apartment wall—quiet, compact, productive
You’ve got one free wall section near an outlet, maybe 52 inches wide. A 48" × 18" × 72" rack fits like a bookcase. Use three growing shelves plus a bottom supply shelf. Run 6 trays in rotation: two brassica mixes, one radish, one pea, one sunflower, and one “experimental” tray. This setup can supply a couple with microgreens 2–4 times per week without crowding the kitchen.
Noise and light control matter in small spaces: choose a quiet clip fan and consider a simple fabric curtain panel to soften the glow at night while still allowing airflow.
Scenario 2: The laundry room conversion—where humidity can be both friend and foe
Laundry rooms often have the perfect combination of warmth and water access, but they can run humid. If your hygrometer reads above 60% consistently, prioritize airflow and avoid overwatering. Place the rack so the fan has a clear path, and keep trays from touching the wall (leave 3 inches behind the rack) to prevent stagnant air pockets.
This is a great spot for peas and sunflower because cleanup is easy near a sink. Add a waterproof mat under the rack and you’ve basically built a tidy micro-farm corner.
Scenario 3: The home office setup—greens without chaos
If you work from home, your rack should feel like a designed piece of furniture, not a science project. Choose a black or chrome wire shelf, route cords neatly, and keep a lidded bin for supplies. Limit the system to 4 trays in steady rotation so maintenance stays under 30 minutes per week. Focus on low-mess crops: broccoli, kale, and radish.
Office air can be dry, which helps with mold but can dry trays quickly. Bottom water more frequently, in smaller amounts, rather than blasting from above.
Budget planning and smart DIY alternatives
You can build a solid rack system without chasing premium gear. Here’s a realistic starter budget for a 4-shelf rack:
- Wire shelving: $70–$160
- LED lights (4 shelves): $80–$240
- Timer + power strip: $20–$40
- Trays (8–12 total): $30–$90
- Fan: $15–$35
If you want to trim costs, prioritize lights and trays; you can DIY the rest.
DIY swaps that still look intentional
- Shelf liners: Cafeteria trays or boot trays are often cheaper than specialty greenhouse liners.
- Weights for blackout stacking: A second tray filled with books sealed in a plastic bag.
- Seed starting medium: Coconut coir bricks are compact to store and consistent; soil works too but is messier indoors.
Ongoing costs depend mostly on seed and medium. If you’re sowing a few trays per week, many households spend roughly $10–$25 per month on seed, depending on variety (peas and sunflowers cost more per tray than brassicas).
Spacing, sowing density, and timing (the details that fix weak crops)
Microgreens are planted densely, but there’s a difference between “dense” and “airless.” Keep the surface evenly covered without stacking seeds in piles. For larger seeds (peas, sunflower), spread them so they touch but don’t mound.
Give most trays 7–14 days from sow to harvest depending on variety and temperature. If your room sits around 68–75°F (20–24°C), you’ll find a comfortable rhythm. Cooler rooms slow things down; warm rooms speed them up but can invite mold if airflow is weak.
Light: aim for 12–16 hours daily, and keep lights close enough to prevent stretching. If your greens lean dramatically, reduce the light distance or increase intensity rather than extending day length endlessly.
Maintenance expectations: what it really takes week to week
A well-designed rack system should feel like a quick ritual, not a chore. For a 6–10 tray system, expect:
- Daily: 2–5 minutes checking moisture and refilling bottom trays.
- Weekly: 20–45 minutes total for sowing, harvesting, and wiping down surfaces.
- Monthly: 30 minutes for a deeper clean—wash trays with hot soapy water, check cords, and wipe fan blades.
Seasonally, your “task” is mostly adjustment. In winter, indoor air is drier; you may water a touch more often. In summer, if your home is humid, run the fan longer and avoid letting water sit in bottom trays overnight.
Keep a simple log—just a sticky note on the rack post—listing sow dates and expected harvest dates. This tiny habit prevents the common problem of harvesting too late (tough stems) or too early (low yield).
Safety and comfort details renters appreciate
If you’re renting, protect surfaces and keep the system reversible. Use a waterproof mat under the rack, avoid drilling where possible, and choose a rack footprint that can move through doorways. LEDs run cooler than older grow lights, but always keep cords elevated and away from standing water. A drip loop in each cord (where the cord dips below the outlet level before rising) is a small professional detail that prevents water from traveling into plugs.
If you design the rack like a tidy utility nook—clean lines, contained water, easy access—you’ll actually use it. And once you’re harvesting a tray of radish or broccoli microgreens every week, you’ll notice the subtle luxury: fresh flavor on demand, grown in a vertical strip of space no wider than a bookcase.
Sources: Purdue Extension (2020) microgreens production recommendations; University of Maryland Extension (2019) microgreens growing and harvest stage guidance.