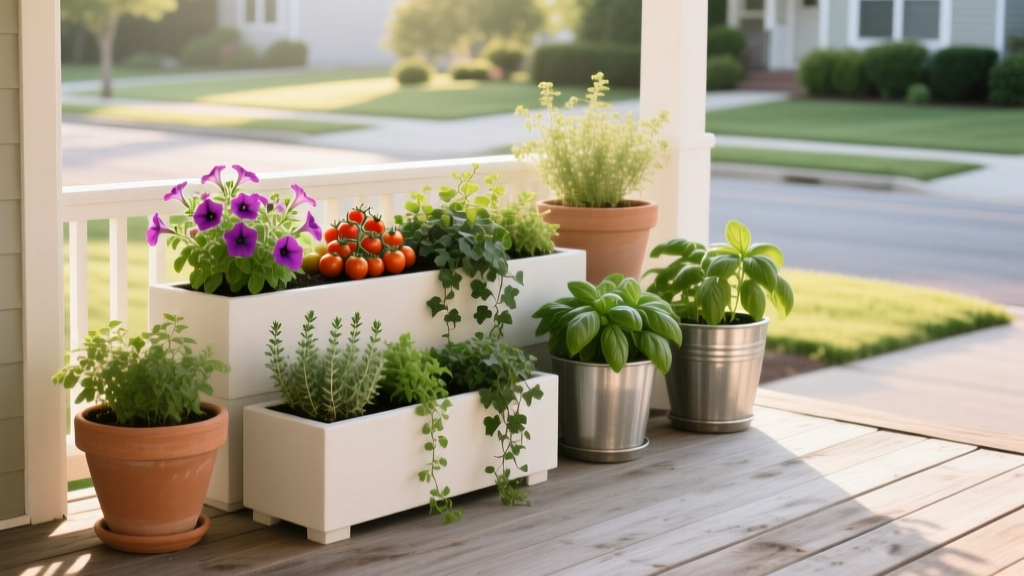
Porch Fall Container Garden Plan
The first chilly evening hits, and suddenly your porch feels like it’s missing something. The summer pots are tired—petunias stretched, basil gone woody, soil crusted over. You’re standing there with a mug in hand, looking at a small patch of concrete or wood that could be welcoming… but instead reads a little bare. The good news: fall is the easiest season to make a porch container garden look intentional. The light is softer, the plants are tougher, and you can build a design that holds up through wind, rain, and the first frosts.
This plan walks you through a designer-style porch arrangement you can scale up or down. It includes a layout you can measure with a tape, specific plant varieties that earn their keep, and a maintenance routine that won’t take over your weekends.
Start with the “porch snapshot”: measure, observe, and decide your goal
Before you buy a single plant, take five minutes and capture the porch as it really behaves. Fall containers succeed when they match your site conditions—not when they fight them.
Measure the usable footprint (yes, with numbers)
Most porches can handle a strong container layout if you leave a comfortable walking lane. Aim for a minimum clear path of 36 inches (common accessibility guidance) so the space still functions like a porch, not a storage shelf.
Quick measuring targets:
- Small stoop: 4 ft x 6 ft (24 sq ft) — plan for 2–3 statement pots.
- Standard porch: 6 ft x 10 ft (60 sq ft) — plan for 4–7 containers plus a doormat moment.
- Deep porch: 8 ft x 16 ft (128 sq ft) — plan for a layered “outdoor room” with 8–12 containers.
Track sunlight hours where the pots will sit
Fall plants are flexible, but they still need appropriate light. Stand where the containers will be and estimate direct sun:
- Full sun: 6+ hours (best for mums, asters, ornamental peppers).
- Part sun/bright shade: 3–6 hours (best for pansies, heuchera, many grasses).
- Shade: under 3 hours (lean on foliage: heuchera, ivy, small conifers, skimmia where hardy).
For frost planning, note your first average frost date. The USDA Plant Hardiness Zone Map (USDA, 2023) is a reliable way to estimate cold limits and helps you decide what can overwinter versus what is seasonal.
Design principles that make fall containers look “designed,” not just purchased
Fall porch containers look best when you treat them like small-scale landscape beds: structure first, then seasonal color, then finishing textures.
Use the “Thriller–Filler–Spiller” formula, but add one more layer: structure
Designers often use Thriller–Filler–Spiller as a base. For fall, add a structure plant that holds shape through weather—usually a dwarf conifer, grass, or woody accent.
- Structure: dwarf spruce, arborvitae, or a tight grass clump for longevity.
- Thriller: upright color or form (ornamental kale, celosia, aster, tall mum).
- Filler: mounding plants that knit the pot together (pansies, heuchera, smaller mums).
- Spiller: trailing edge softener (creeping Jenny, ivy, sweet potato vine).
Build repetition across containers for instant cohesion
If you’re using multiple pots, repeat one plant and one material (like all black nursery pots inside matching baskets, or all terracotta). Repetition is what makes three different pots read like one intentional “set.”
Right-size your containers for fall wind and drying
Fall air is drier and windier; small pots dry out fast. Use containers that are at least:
- 12–14 inches wide for a single focal planting
- 16–20 inches wide for a true mixed design
- 18–24 inches tall for top-heavy plants (mums, grasses) so they don’t tip
Also note the engineering: wet potting mix is heavy. A 20-inch ceramic pot can be difficult to move once filled, so stage it in place first.
“A container is a microclimate—exposed on all sides—so wind and temperature fluctuations hit harder than in-ground plantings.” — Royal Horticultural Society advice on container growing (RHS, 2021)
A practical layout plan you can copy (and scale)
This is a “designer’s triangle” composition that works for most porches. It’s built around one anchor near the door, one counterweight near the steps, and a connector pot (or two) that ties them together.
The 3-container layout for a 6 ft x 10 ft porch
Placement:
- Anchor pot: 18–22" diameter, placed 12–18" to the side of the door (hinge side is ideal so it doesn’t interfere with entry).
- Step pot: 16–20" diameter, placed at the outer corner near steps/railing.
- Connector pot: 12–16" diameter, halfway between anchor and step pot, pushed to the wall to keep a 36" walking path.
Spacing rule: Keep 8–12 inches between pots so the group reads as a composition but still allows sweeping and drainage.
Add a fourth element if you have a blank wall
If your porch has a flat wall or railing that looks empty, add one vertical element:
- A rail planter box (24–30" long), or
- A slim 10–12" pot on a stand (18–24" tall)
This creates eye-level interest without blocking the floor plane—especially useful for renters who can’t install permanent hooks or trellises.
Plant palette: specific varieties that work hard in fall containers
The goal is a porch that looks good in daylight, holds color into early frost, and still feels crisp at night under a porch light. Here are plant choices that consistently perform, plus why each earns a spot.
Structure plants (choose 1 per large pot)
- Dwarf Alberta spruce (Picea glauca ‘Conica’): Tight evergreen cone, reliable structure. Works as a winter holdover in many zones if the pot is protected.
- Blue fescue (Festuca glauca ‘Elijah Blue’): Steel-blue tuft adds cool contrast to warm fall tones; handles sun and leaner watering.
- Little bluestem (Schizachyrium scoparium ‘Standing Ovation’): Upright grass with copper tones that intensify as nights cool.
Thrillers for fall punch
- Ornamental kale (Brassica oleracea): Looks better after cold nights; ruffled texture reads as “designed.” Try ‘Redbor’ (tall, burgundy) or ‘Color Up Pink’ (rosette).
- Garden mum (Chrysanthemum x morifolium): For full sun porches, choose tight-budded plants for longer show. Look for hardy garden mums rather than florist mums.
- Aster (Symphyotrichum): Airy, daisy-like flowers that feel more naturalistic than mums. ‘Purple Dome’ stays compact.
- Ornamental pepper (Capsicum annuum ‘Black Pearl’): Dark foliage with glossy peppers—excellent under porch lighting and in modern containers.
Fillers that knit the pot together
- Heuchera (coral bells): Foliage is the whole point. Try ‘Caramel’ (warm amber), ‘Obsidian’ (near-black), or ‘Lime Marmalade’ (chartreuse pop). Great in part shade.
- Pansies/violas (Viola): Cool-season color that can rebound after light frost. Use as the “skirt” around a central thriller.
- Dusty miller (Jacobaea maritima): Silver foliage makes oranges and burgundies look richer; handles sun and some drought once established.
Spillers that soften edges (and hide pot rims)
- Creeping Jenny (Lysimachia nummularia ‘Aurea’): Bright chartreuse cascade; best in part sun/part shade so it doesn’t scorch.
- English ivy (Hedera helix): Classic trailing green for shade; choose smaller-leaf varieties for a refined look.
- Sweet potato vine (Ipomoea batatas ‘Blackie’ or ‘Margarita’): Fast trailing volume; treat as seasonal in most climates.
Comparison table: choose plants based on porch conditions
| Plant | Best Sun | Visual Role | Cold Tolerance (typical) | Notes for Containers |
|---|---|---|---|---|
| Garden mum | 6+ hours | Thriller/Filler | Light frost | Buy tight buds; water evenly to extend bloom. |
| Ornamental kale | 4–6+ hours | Thriller | Improves with cold | Color intensifies as temperatures drop. |
| Heuchera | 3–6 hours | Filler | Often hardy (varies) | Great for shade porches; focus on leaf color. |
| Pansy/viola | 3–6 hours | Filler/Edge | Handles light frost | Deadhead to keep tidy; can overwinter in mild climates. |
| Dwarf Alberta spruce | 4–6+ hours | Structure | Hardy, but roots exposed | Use a large pot or insulate for winter; don’t let dry out. |
Three real-world porch scenarios (with tailored plans)
Use these as templates. The same design logic applies—you’re just adjusting plant choice, container weight, and sun tolerance.
Scenario 1: Apartment renter with a narrow 3 ft x 8 ft landing (bright shade)
Challenge: Limited floor space, can’t drill, and wind tunnels between buildings. Your design needs to stay upright and not block the door swing.
Plan: Two medium pots and one rail box.
- Pot A (16"): Heuchera ‘Caramel’ (filler) + ornamental kale rosette (thriller) + ivy (spiller)
- Pot B (14"): Violas (filler) + blue fescue (structure) + creeping Jenny (spiller)
- Rail box (24–30"): Alternating pansies and trailing ivy for a continuous band
DIY alternative: Use black nursery pots dropped into thrifted baskets (line with a cut trash bag and poke drainage holes). This often brings the look together for under $15 per “container” if you already have baskets.
Scenario 2: Homeowner with a full-sun front porch (6+ hours) and big steps
Challenge: Full sun can dry pots quickly in early fall, and big steps need symmetry so the entry doesn’t feel lopsided.
Plan: Matched “step pots” plus one anchor by the door.
- Two step pots (20"): Dwarf Alberta spruce (structure) + orange mum (thriller) + dusty miller (filler) + sweet potato vine ‘Blackie’ (spiller)
- Anchor pot (22"): Little bluestem ‘Standing Ovation’ (structure/thriller) + aster ‘Purple Dome’ (filler) + creeping Jenny (spiller)
Designer’s trick: Keep mum colors to one family (all rust/orange or all burgundy) and let foliage provide contrast. Too many flower colors on a bright porch can look busy from the street.
Scenario 3: A shaded, covered porch (under 3 hours) that feels dim
Challenge: Shade reduces flowering, and covered porches sometimes get less rain, so pots can paradoxically dry out.
Plan: Focus on foliage brightness and reflective tones.
- Large pot (18–20"): Heuchera ‘Lime Marmalade’ + ornamental kale (lighter center) + ivy
- Medium pot (14–16"): Skimmia (where hardy) or a small evergreen + violas + creeping Jenny
- Optional lantern moment: Place a weatherproof LED lantern between pots to bounce light off chartreuse foliage at night.
Budget note: In shade, spend more on foliage (heuchera, evergreen) and less on flowers. Flowers fade faster in low light, while foliage carries the design.
Step-by-step setup instructions (designer workflow)
Plan on about 60–90 minutes for planting three containers, plus a cleanup sweep.
- Stage your empty pots in position before filling. Check door swing and confirm a 36-inch clear path.
- Add drainage and ballast. If a pot is very tall, add a few inches of empty plastic bottles or upside-down nursery pots at the bottom to reduce soil volume, then add a layer of mix. (Avoid gravel layers; they don’t improve drainage in a container and just add weight.)
- Use fresh potting mix. For a 20" mixed container, expect to use about 1.5–2 cubic feet of potting mix depending on pot shape.
- Place the structure plant first (slightly off-center looks more natural). Rotate the pot so the best face points toward the main viewing angle (usually from the walkway).
- Add your thriller(s) next. Keep the tallest plant toward the back if the pot is against a wall; keep it centered if the pot is viewed from all sides.
- Fill around with mounding plants (heuchera, pansies, smaller mums). In a 20" pot, 5–7 plants total is a good target for a full look without overcrowding.
- Finish with spillers near the rim, spaced 6–8 inches apart so they can drape without tangling immediately.
- Top-dress for polish. Add pine cones, mini pumpkins, or a thin layer of bark chips. Keep top-dressing under 1 inch so it doesn’t interfere with watering.
- Water deeply. Water until it runs out the bottom. This settles soil around roots and prevents dry pockets.
Cost planning: what to expect, plus DIY swaps
Prices vary by region, but a realistic fall porch container budget often looks like this:
- Potting mix: $10–$18 for 2 cu ft (often 1 bag per large pot)
- Garden mum (1-gallon): $8–$15 each
- Ornamental kale: $4–$8 each
- Heuchera: $10–$18 each
- Dwarf conifer (2–3 gallon): $25–$60 (your “investment plant”)
Example total: A three-pot design with one conifer anchor, two mums, two heuchera, three pansies, and two spillers typically lands around $90–$180 depending on pot costs and plant sizes.
DIY alternatives that still look high-end:
- Use nursery pots inside cachepots. If you already own decorative outer pots, keep plants in nursery pots for easy swapping and better drainage control.
- Buy smaller perennials. A 4" heuchera is cheaper than a 1-gallon; it will still read well when grouped (use 2 smaller instead of 1 large).
- One “hero” plant per arrangement. Spend on the conifer or grass, then fill with affordable cool-season annuals.
Maintenance expectations: what you’ll actually do each week
A well-built fall container garden is low drama. Expect about 20–30 minutes per week for a three-container porch—mostly watering and cleanup.
Weekly routine (10–15 minutes, twice a week early on)
- Water check: Stick a finger 2" into the soil. If dry, water thoroughly. Windy porches may need watering every 2–3 days at first.
- Deadhead mums and pansies to keep them tidy and extend bloom.
- Rotate pots a quarter turn weekly if they receive one-sided sun, so growth stays balanced.
Seasonal tasks as temperatures drop
- Before first hard frost: Move tender spillers (sweet potato vine, ornamental pepper) closer to the house wall where it’s slightly warmer.
- After frost blackens annuals: Pull the mushy plants and replace with evergreen boughs or dried stems for structure.
- Late fall refresh (15 minutes): Tuck in cuttings of pine, cedar, or fir, and add birch twigs for height. Many garden centers sell evergreen bundles for $8–$20.
For overwintering, remember that roots in containers are more exposed to cold than roots in the ground. Extension guidance from universities commonly notes that container plants experience more severe freezing conditions because the entire root zone is above ground (e.g., University Extension container overwintering recommendations; see also general container guidance from RHS, 2021). If you want to keep a dwarf conifer, consider moving the pot into an unheated garage once temperatures stay consistently below freezing, or insulate the pot with burlap and leaves.
A designer’s finishing touches that make it feel intentional
If your plants are right but the porch still feels “a little scattered,” it’s usually an editing issue.
- Limit your palette: Choose 2 main colors (example: burgundy + chartreuse) and one neutral (silver or deep green).
- Repeat one element at the door: Same pumpkin color, same lantern finish, or same grass variety in two pots.
- Mind the night view: Dark foliage like ‘Black Pearl’ pepper or ‘Obsidian’ heuchera looks sophisticated under warm porch lights.
When you’re done, step back to the sidewalk (or the hallway, if you’re in an apartment). The best porch fall container garden plan isn’t just pretty up close—it reads clearly from where people approach. You’ll see the structure first, then the seasonal color, then the trailing softness at the edges. And when summer is a distant memory and winter hasn’t fully arrived, your porch will still feel like a place worth coming home to.
Citations: USDA Plant Hardiness Zone Map (USDA, 2023); Royal Horticultural Society container gardening guidance (RHS, 2021).