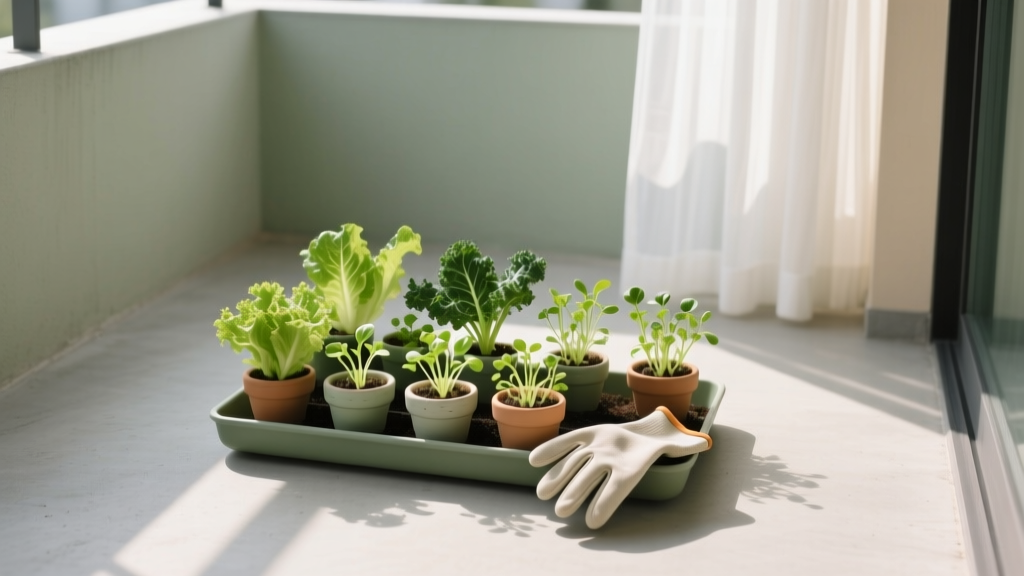
Tiny Balcony Microgreen Setup
The balcony is barely wide enough for your morning coffee. There’s a chair, a small table, and that one pot you keep meaning to repot. You step outside, hoping for a little green—then notice the same thing every time: wind that dries everything out, a wall that blocks half the sun, and a floor that gets messy fast. You want to grow something edible, but you don’t want a jungle of planters or a project that requires hauling bags of soil through the living room.
This is where microgreens shine. They’re fast, clean, and intensely productive in a tiny footprint—especially when you treat your balcony like a miniature design site: define the circulation, manage light, control mess, and build a setup that looks intentional. I’ll walk you through a balcony microgreen layout the way I’d approach a small urban terrace: start with constraints, place the “hardscape,” then fill in the edible planting plan.
Start With the Balcony as a Floor Plan (Not a Plant Shelf)
Microgreens are often sold as a “windowsill hobby,” but on a balcony you can create a true micro-farm corner. The goal is to make it compact, stable in wind, and easy to maintain so you actually harvest every week.
Measure the usable rectangle
Stand where you’ll work and measure the area you can claim without blocking the door swing or the path to the chair. A common “tiny balcony” workable zone is about 24 inches (61 cm) deep by 36 inches (91 cm) wide—enough for a slim rack plus a drip tray, while still leaving walking space.
Design rule: keep a 18–24 inch clear walkway from the door to your seating spot. You’re building a garden you’ll live with, not an obstacle course.
Choose one primary growing surface
A microgreen setup works best when it’s consolidated. Pick one of these as your “main stage”:
- Wire shelving rack: Most space-efficient; airflow-friendly; easy to add lights.
- Wall-mounted vertical rail + trays: Best when floor space is tight, but wind exposure is higher.
- Bar-height narrow table: Aesthetic and simple; less vertical capacity.
For most balconies, a slim wire rack around 24" W × 14" D × 48" H gives you the best balance of capacity and stability. If your balcony is windy, plan to strap it to the railing or wall with removable ties.
Light Mapping: Treat Sun Like a Design Material
Microgreens don’t need full outdoor sun, but they do need consistent light. Outdoors, they’ll grow with bright shade; on darker balconies, a small grow light becomes the difference between “stringy and slow” and “upright and harvestable.”
Know the minimum sunlight hours
A practical threshold:
- 4+ hours of direct sun: many microgreens can thrive in natural light with some shade protection in summer.
- 2–4 hours of direct sun: doable, but expect leggier growth; consider supplemental lighting.
- <2 hours of direct sun: plan on a grow light for reliable harvests.
For indoor-style microgreen production, many growers use long photoperiods. University of Maryland Extension notes that seedlings typically need 12–16 hours of light daily for good growth indoors (University of Maryland Extension, 2020). On a balcony, your natural light may be enough in summer, but shoulder seasons often benefit from a timer-controlled LED.
Wind and heat are part of your light plan
That sunny corner can also be the hottest, windiest spot. Microgreen trays dry quickly because they’re shallow. If your balcony gets afternoon sun, plan a simple shade strategy: a 30–40% shade cloth clipped to the railing can prevent midday scorch while keeping brightness high.
Layout Strategies That Keep It Clean, Calm, and Productive
Zone the setup into three micro-areas
Even in a 2-foot-wide slice of balcony, zoning makes it feel designed and reduces mess:
- Sowing zone: a small bin with seed packets, a measuring spoon, and labels.
- Growing zone: your rack with trays, lights (if needed), and airflow.
- Rinse/harvest zone: a lidded container for scissors, a salad spinner, and a catch tray for cuttings.
Place the sowing bin on the lowest shelf (heaviest items low), growing trays at waist height, and reserve the top shelf for light fixtures, extra trays, or lightweight supplies.
Use a “double-tray” system to prevent balcony runoff
Balconies punish sloppy drainage. The cleanest approach is a nested tray system:
- Inner tray: a standard 10" × 20" microgreen tray with drainage holes.
- Outer tray: a matching solid tray beneath to catch water.
This reduces drips, protects flooring, and keeps you on good terms with neighbors below. It also enables bottom-watering (less mold risk on stems).
Design for ergonomics: harvest without bending
Plan your primary harvest shelf at roughly 36–44 inches high (counter height to slightly higher). Your back will thank you. Microgreens are a frequent-harvest crop—comfort matters as much as aesthetics.
“Design is not just what it looks like and feels like. Design is how it works.” — Steve Jobs (quoted in Isaacson’s biography, 2011)
That line fits microgreens perfectly: the most beautiful balcony setup is the one you can water, check, and harvest in under five minutes.
Step-by-Step: A Tiny Balcony Microgreen Build (1 Rack, 6 Trays)
This setup targets a steady rotation: start two trays per week, harvest two trays per week, eat microgreens most days without clutter.
- Choose the footprint. Reserve a 24" × 36" zone near the outlet (if using lights) and out of the door swing.
- Set the rack and anchor it. Assemble a 24" × 14" × 48" wire shelf and secure it with removable straps to the railing/wall.
- Add waterproofing. Place a boot tray or waterproof mat under the rack sized around 30" × 18" to catch stray drips.
- Install lighting (if needed). Mount a 2-foot LED grow bar under each shelf with zip ties; set a timer for 14–16 hours/day.
- Set up trays. Place 6 trays total: 3 draining trays nested in 3 solid catch trays (or 6 pairs if you want every tray nested).
- Mix medium. Use a sterile seed-starting mix or coco coir. Fill to 1 to 1.5 inches depth; level firmly.
- Sow and press. Sprinkle seed evenly (see crop rates below), mist, then press with an empty tray to seat seed-to-medium contact.
- Blackout briefly. Stack a tray on top for 2–3 days (crop-dependent) until sprouted; then move to light.
- Bottom-water. Add water to the outer tray; let the medium wick for 10–20 minutes, then pour off excess if needed.
- Harvest. Cut at the base with clean scissors when most leaves are fully open (usually 7–14 days from sowing depending on variety).
Plant Selection: Microgreens That Behave Well on Balconies
On a balcony, you’re selecting for quick turnaround, upright growth, and resilience to small swings in temperature and humidity. You also want flavor diversity so the same salad doesn’t taste identical every day.
Reliable, fast, and forgiving (start here)
- Radish (Raphanus sativus) ‘Rambo’ or ‘China Rose’: Bold flavor, stands up well, harvest often in 7–10 days. Great “confidence crop.”
- Broccoli (Brassica oleracea) microgreen seed: Mild, versatile; tends to grow evenly in moderate light; typically 8–12 days.
- Pea shoots (Pisum sativum) ‘Dun’ peas: Big yield, hearty stems; handles balcony temperature swings better than delicate crops; usually 10–14 days. Needs thicker sowing and a bit more depth.
- Sunflower (Helianthus annuus) black oil sunflower: Nutty crunch, high visual impact. Likes consistent moisture and airflow; typically 9–14 days.
Aromatic upgrades (small amounts, big payoff)
- Basil (Ocimum basilicum) ‘Genovese’: Slower (often 14–21 days), but perfume-level aroma. Better with supplemental light.
- Cilantro (Coriandrum sativum): Unique flavor; slower and trickier germination. Use once your watering rhythm is dialed in.
Seeding density and spacing (practical numbers)
Microgreens are sown densely, but “dense” has a limit—overcrowding invites damping-off and mold. For a standard 10" × 20" tray (about 200 sq in), these starting points work well:
- Radish: ~20–30 g seed per tray
- Broccoli: ~10–15 g per tray
- Pea: ~150–250 g per tray (pre-soak 8–12 hours)
- Sunflower: ~150–200 g per tray (pre-soak 8–12 hours)
If you don’t own a scale, use volume as a rough proxy (for example, radish is roughly a few tablespoons), but a small kitchen scale is a worthy upgrade for consistency.
Comparison Table: Best Crops for Different Balcony Constraints
| Microgreen | Typical Harvest Window | Light Tolerance | Wind/Heat Tolerance | Flavor & Use | Notes for Tiny Balconies |
|---|---|---|---|---|---|
| Radish ‘Rambo’ | 7–10 days | Good in moderate light | Fair (keep evenly moist) | Spicy; tacos, eggs | Excellent first crop; upright and fast |
| Broccoli | 8–12 days | Good | Fair | Mild; salads, sandwiches | Even growth; pairs well in mixes |
| Pea shoots ‘Dun’ | 10–14 days | Moderate to high | Good | Sweet; stir-fries | Heavier trays—place on lower shelf for stability |
| Sunflower (black oil) | 9–14 days | Moderate to high | Moderate (needs airflow) | Nutty; grain bowls | Rinse seed well; avoid overwatering to limit mold |
| Basil ‘Genovese’ | 14–21 days | Needs higher light | Fair (avoid cold nights) | Fragrant; pasta, tomatoes | Best with LED support and steady warmth |
Budgeting the Build: From “Rental-Friendly” to “Fully Dialed In”
You can start microgreens with a couple of trays and a sunny balcony corner, but a tidy system pays off quickly. Here are realistic cost ranges (USD) you can mix and match:
- Wire rack (24" wide): $35–$80
- 10" × 20" trays: $2–$6 each (often cheaper in multipacks)
- LED grow light bars (2 ft): $20–$45 each
- Timer: $8–$15
- Coco coir brick: $4–$8 (expands to multiple trays’ worth)
- Seed cost: typically $3–$12 per packet, or less per tray when buying in bulk
DIY alternatives that still look intentional
- Instead of a rack: a sturdy shoe shelf or bar cart you already own (add a waterproof liner).
- Instead of microgreen trays: cafeteria trays or shallow storage bins (just ensure food-safe plastic; drill holes for drainage and nest into another tray).
- Instead of shade cloth: a sheer curtain panel clipped to the railing—surprisingly effective as a light diffuser.
Three Balcony Scenarios (Real-World Layouts That Actually Work)
Scenario 1: The rental balcony with strict “no dripping” rules
Constraints: You can’t let water run off the balcony. You also can’t drill into walls. You have about 30" × 30" of space near the railing.
Design move: Go “fully contained.” Use nested trays, a waterproof boot mat, and a single rack shelf height (no tall structure if wind is a concern). Bottom-water only, and keep a small pitcher dedicated to the balcony so you never carry a dripping tray through the apartment.
Crop plan: Radish + broccoli (fast, forgiving). Avoid sunflower early on if your airflow is limited.
Scenario 2: The windy high-rise ledge with strong morning sun
Constraints: Gusts can knock over lightweight gear. Morning sun gives you about 3–5 hours direct light, then bright shade.
Design move: Put weight low. Store your extra medium and a small water container on the bottom shelf to ballast the rack. Strap the rack to the railing with removable ties. Add a simple windbreak: a clear outdoor table cover clipped along one side can cut wind while preserving light.
Crop plan: Pea shoots and radish—both handle the rhythm of outdoor conditions better than basil. Keep trays slightly more moist than you would indoors because wind accelerates evaporation.
Scenario 3: The shaded balcony canyon (bright but low direct sun)
Constraints: You get maybe 1 hour of direct sun, but it’s bright ambient light the rest of the day.
Design move: Treat it like an indoor grow corner that happens to be outside. Add one LED bar per shelf and set it to 16 hours/day. Use a reflective panel behind the rack (even a piece of white coroplast) to bounce light back onto trays.
Crop plan: Broccoli and basil (with lights), plus a micro-mix. Avoid stretching by keeping the light 6–10 inches above the canopy and raising it as greens grow.
Microgreen Hygiene and Food Safety (Small Space, High Stakes)
Microgreens are harvested young and eaten fresh, so cleanliness matters. The U.S. FDA’s Food Code emphasizes preventing contamination in foods served raw (FDA Food Code, 2022). You’re not running a restaurant, but the principle applies: clean tools, clean trays, clean hands.
- Sanitize trays between grows with hot soapy water; periodically use a dilute bleach solution (follow label directions) and rinse well.
- Use clean scissors and a clean cutting board reserved for greens.
- Store harvested microgreens dry (spin or pat dry) in a container with a paper towel to manage condensation.
Maintenance Rhythm: What This Setup Asks of You
Microgreens reward consistency more than effort. For a 6-tray rotation, expect about 30–60 minutes per week total once you’re in a groove.
Weekly tasks (simple, repeatable)
- 2 sowing sessions: 10–15 minutes each (fill tray, sow, label, stack).
- Water checks: 2–4 minutes a day in warm weather; every other day in cooler, humid conditions.
- 1 harvest session: 10–20 minutes (cut, rinse/spin, store).
- Tray wash/reset: 10–15 minutes.
Seasonal adjustments (balcony-specific)
- Summer: Add shade cloth during heat waves; water more frequently; increase airflow to reduce mold.
- Winter: If nighttime temps drop near 40°F (4°C) or below, bring trays inside overnight or rely on lights indoors—microgreens slow down dramatically in cold conditions.
- Shoulder seasons: Watch for condensation and fungal issues when days are mild and nights are cool; water earlier in the day so surfaces dry by evening.
Designer Tricks for a Balcony Setup That Looks Good Enough to Leave Out
Microgreens can look like a science project—unless you borrow a few techniques from patio design.
- Repeat materials: Use the same tray color and the same labels. Visual repetition instantly reads as “intentional.”
- Hide clutter: Keep seeds and tools in one lidded bin (a single object is calmer than many small ones).
- Add one ornamental anchor: A slim pot of rosemary or a tough succulent at floor level makes the corner feel like part of the balcony, not a separate workspace.
- Use warm lighting: If your LEDs are harsh, add a small warm patio string light nearby for evening ambiance—your microgreen station can be both productive and pleasant.
A Practical Rotation Plan (So You Actually Harvest Every Week)
Here’s a simple cadence for steady supply using three active trays at a time, starting two weekly:
- Week 1: Sow radish tray + broccoli tray.
- Week 2: Sow pea tray + radish tray. Harvest the earliest radish.
- Week 3: Sow sunflower tray + broccoli tray. Harvest broccoli and radish.
By week three, your balcony rack is in a smooth loop: something sprouting, something greening up, something ready to cut. That’s the moment the setup stops feeling like “a project” and starts feeling like a small, dependable pantry.
If you want to keep it even tighter, run just 2 trays total on a single shelf and sow one every week. If you want more abundance, add a second shelf and scale to 8–10 trays—the layout principles stay the same: contain the water, stabilize for wind, and make daily checks effortless.
The best tiny balcony microgreen setup isn’t the one with the most gear. It’s the one that fits your walking path, respects your light, and lets you step outside with a mug in one hand and a pair of scissors in the other—snipping something fresh in under a minute, then going back to your day.
Sources: University of Maryland Extension (2020); U.S. Food & Drug Administration, Food Code (2022); Isaacson, W., Steve Jobs (2011).